Related Posts
Best practices to move SQL server to amazon RDS

Written By
Yatendra Singh
Updated On
October 11, 2023
Read time 9 minutes
Amazon Web Services brings a lot of benefits like Amazon RDS. It reduces the activities required for setting up, operating, and maintaining on-premises relational databases. It can run all the tasks to manage a large-sized database, and so you need to spend minimum time for server maintenance.
Amazon RDS lets you create multiple types of relational databases like PostgreSQL, SQL Server, Maria DB, Oracle, MySQL, etc. Amazon RDS will take care of all the maintenance of the database, take a routine backup, and allows the use of the latest version of the selected database application.
With the Native Backup/Restore support for SQL Server database, the target users can now create native database backups from the RDS instance and store it in Amazon S3 bucket. As per the need, you can restore the database backup either to on-premises SQL Server or another RDS instance.
With native backup/restore for SQL Server database, the user (DBA) can do the following:
With Amazon RDS, the approach is quite different, in place of using the local file system on the SQL database server, the user (DBA) accesses files stored in Amazon S3.
The migration method to RDS differs from what it is usually for normal SQL Server migration – the user creates a database backup from the local server, saves it on Amazon S3 and later restores it either to an existing or new Amazon RDS DB instance. Below illustration demonstrates the same.
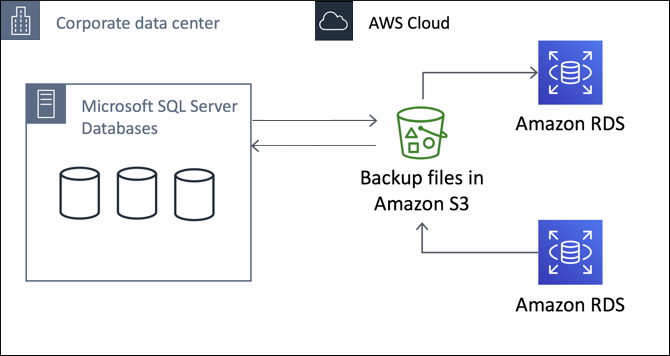
Source: AWS Documentation
Native backup/restore is made available to all regions of AWS including both Single-AZ & Multi-AZ DB instances and supports all available versions of Microsoft SQL Server.
With all the usefulness and the benefits that Amazon RDS offers, there are some limitations and recommendations that users should be aware of.
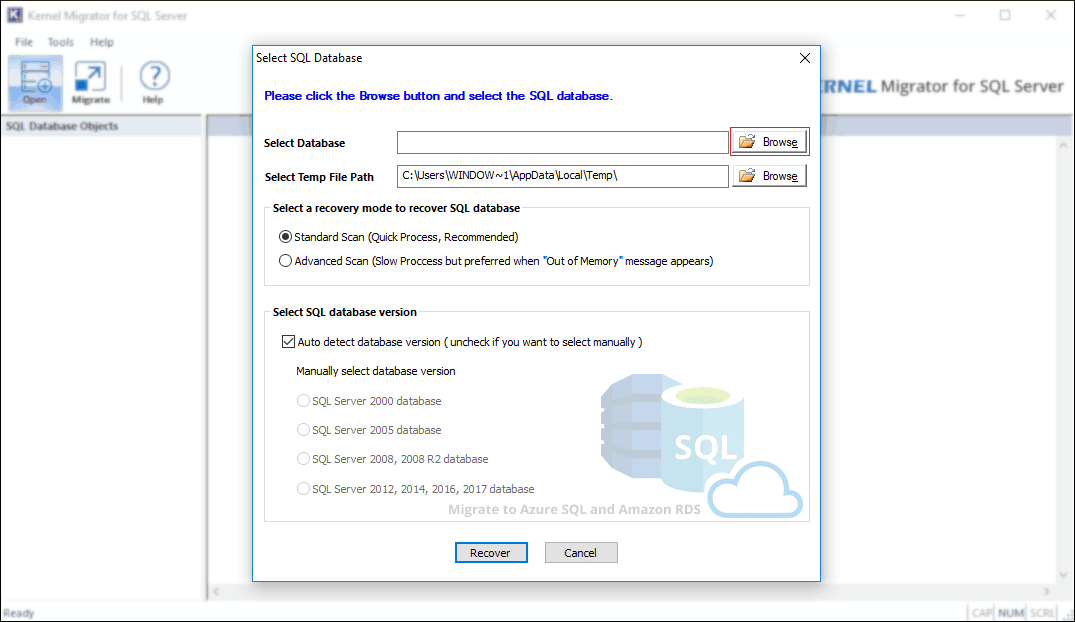
To start using Amazon RDS service, first you need to set up the native backup and restore which includes an Amazon S3 bucket to store the database backup (BAK) files, the AWS Identity and Identity Access Management role to access the S3 bucket, and the SQLSERVER_BACKUP_RESTORE option added to the option group on users’ DB instance. Considering that you are ready with them, you can proceed with the database migration process to Amazon RDS using native backup and restore.
Before proceeding with the migration process, make sure that native backup and restore is enabled & configured, follow the steps given below:
Backup SQL Server Database
Use the rds_backup_database stored procedure to back up the SQL Server database.
To call RDS database backup procedure following parameters are necessary:
@source_db_name – Name of the database you want to backup.
@s3_arn_to_backup_to – Amazon S3 bucket you want to use for database backup.
Note: For the second parameter, it’s the combination of two, S3 bucket name + key ARN.
ARN stands for “Amazon Resource Name.”
Following are Optional Parameters
@kms_master_key_arn
@overwrite_S3_backup_file
@type_
Example
Differential Backup Without Encryption
Full Database Backup with Encryption
Check Last Backup or Snapshot Using the given SQL Query
Use the rds_restore_database stored procedure to restore the database.
For restoration, the following parameters are necessary:
@restore_db_name – Database name you want to restore.
@s3_Arn_to_restore_from – ARN prefix of the backup files from which you want to restore the database.
Following are Optional Parameters
@kms_master_key_arn
Database Restore Without Encryption
Database Restore with Encryption
Single Database File Restore
Multiple Database File Restore
Note: Make sure all database backup files have the same prefix, and no other files use it to avoid errors.
Track the Task Status
Call the rds_task_status stored procedure to track the task status.
Note: On calling the stored procedure will return the status of all tasks if no parameter is provided.
Following are Optional Parameters
@db_name
@task_id
Example Query
Note: The task status procedure can return different columns as per the parameter specified.
Using the call procedures given above, you can backup database, restore the database, and track the task status.
But to simplify things to the next level and for the making the database migration to Amazon RDS more easy and fun, we’d suggest using a SQL migration tool.
It’s an advanced tool that assists you with SQL Server database migration to both Microsoft Azure SQL & Amazon RDS with ease irrespective of the database or backup file size. Not all users run the latest version of Microsoft SQL Server; thus, to make the software available for everyone, we’ve made it compatible with a wide range of SQL Server versions you can find on the internet.
Follow below steps to migrate SQL Server Database to Amazon RDS using the easiest method:

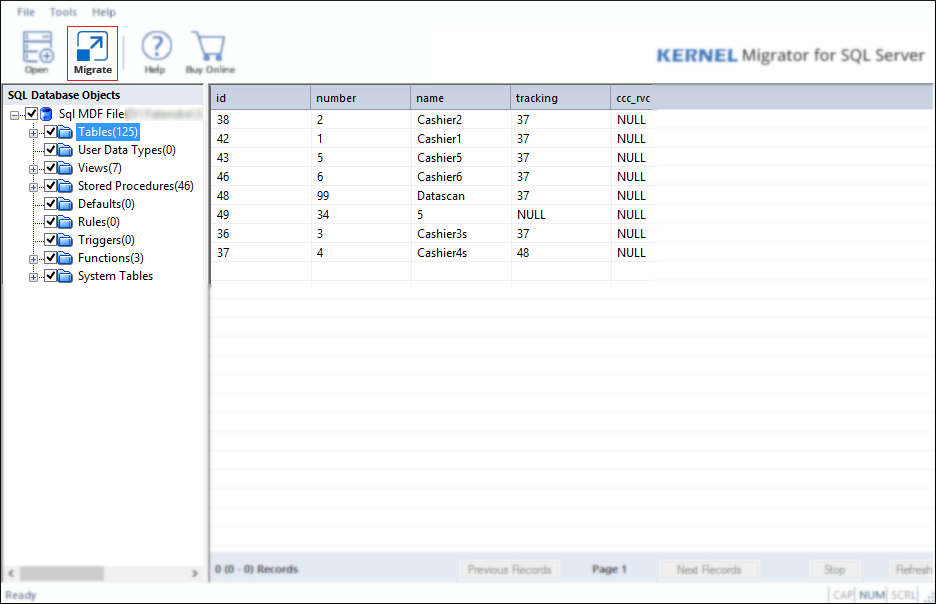
Click on the + icon to expand or – to collapse the object.
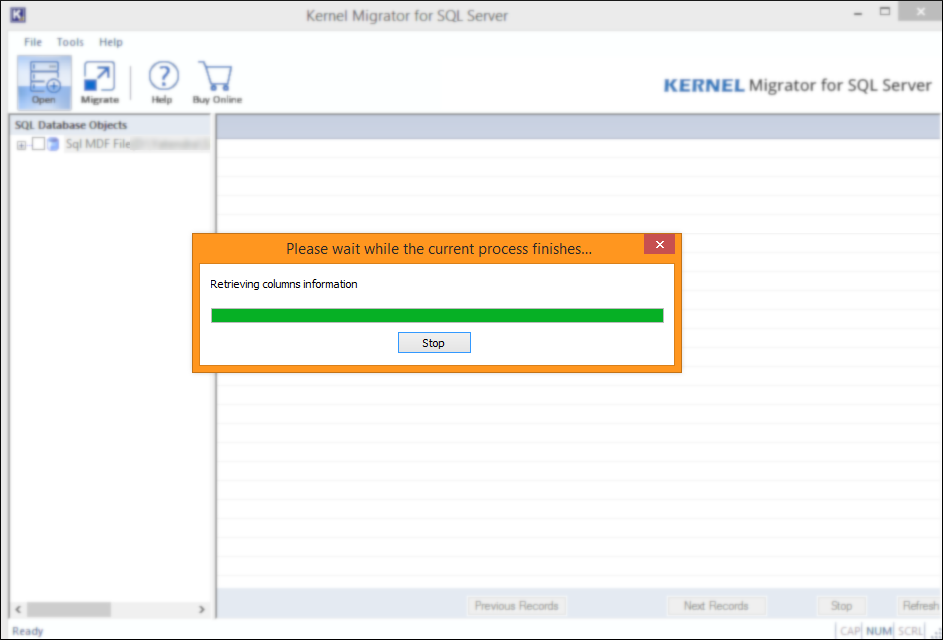
To generate live data preview, select the parent or child object by clicking on it, as shown below.
To start the database migration, click on the Migrate button.
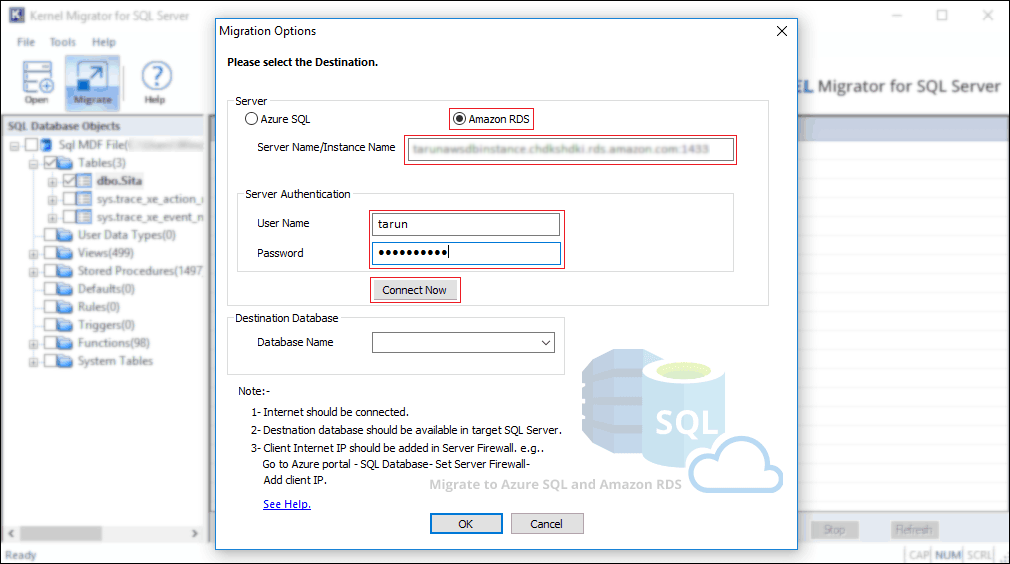

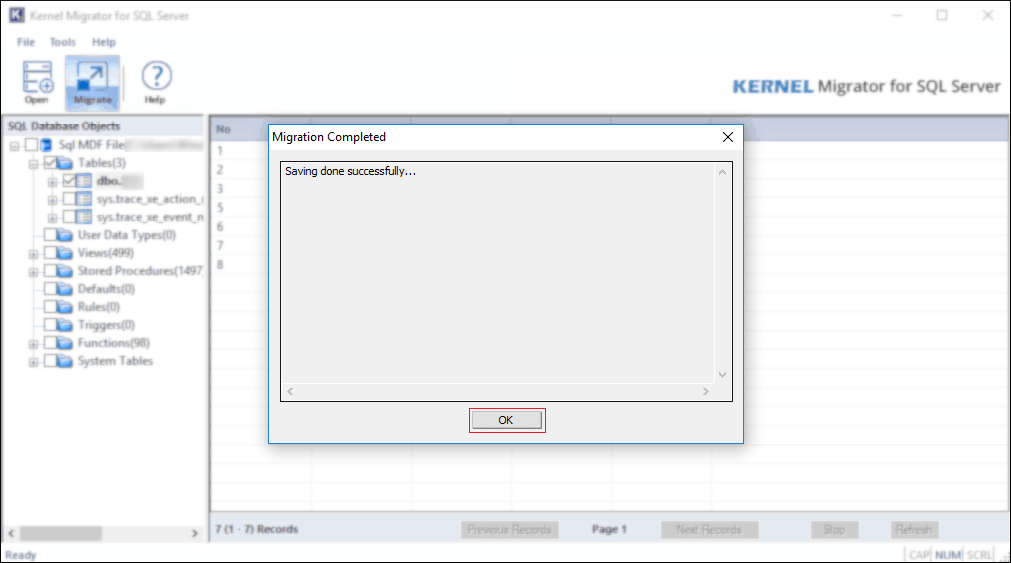
You’ve migrated the selected SQL Server database to Amazon RDS successfully. To confirm login to RDS using sign-in credentials and check.
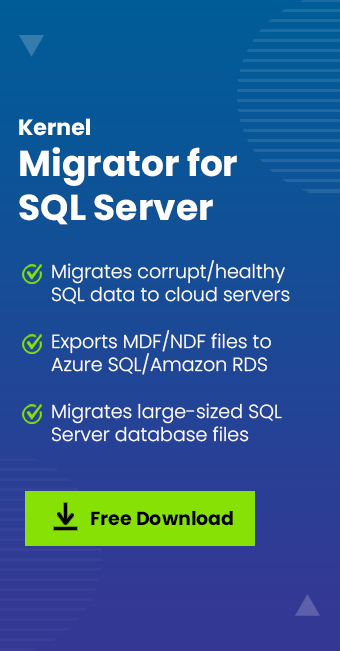
Kernel Migrator for SQL enables the users to open both corrupt/damaged or healthy MDF/NDF/LDF files, and as a third-party tool, it offers the easiest database migration approach whether to Microsoft Azure SQL or Amazon RDS.