

Read time 5 minutes
Digital media, and more precisely photos, have become the lifeline of today’s generation and keeping them safe and secure is all we think and care about. In this scenario, imagine if these digital memories getting deleted or losing accidentally! I am sure most of us will skip a beat in such a situation. Well, in such a critical situation, a photo recovery tool plays a crucial role and helps users to deal with the problem.
It is not suggested to take this business of recovering the lost images in your own hands. Be smart and go for Kernel Photo Recovery, the best photo recovery tool to recover and restore the deleted images. After getting so many positive feedbacks and success stories from the users across the globe, the tool has touched new heights in the media recovery market.
Features of Kernel Photo Repair software
Let’s know why it is the best choice and what made it the best photo recovery solution:
- Engineered with advanced technology after rigorous market research. That’s why it covers all the aspects of Photo recovery.
- Recovers permanently deleted photos without any trouble.
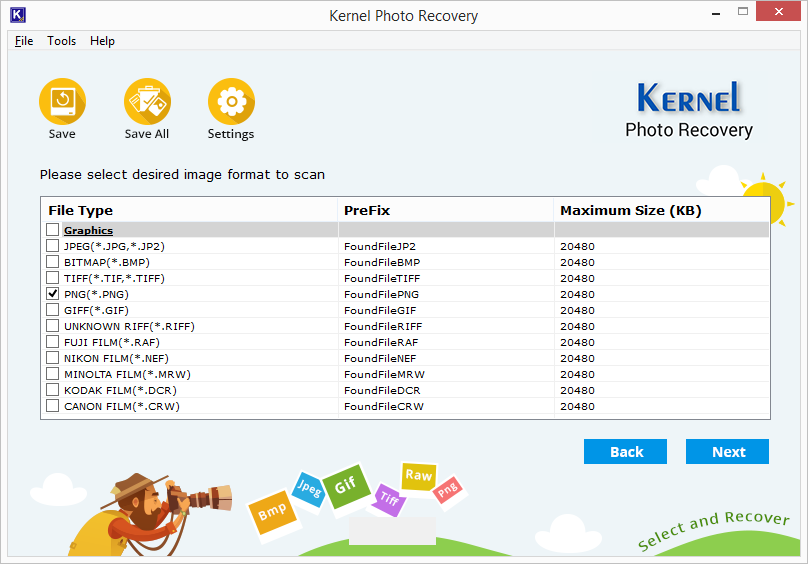
- Able to recover multiple formats like JPG, JPEG, PNG, TIF, BMP, GIF, RIFF, etc.
- Recover popular camera formats from Kodak, Canon, Minolta, Nikon and Fuji Film.
- Comes with an option to choose the format of images which you want to recover; hence, saves a lot of time and effort.
- Recovers photos as per the set size, hence totally customizable.
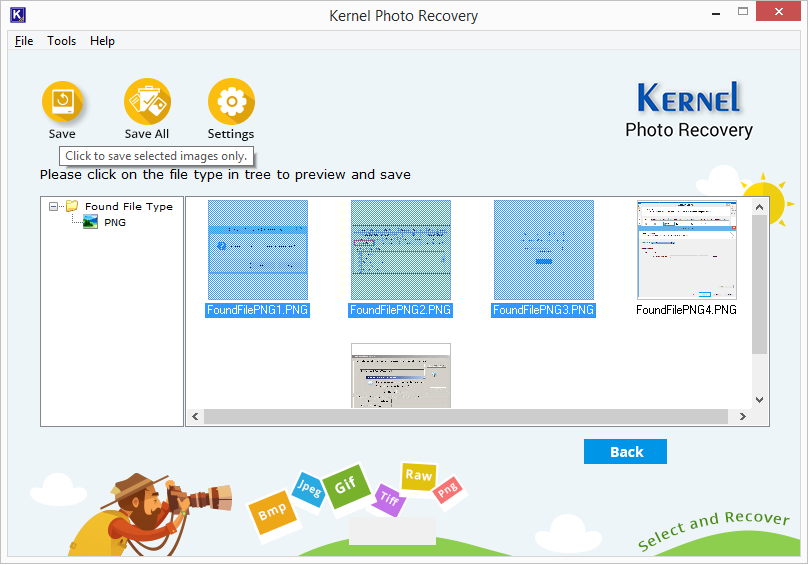
- Allows the preview of the images before saving them.
- Allows you to select pictures individually to proceed with saving.
- Compatible with all versions of Windows.
How does Kernel Photo Recovery work?
We have discussed and gathered a lot of information about Kernel Photo Recovery, now its time for some action. Let’s discuss how this tool works and what all steps are involved in the process:
- Once you have downloaded and installed the software, run it. When the tool is open, select a partition from where you want to make the recovery. Click on Next after selecting.

- In this step, select all the formats of images you want to recover. You can also select all the formats if you are not sure about the exact format. Now, click Next.
Note: On the top of the screen of the tool, you will find an option for Settings. By clicking on the Settings button, you can set the prefix and size for the image recovery. Click on OK once done.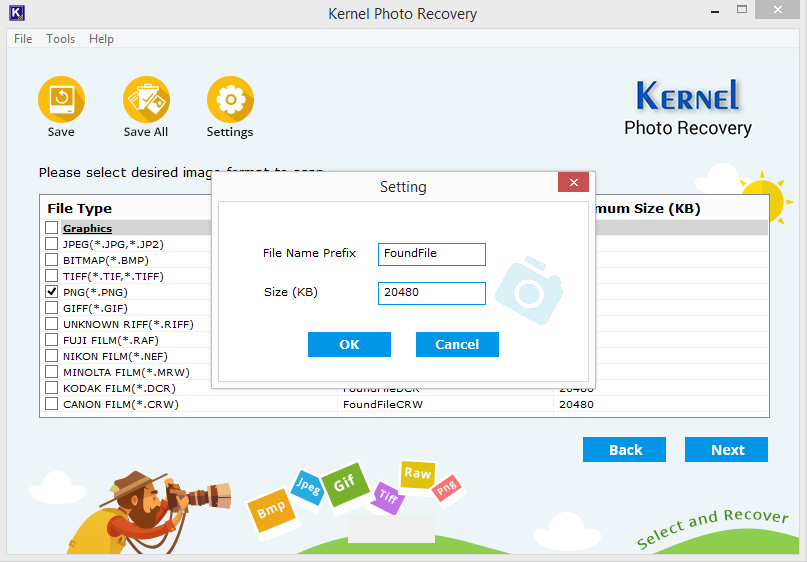
- As soon as you click on the Next button, the scanning process will take place, wait for it to finish, and you will get the results on your screen. Here you can select the formats from the folder tree on the left and can have the preview of images from the selected format.

- Now, select the images you want to recover and click on the Save button on the top. Or you can save all the images by click on the Save all button.
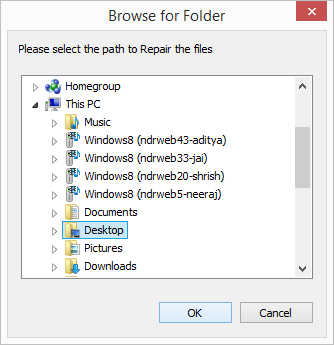
- Now, you need to provide a destination for the recovered images. Select a destination and click on Ok.


Conclusion
Kernel Photo Recovery tool matches all the standards of an extra-ordinary photo recovery tool. So, your search for the best photo recovery tool has ended here. You can use this tool to recover JPEG, JPG, PNG, TIF, GIF, BMP, RIFF quickly. Also, this tool supports image formats of popular camera brands.