

Read time: 17 minutes
Data in any arena is the most crucial element that keeps a business running and keeping it safe is the sole responsibility of the business itself. Microsoft 365 is trending not just as a collaboration platform but as a prominent email client as it meets the demand of the present era. The simplest way to backup Microsoft 365 data is manually exporting Office 365 emails to PST files. However, to execute this, you need necessary rights and permissions with your Outlook account to access the mailboxes and export the required data.
Even though Microsoft provides data retention policies that allow you to manage the permanent deletion of mailbox data, it doesn’t offer backup and recovery services. This implies that the protection of your data is the undertaking of your organization, which creates the need to find reliable solutions to backup m365 data. Without further ado, let’s proceed and learn about Microsoft 365 backup in detail.
What is Microsoft 365 backup?
Microsoft 365 is a cloud-based platform with a suite of productivity applications like SharePoint, Exchange, OneDrive for Business, Skype for Business, Teams, and others. Unlike Office 365’s conventional licensing, in Microsoft 365 licensing, you get access to all the applications under one roof that are easily accessible anytime and anywhere.
M365 backup, generally, refers to keeping a copy of the data stored on the Microsoft 365 platform offline on your system or hard drive or online at some cloud storage. This helps in preventing the unforeseen deletion or loss of crucial data. When evaluating what backup Microsoft 365 offers, backup is not the only thing that matters, saving healthy backup is relatively more important so that you can restore complete data later.
Here’s a list of significant data that you can recover from the Microsoft 365 suite:
- Exchange mailboxes: Perform easy backup of all the mailbox data, including emails, contacts, calendars, and attachments from the Exchange mailboxes.
- OneDrive files: Save all the OneDrive accounts with site-level metadata, permissions, and the files.
- Teams data: You can easily backup Microsoft Teams data, include chats, channels, files, posts, tabs, etc.
- SharePoint sites: You can backup all or selected SharePoint, including sites, permissions, lists, and libraries, from M365 account.
Why do you need to backup Microsoft 365 data?
Backing up Office 365 data is done for several purposes. Here we’ll learn the reasons why you need to take backup Microsoft 365 data:
Avoid data loss that happens on deleting Microsoft account
Once the purpose is fulfilled, there’re companies that prefer deleting some of the Office 365 accounts. Some of the reasons for the deletion of account includes end of service license, unintentional deletion of account, save cost after an employee leaves the organization, to migrate data to other account, and malicious or intentional deletion of the account.
Once the account is deleted, all the data stored within it will also be removed permanently. This is why Microsoft always recommends its users to backup Office 365 data.
Interruptions in Microsoft 365 service leading to data loss
Disturbances in the Microsoft 365 service due to abrupt system shutdown, hardware or software crashes, or power outages can often cause downtime. And if something happens unexpectedly, you won’t be able to reach out to your data if there’s no backup available. Moreover, if the damage is severe, there’s no way to get hold of your data. Such situations make M365 backup even more important.
Prevent data loss caused due to deletion of data
There can be times when users or administrators intentionally or unintentionally delete crucial data from the Microsoft 365 suite. If you have already taken Microsoft 365 backup, you know you don’t have to worry because the data can be recovered from the backup.
Safeguarding data from phishing or ransomware attacks
Ransomware attacks and phishing can get into the database of the organization by infecting it using viruses that allow them to encrypt your confidential data. This often makes the organizations unable to access their data for which these attackers even demand ransom, however, if there’s any delay or denial in providing the ransom money, they might remove the data permanently. Even though Microsoft 365 ensures data protection, you can’t completely rely on it to prevent Office 365 data against ransomware attacks.
You might or might not get to know about intruders or even malware entering your system, and so having a backup strategy in place will help you avoid any downtime or permanent deletion of data.
Irreversible permanent deletion of data if there’s no backup
Data is usually temporarily or permanently deleted. Temporary deletion of data is recoverable even if there’s no backup, however, permanent deletion of data isn’t easily recoverable. The deleted data in Microsoft 365 is retained for a particular time period before it is permanently deleted. If you haven’t restored the data within the 30 days and there’s no available backup, the data will be removed forever. Moreover, if the data was manually deleted from Recoverable items folder, there’re no chances of getting it back without a prestored backup.
Teams data is stored at multiple destinations within Office 365
All the Microsoft Teams data is stored in a chronological order that Microsoft removes after a certain time period. With the Microsoft 365 Business subscription, the Teams data can be saved in Exchange mailboxes, public folders, and SharePoint. You can’t restore or recover the files if they’re deleted if there’s no available backup.
How to Backup Microsoft 365?
Now, that we know what actually m365 backup is and why is taking Office 365 data backup critical, it’s time to learn about the effective methods for Microsoft 365 backup:
Use eDiscovery to backup m365
eDiscovery feature in Microsoft 365 uses search to find the desired data in the entire database of Microsoft 365 for a case. It includes three solutions: content search, core eDiscovery, and advanced eDiscovery. The feature can be utilized for performing backup of the data which is carried out in the following steps. However, make sure that you work on Windows 7 or above version, have a Microsoft .Net framework, and the latest Internet Explorer to download the utility.
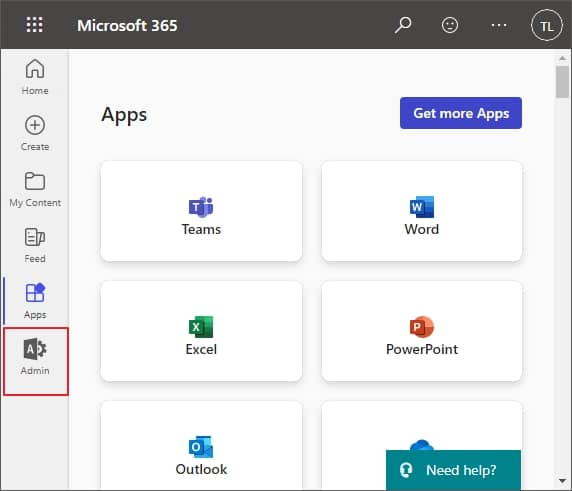
- Login to Microsoft 365 using your admin credentials and then click Admin to go to the Office 365 admin center.
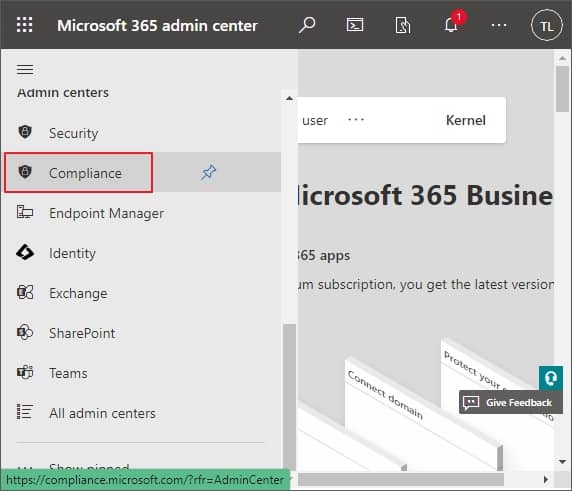
- From the left panel, click on the Compliance, which will open a new window.
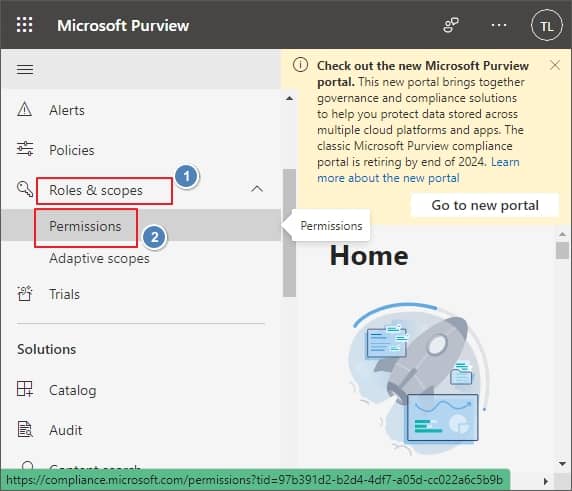
- Now, go to Roles & scopes and select Permissions from the dropdown.
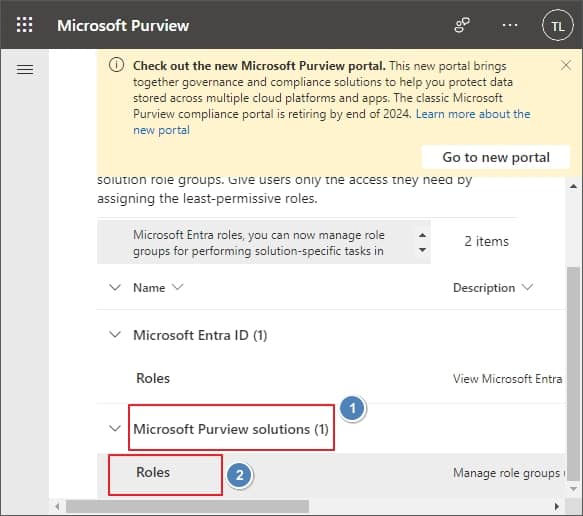
- Under Microsoft Purview solutions, click Roles.
- This loads a new page, and from the list, select e-Discovery Manager.
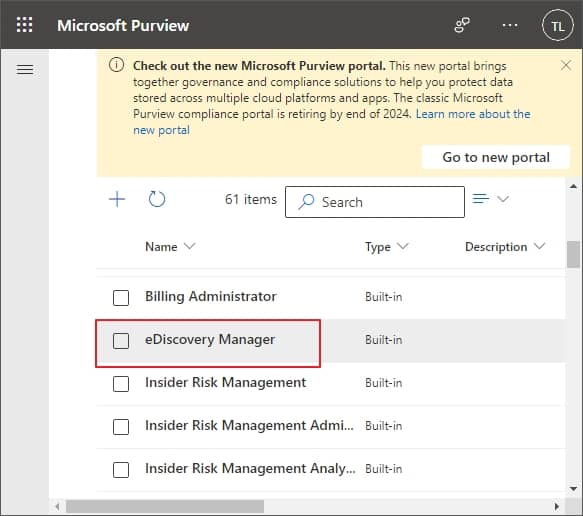
- A new window will pop up on the right side of the window. Click on the Edit button to choose the users.

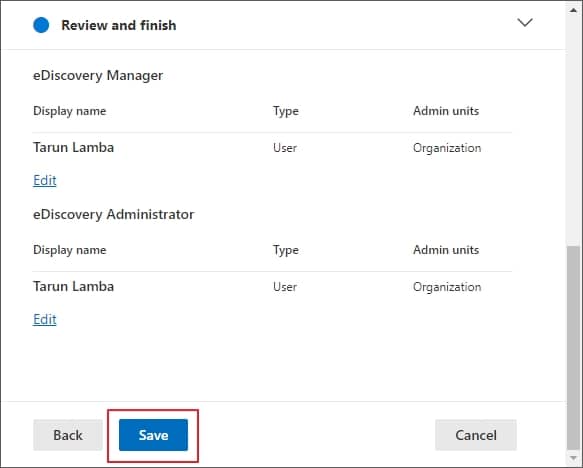
- Now, from the list of users, select the eDiscovery Administrator and tap on the Save button.
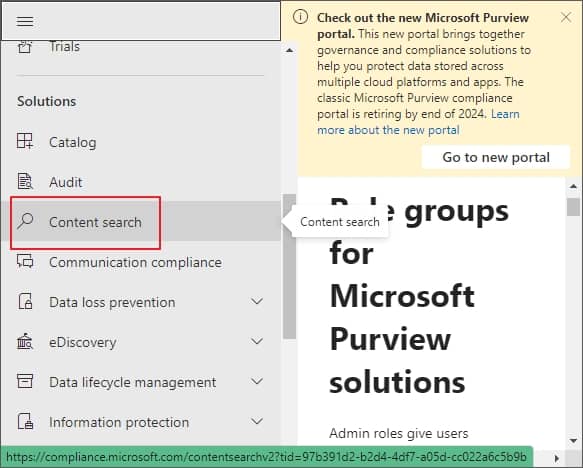
- Go back, and from the options under Solutions, click on the Content search.
- Now, on the content search window, click the + New search to define a new search.
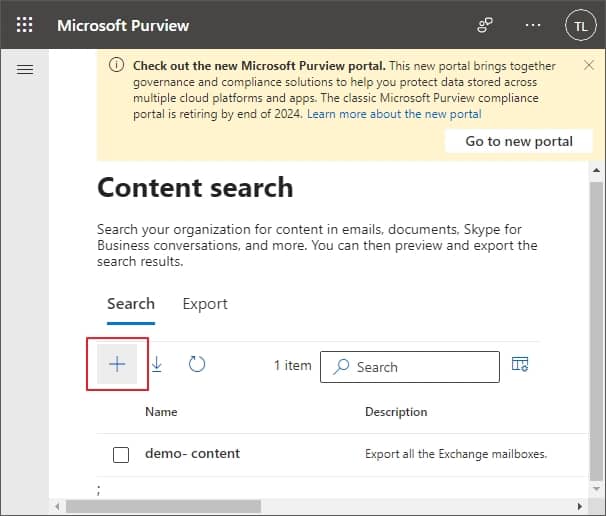
- Provide the name and description for your new search and click the Next.
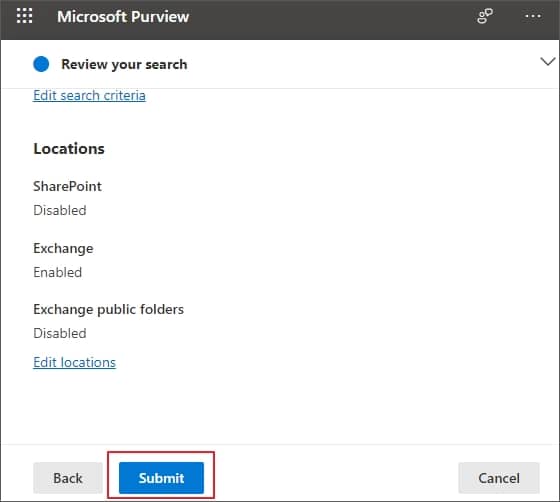
- In the next window, choose the Location (Exchange mailboxes, SharePoint, Exchange public folders) you want to backup and click Next.
- Under Conditions, select desired filters like Query builder, KQL editor, specify Keywords, and then Add condition (Date, Sender/Author, Type, Sent, To, Title, etc.) to selectively backupMicrosoft 365 data to Outlook PST.
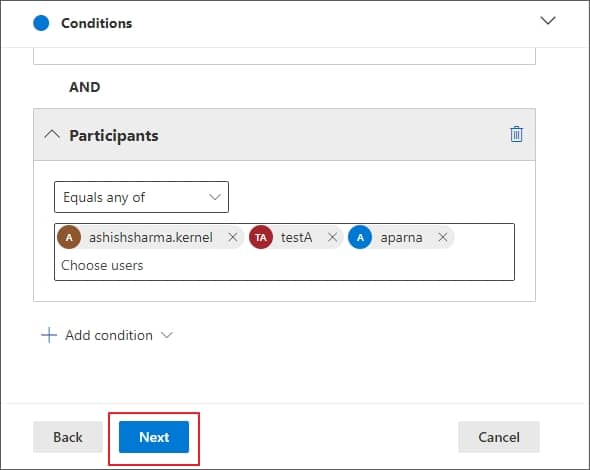
- Review your search settings and click on the Submit button to start eDiscovery. Click Back in case you want to change the search settings.
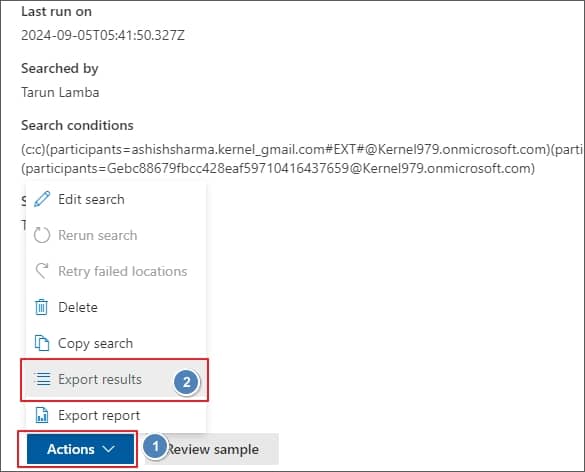
- You can see the new search on the Content search page, select your search from the list.

- Now click on the Action dropdown and then select Export results.
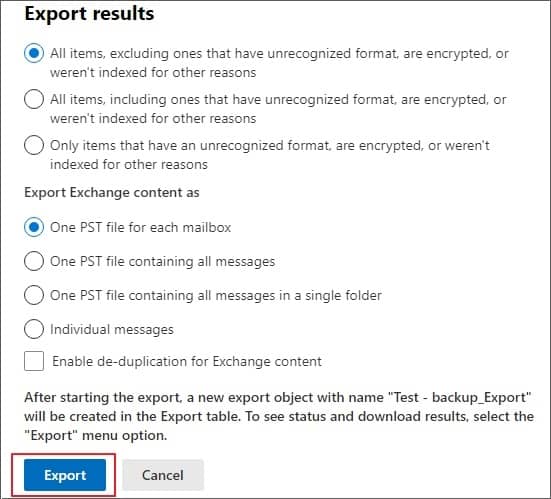
- Check all the Output options and hit the Export button.
- Select the Export tab on the Content search page and select the latest export you run.
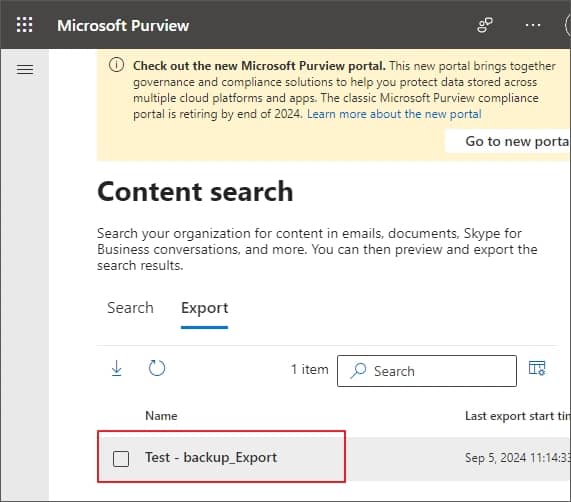
- Click on the Download results and then scroll down a bit to copy the Export key.
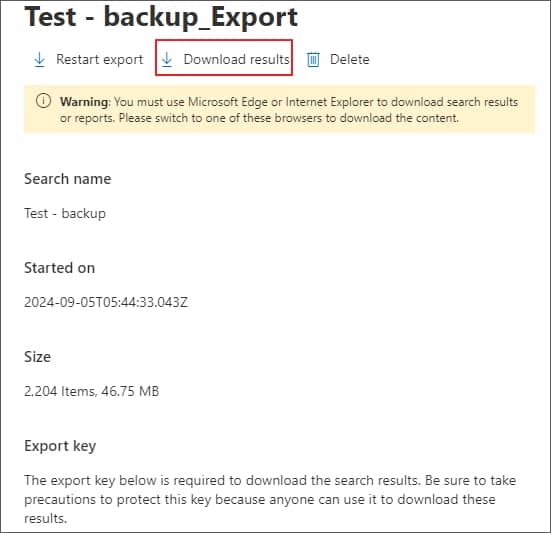
- Once downloaded open the export and then in the new pop-up eDiscovery PST Export Tool, paste the Export key you copied and provide the path to save the exported files.
- Press Start to initiate the backup of Office 365 emails to PST.


With this the backup of selected items from Microsoft 365 will begin. Microsoft 365 is a wide platform offering extensive services to run your business efficiently. It is important to be very cautious while running backup to avoid backup mistakes that results in data loss.
Limitations of using native backup approach for Microsoft 365
Even though the above-mentioned approach helps in getting backup of Office 365 components, it has some limitations as mentioned below:
- Conducting backup using this approach is quite time-consuming.
- Requires an efficient understanding of Microsoft 365 and Compliance.
- It doesn’t guarantee that there’ll be no loss of data or integrity.
- Backup of selective data is not possible.
- Can cause duplicity of data when backup is taken again and again.
For someone who is not familiar with all the components of Office 365, it can become a complicated task. So, the question comes, how to backup Microsoft 365. The answer to this will be the use of an automated tool.
Backup Microsoft 365 using a reliable third-party tool
As we’ve established that native methods like eDiscovery manager or data retention policies aren’t as efficient, a professional tool will be the best bet to save a backup without any data loss. Third-party tools like Kernel Office 365 backup provide a reliable and secure Microsoft 365 backup.
The tool comes with a user-friendly interface that saves your time as well as effort. All the data backed up through this tool is saved in the same folder hierarchy as it was in original platform. This allows easy restoration and access to the items later on.
Features offered by the Office 365 backup tool
Our Microsoft 365 backup tool is known for offering a range of prominent features that makes taking backup of Office 365 applications an easy process. Below are some of the exclusive capabilities of the tool:
- Backup hosted Exchange: The tool makes it easy to save the backup of single as well as multiple user mailboxes from Hosted Exchange to PST file or any other formats you like. The provided backup is consistent and secure from any manipulation.
- Easy backup to different file formats: You can use the tool to save M365 backup (user mailboxes, public folders, or archive mailboxes) to different file formats, including PST, MSG, PDF, DOC, DOCX, EML, MHT & HTML without losing any data.
- Generates detailed report: This office 365 backup tool shows detailed status of each item being migrated plus it also generates a backup report of all the items in detail at the end of the process. The generated report includes mention of the items backed up and state the items failed to backup (if any).
- Supports incremental backup: There is no duplicity of data each time you backup data using this tool. This is because the tool is designed with the feature of incremental backup, which ensures that only the new or recently changed data is backup always after the initial backup.
- Filters for advanced backup: There are several filters available in the tool to allow you perform selective backup of only the items you need. Some filters available in the tool are date, item type, exclude deleted and empty folders, skip previously migrated items, and others.
- Split large PSTs into small files: Split PST file feature allows you to manage large size PSTS by dividing them into multiple small size PSTs based on your requirement. You can split it into multiple PSTs of size varying from 1GB, 2GB, 3GB, etc.
Step-by-step process to perform Microsoft 365 backup
Here’s how to use the tool for backing up Office 365 email data:
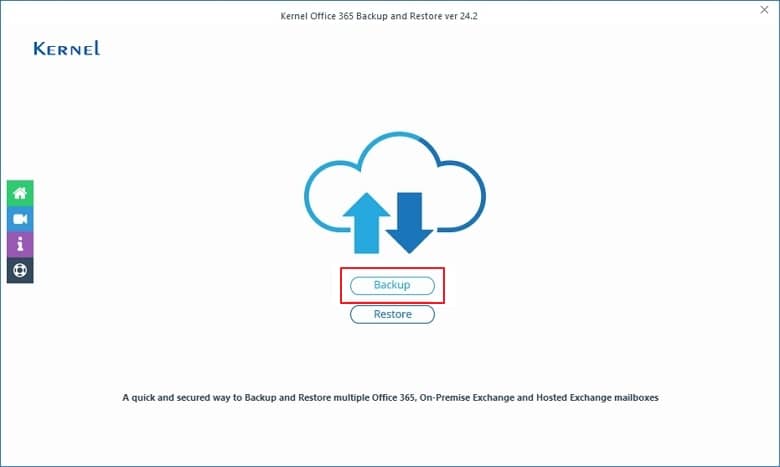
- Launch Kernel Office 365 backup tool, and from the home screen select Backup option.
- In this window, click on + Add button to add the tenant whose data you’re planning to backup.
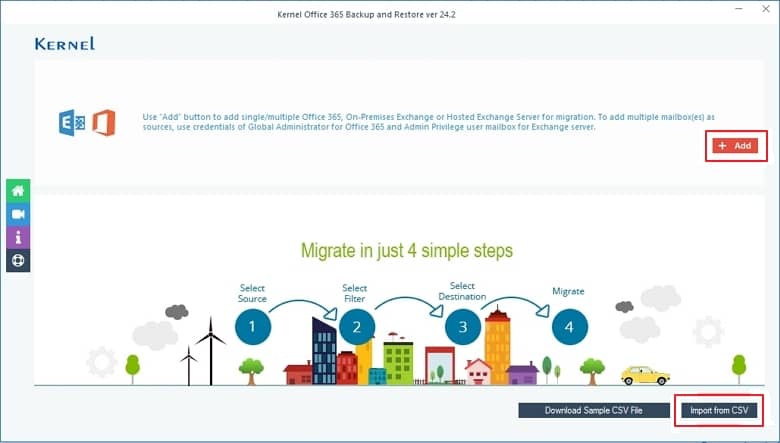
Note: You can also select Import from CSV to bring all the mailboxes while skipping the hassle involved.
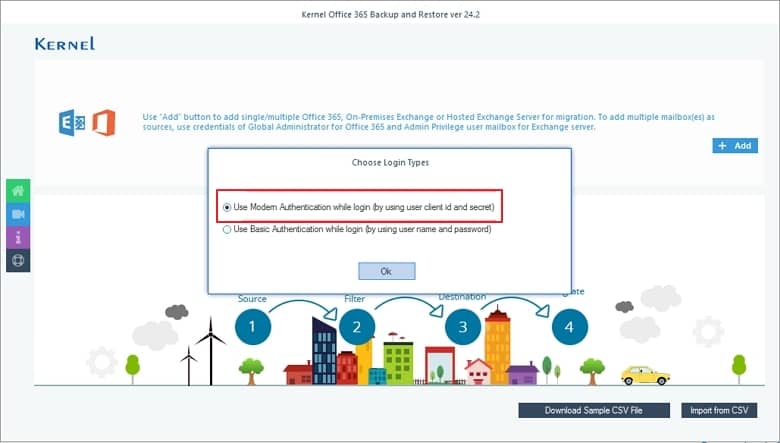
- Now choose the login type from the given options: Modern Authentication or Basic Authentication and then click OK to proceed.
- Enter the details for Modern Authentication login including Tenant ID, Client ID, and Client Secret Value. Once done, select if you want to backup a single user mailbox or multiple mailboxes. If backing up multiple mailboxes after selecting List all Mailboxes using above credentials, click on Get user Mailbox(es).
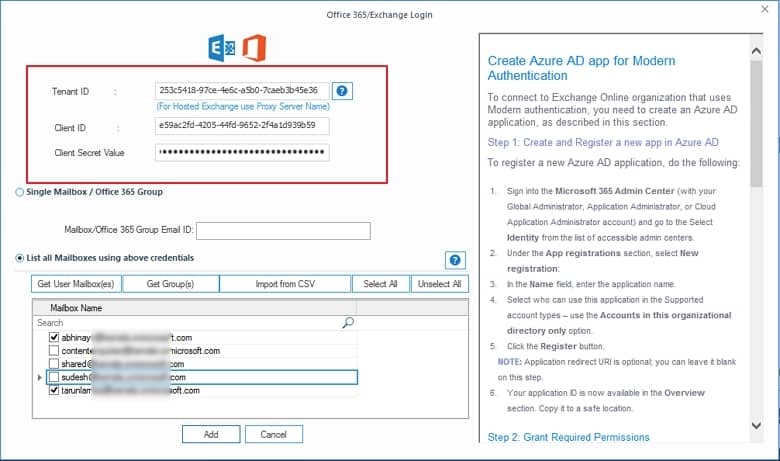
- Select users whose data you want in M365 backup and then click Add button.
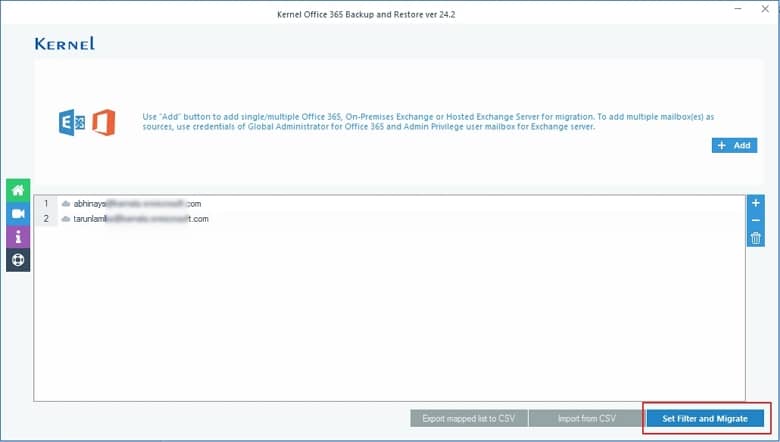
- You can add more mailboxes by clicking on + button or directly Import from CSV. Press – button to remove selected user mailboxes from the list. Click Set Filter and Migrate.
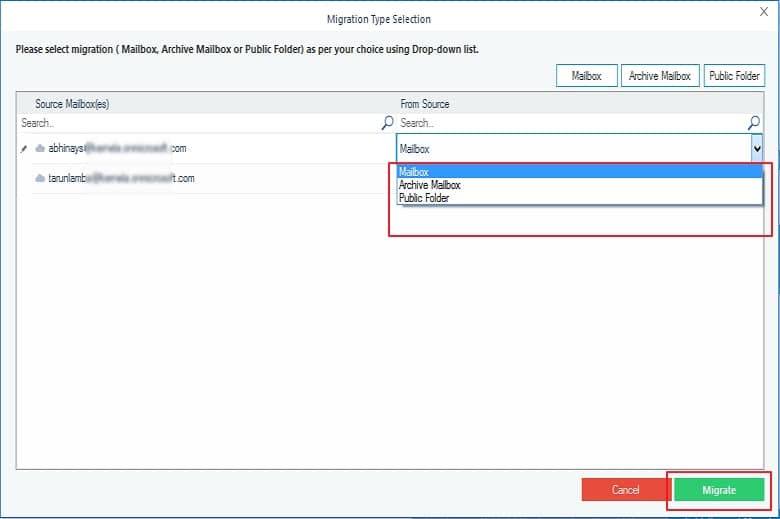
- There’s a dropdown list adjacent to each user mailbox, select anyone from the three: Mailbox, Archive Mailbox, or Public Folder to define the migration. Now, click Migrate to proceed.
- The tool will begin enumerating folders from the selected user mailboxes and as soon as the process finishes, you’ll see all the folders in the original hierarchy.
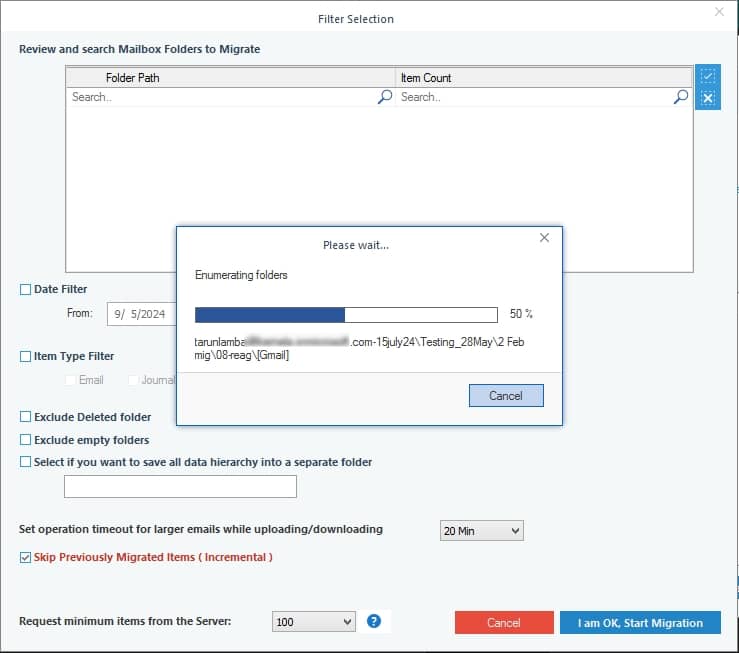
- Select the desired folders and then apply the required filters to backup selective data. Then click on I am OK, Start Migration.

Note: Mark the checkbox to Select if you want to save all data hierarchy into a separate folder.
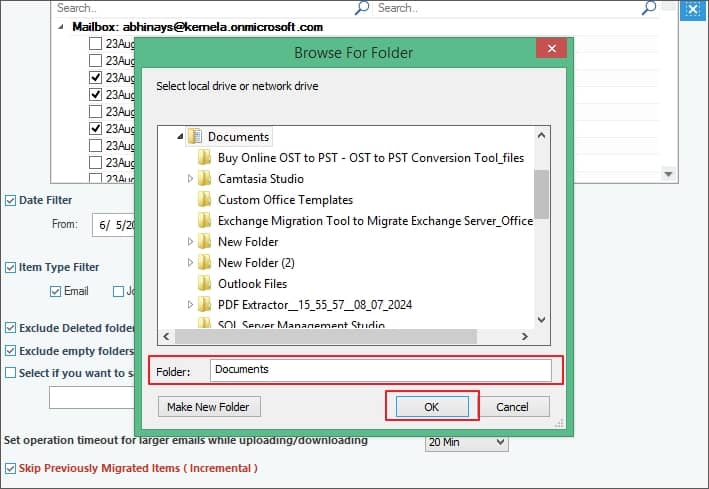
- Select the output type in which you want to store the backup on your system. Click OK to backup M365 data.

- Now provide the destination path where you want to store the output of backup and hit OK.
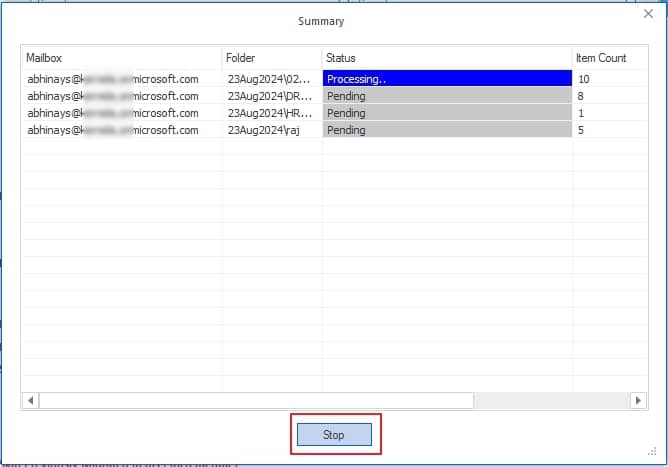
- This will begin the process of data backup. The progress of the process is shown on the Summary window. You can click Stop button to stop the backup process at any point you want to.
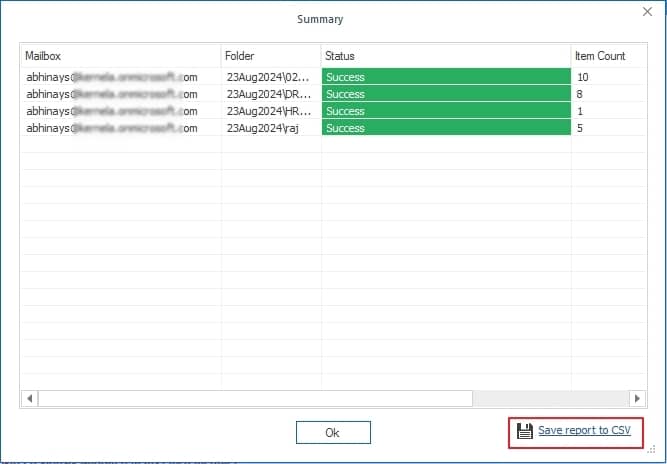
- Once done, you will see a dialog box saying, “Process completed. Please save the report to CSV.” Click OK to finish.

- To save the migration report for future insights into the process, you can click on Save report to CSV. Click OK.


With this, you can attain an easy backup of Microsoft data in a few steps without much hassle. You can get the trail version of the tool to backup 10 items per folder and 5 documents per drive.
Conclusion
Backing up Office 365 data is a crucial practice that most businesses neglect even today. Native methods for taking a smooth backup are not feasible for the non-technical users. Therefore, using a professional tool like Kernel Office 365 backup seems the right choice to avoid hiccups, data loss, and manipulation. Other than easy backup, you can also use this tool to restore the backup to an active Microsoft 365 account and access all the mailboxes again.