Read time 10 minutes
Many Google Drive users realize the need to backup and synchronize specific folders while using the Backup & Sync app. Get some solutions for such requirements as we have tried to answer a lot of common queries related to this topic through this blog.
Backup and sync for Google Drive
Backup & Sync for Google Drive is an inbuilt application developed by Google for the file backup and synchronization between the local system and Google Drive. Its foremost use is to backup desired system folders to Google Drive cloud storage to access it anytime and synchronize Google Drive folders to the local system. The updates on any one of them would reflect on the other due to the synchronization. It supports files in My Drive only and not on Shared Drives. The Backup & Sync app for Google Drive also helps users recover deleted files from Google Drive through the Recycle Bin folder available in the synchronized Google Drive folder on the local system.
Important: According to the latest announcement (in 2021) by Google, the two products, namely Google Drive File Stream and Backup and Sync, would be merged into a single product – Google Drive for desktop, which will have exclusive features earlier appreciated by its clients.
How to Backup and Sync a Specific Folder in Google Drive?
Backup and Sync for the Google Drive application allow users to select specific folders for backup and synchronization processes that you can select at the start of the application installation; you can also modify the folder selection if you are already using the Backup and Sync for Google Drive application. Let us understand both scenarios one by one.
When You are New to Backup and Sync for Google Drive App
If you have downloaded the Backup and Sync application for Google Drive from this link Download – Google Drive, continue with these steps.
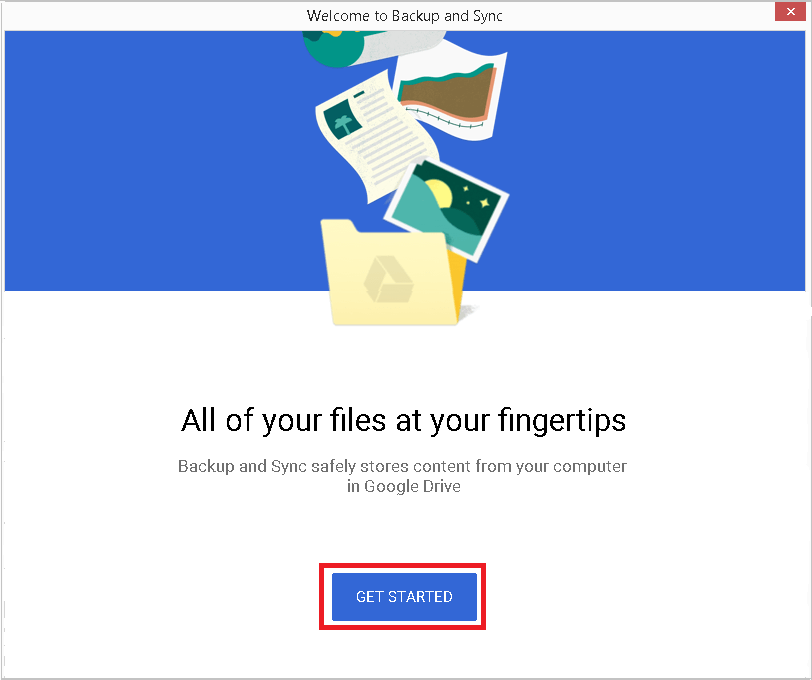
- Install the downloaded .exe and then click the GET STARTED option to continue the process.
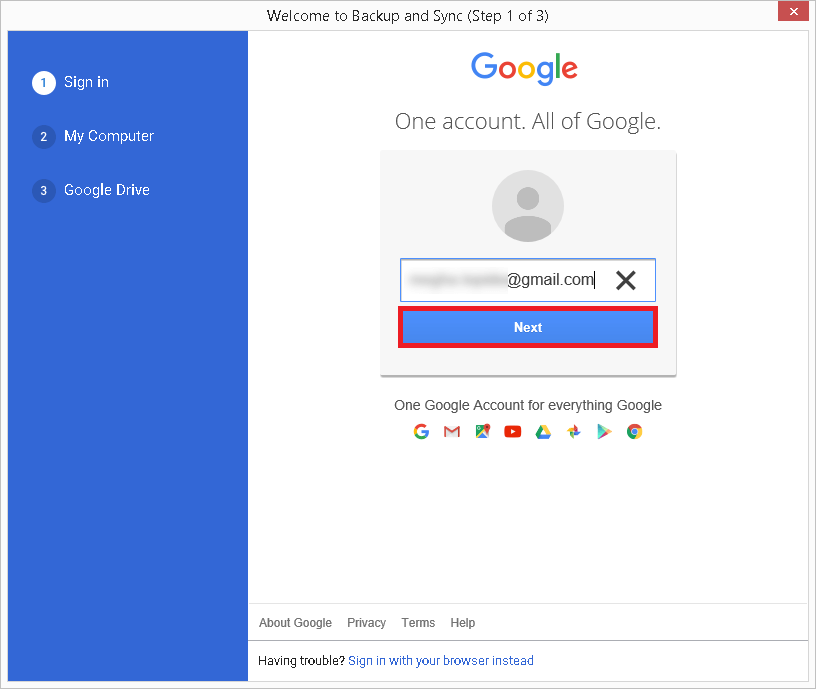
- Provide your Google account email address and click Next.
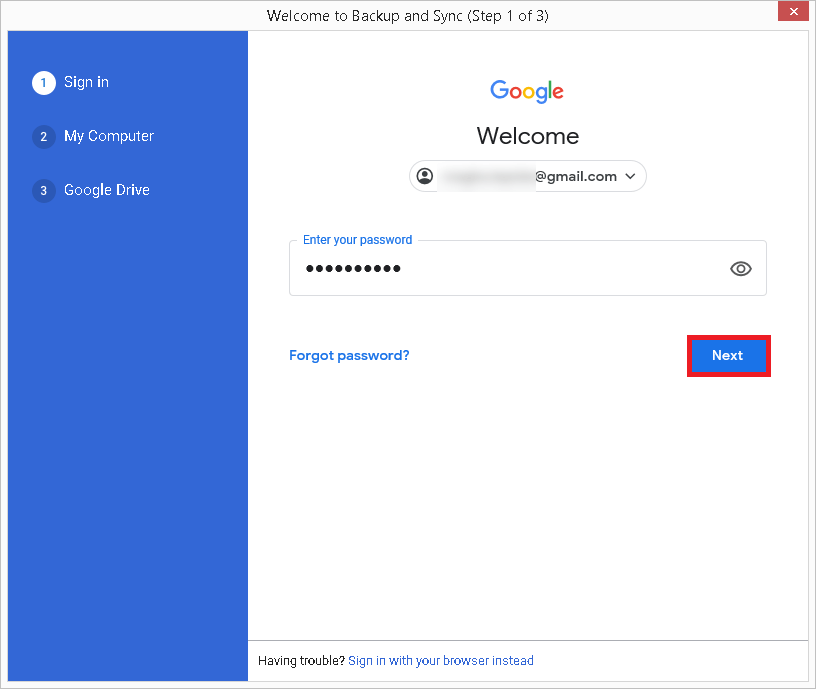
- Enter the password for the Google account and click Next.
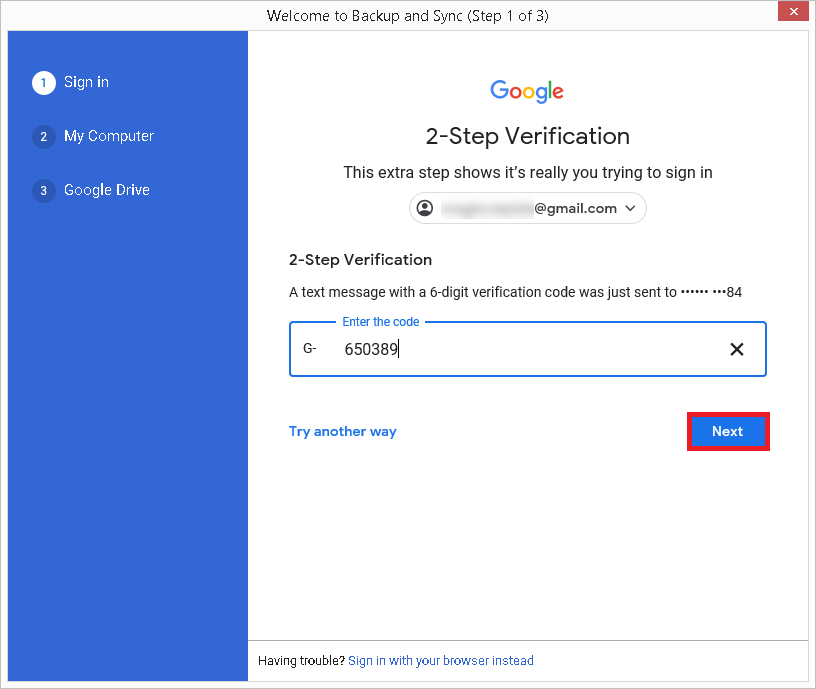
- An OTP would be sent to the registered email address or phone number for the two-step verification for the account; enter the received code and click Next.
- The next page asks to choose folders from the system for continuous backup to Google Drive. Click GOT IT to continue.
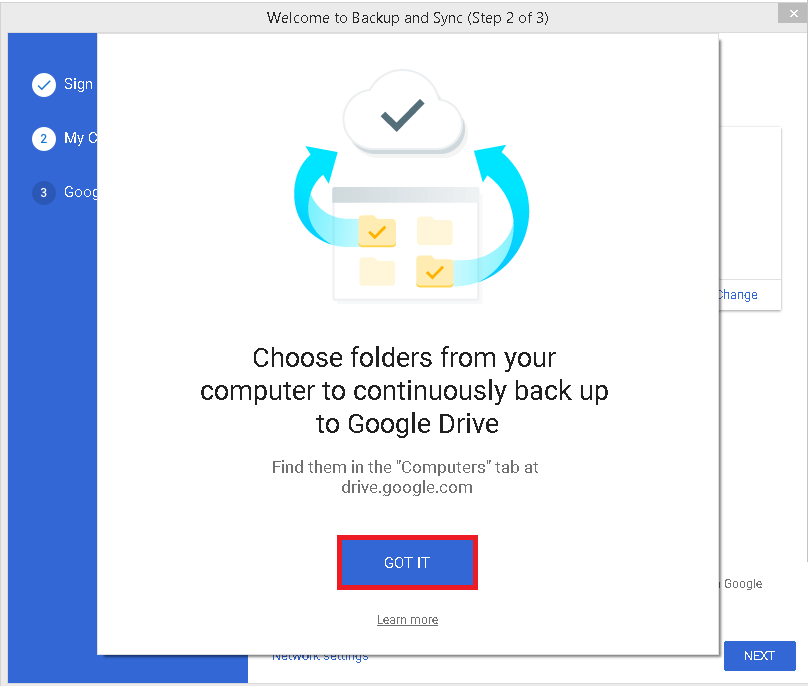
- Use the CHOOSE FOLDER option to select and add desired folders from the system drives. Select the checkbox against that folder(s) to backup it to Google Drive and click NEXT.
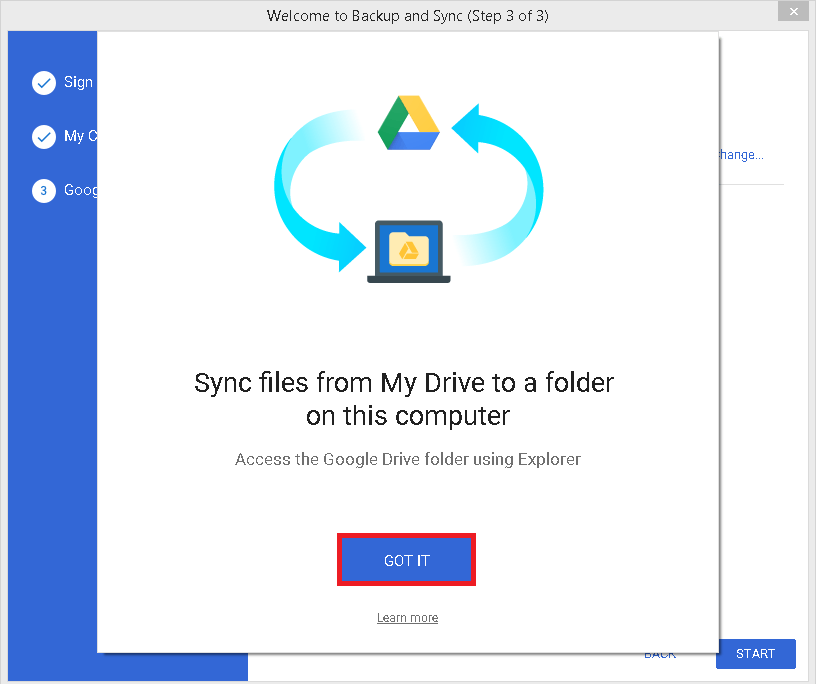
- The next page displays information about the file(s) synchronization of Google Drive folders to the system. Click GOT IT.
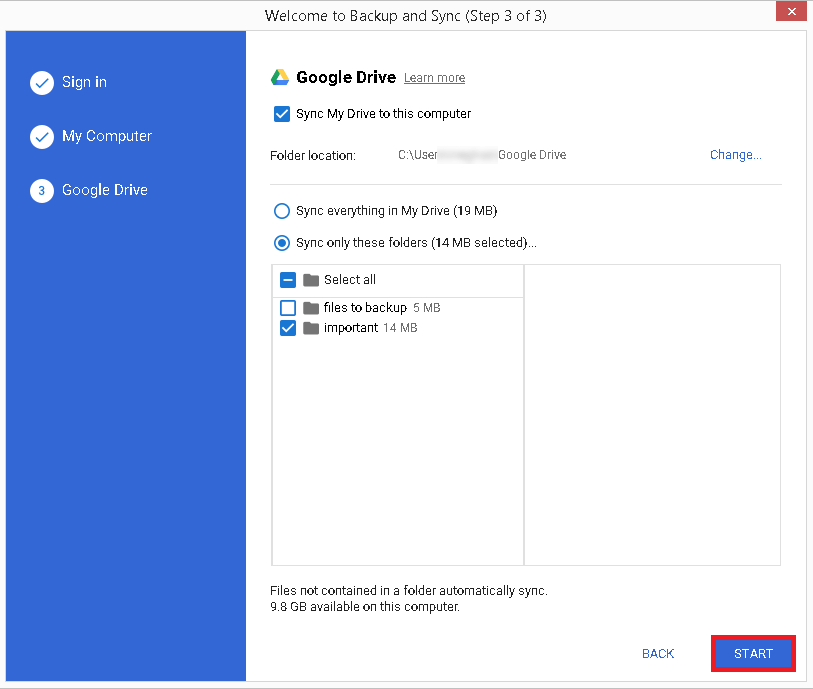
- Select the second option Sync only these folders and select the desired folder(s) by selecting the checkbox against it. Then, click START to start the backup and synchronization process.
When You Already use Backup and Sync for Google Drive App
This is another case where you are already having backup and synchronization services from the Backup & Sync app for Google Drive and want to backup and synchronize only a specific folder now. Let us know the modification process.
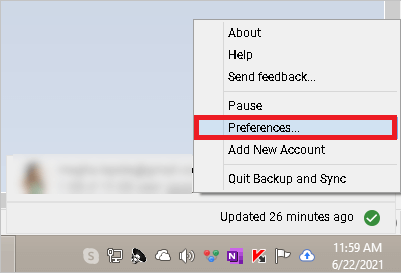
- Right-click on the Backup & Sync icon on the bottom right of the system taskbar, click 3 dots and then select the Preferences option.
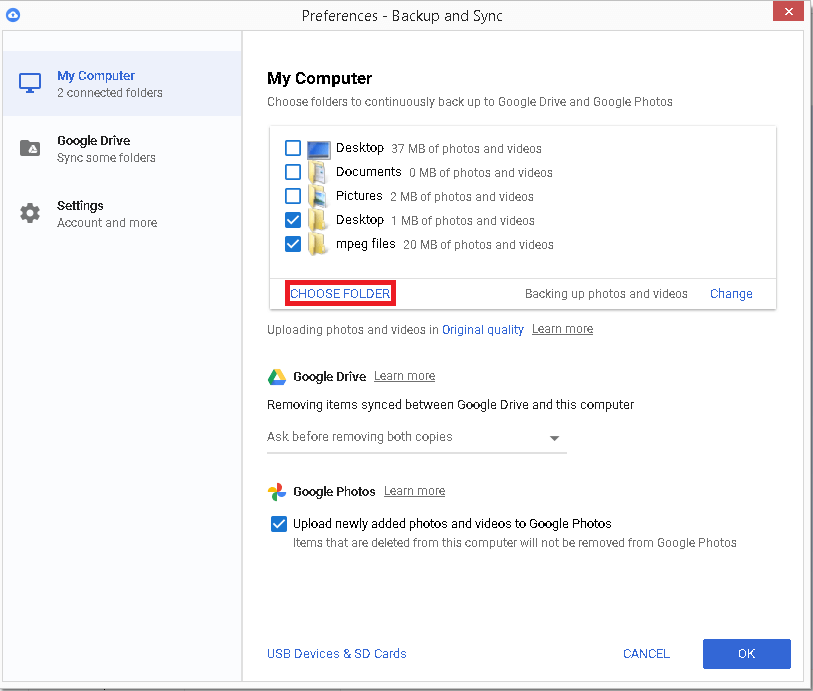
- Now, add another folder for the backup process by clicking on the CHOOSE FOLDER option.
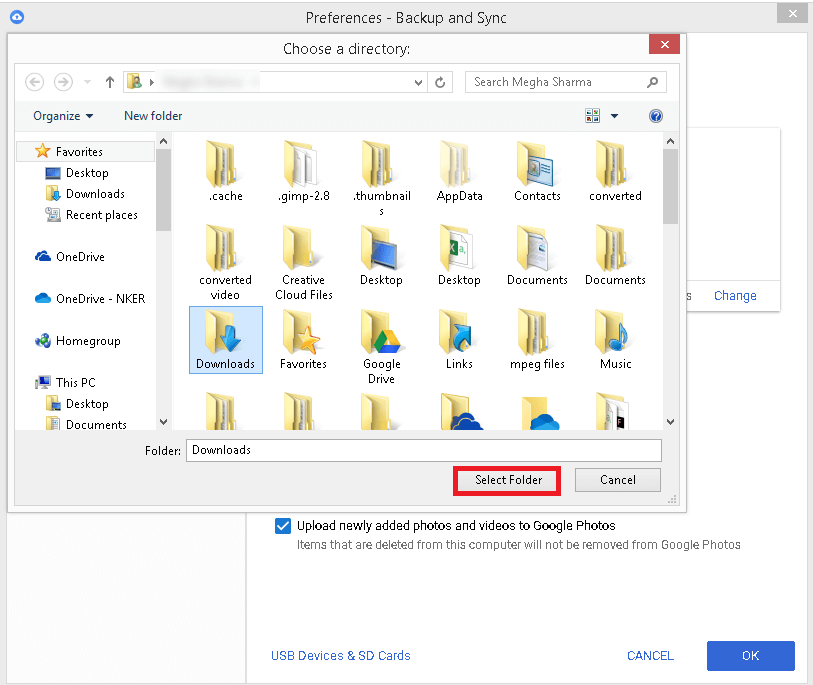
- Browse and select the folder to backup. Then click Select Folder to add it to the application.
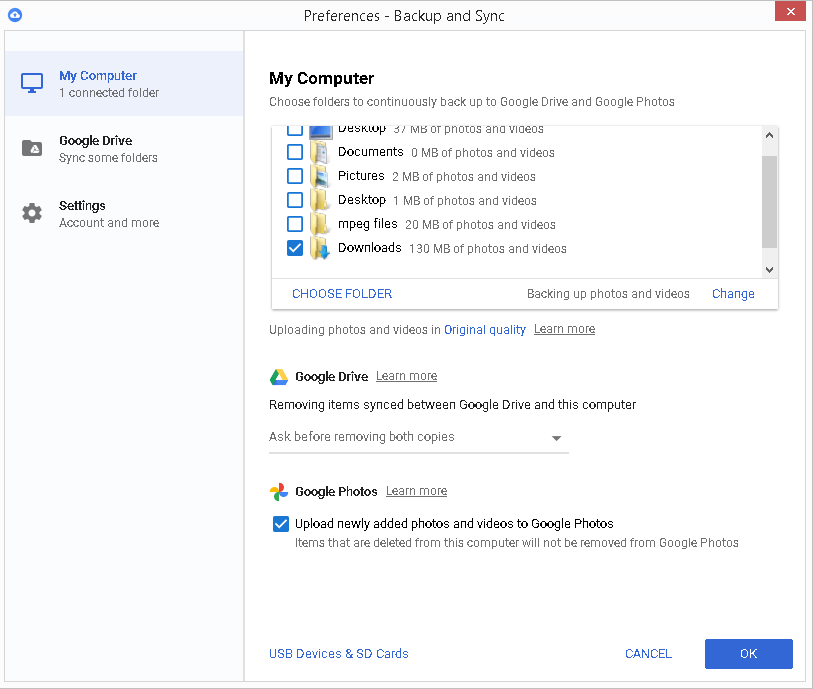
- Select the checkbox against the added folder and click OK.
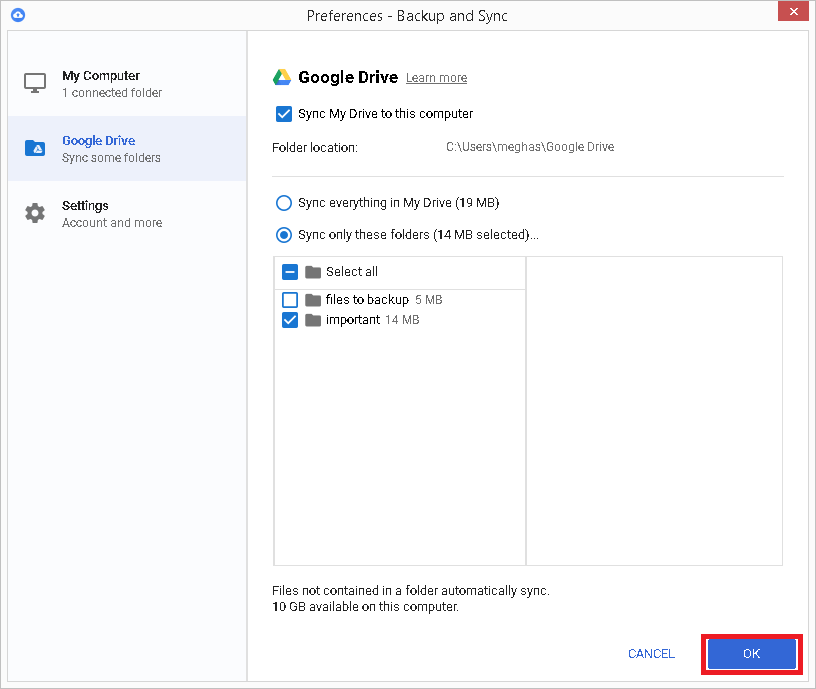
- Click the Google Drive option from the left panel of the same page, select the desired folder for synchronizing Google Drive to the system (under the Sync only these folders option), and click OK.
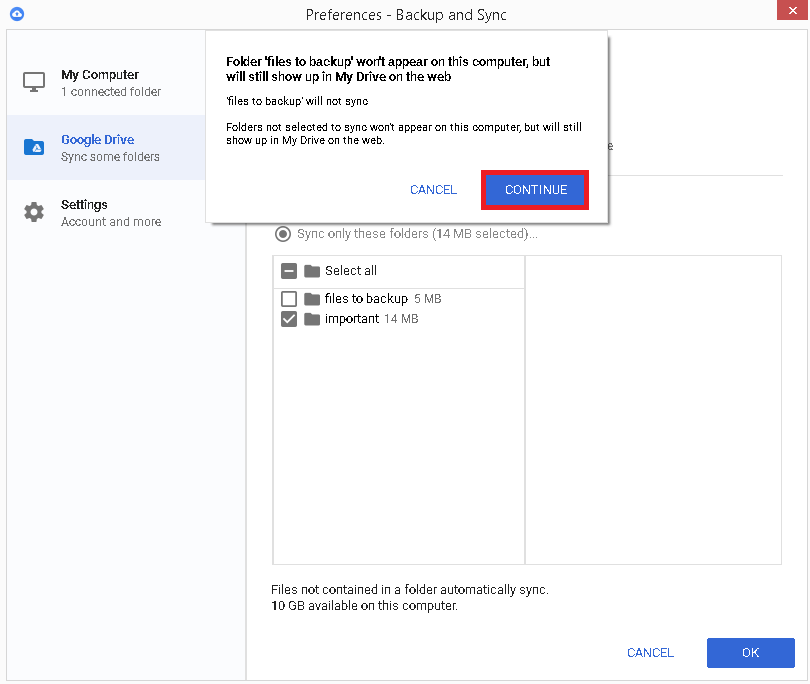
- The last dialogue box would display that the other folders can be accessed in Google Drive on the web, and only the synchronized one can be accessed on both the Drive folder on the system and the web. Click CONTINUE to complete the process.
Sync Google Drive Specific Folders with Your PC
In case you don’t need Google Drive items that sync anyway, but they take up a lot of space on your computer hard drive, you can make Google Drive sync only certain folders to your PC. The Google Drive client allows you to sync Drive files by streaming them or by mirroring them.
The Stream feature allows you to access Drive files through your computer’s hard disk, but the files are stored only in the cloud, meaning that they will not take up hard disk space on your computer.
In Mirror files, you can access files in a Google Drive folder on your PC. All Drive files are saved on your computer and in the cloud. Therefore, you should pick the Stream files option to sync specific folders from Drive to the computer.
- On your computer, open the Drive application.
- Click the gear position & select Preferences.

- Select Save under the Stream files tab of Google Drive.

So, these were the native methods to backup and sync specific folders on Google Drive.
Get an Automated Backup Solution for Your Google Drive
If you do not wish to encounter accidental data loss situation during the file and folder synchronization between Google Drive and the local system or want to avoid the tedious backup process using the native solution, you are welcome to try the professional Kernel G Suite Backup tool which not only backs up Google Drive files but also backs up G Suite mailboxes, Contacts, Chats, and Appointments readily. It integrates a user-friendly interface, interactive features, and smart filters for quick and efficient data backup.
- Protection of metadata of each item in the mailbox.
- Saves Google Drive data in the original formats.
- Saves Hangout chats in the same threaded messages.
- Select multiple mailboxes using automated CSV files.
- Backup reports in CSV formats.
- Incremental backup of new data excluding previous ones.
- Assistive login information at the login page.
Summary
This article outlines the best ways to back up and sync specific folders in Google Drive via the Backup & Sync application and My Drive Syncing options. We have quoted the entire process step wise and hope you are successful in syncing and backing up your desired folders in Google Drive. To make things better for you, we suggest you the Kernel G Suite Backup tool which is the best alternative for such processes. Download the tool for free and install it to make things easier, better, and faster.

