Read time 4 minutes
Exchange Administrators always try to optimize the Exchange infrastructure. It helps them keep Exchange in good health and also to avoid unnecessary expenditure on infrastructure. However, when the size of the mailbox database increases, the administrator can choose to either reduce the Exchange database size or he can move mailboxes from one database to another. It all depends on your exchange environment and data management process.
How to move Exchange mailbox to a different database
Two methods are there to move Exchange mailboxes. The one is using Exchange admin center and the second one is using Exchange Management Shell. Both the processes are quite simple, and an administrator can complete them in minimum time.
Using Exchange Administrator Center
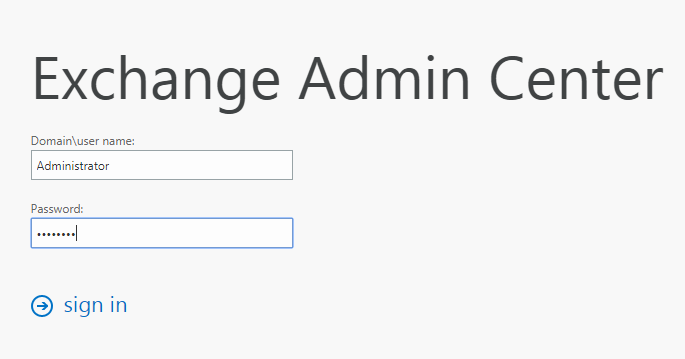
- To move the mailbox using Exchange admin center, first log in to EAC.
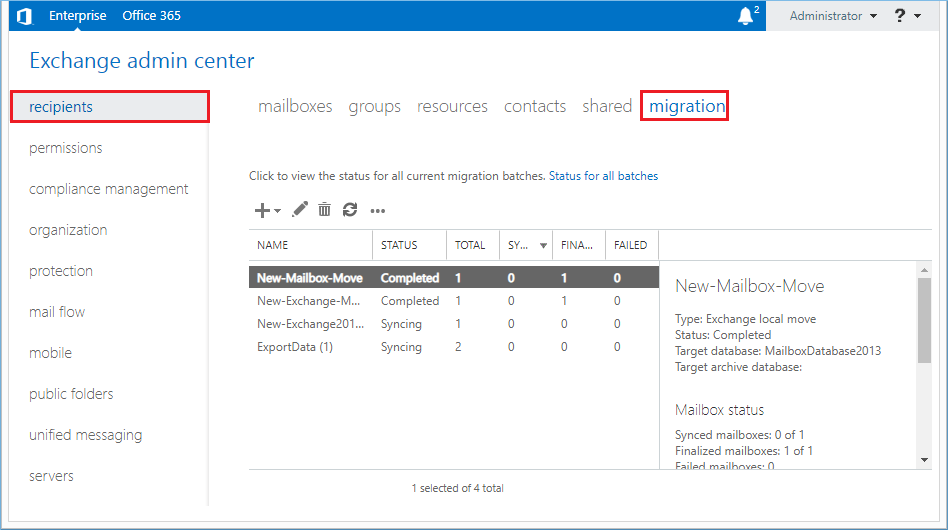
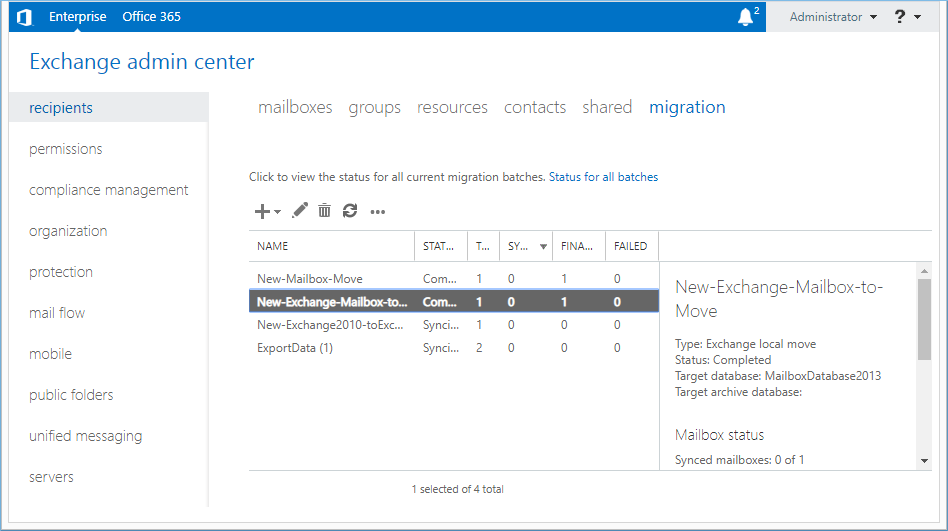
- Under Recipients > mailboxes, you can see all the mailboxes. To move them, click on the Migration tab.
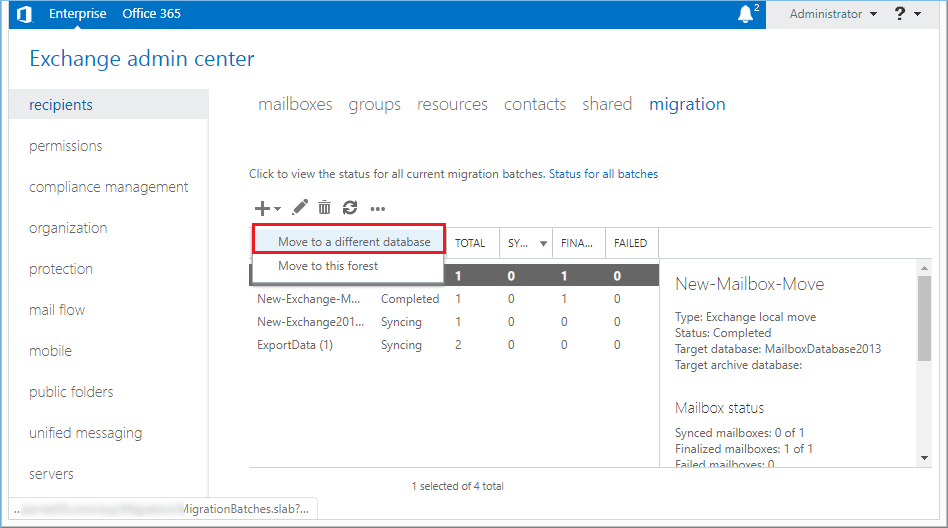
- In the migration, click the (+) icon and select the option Move to a different Database.
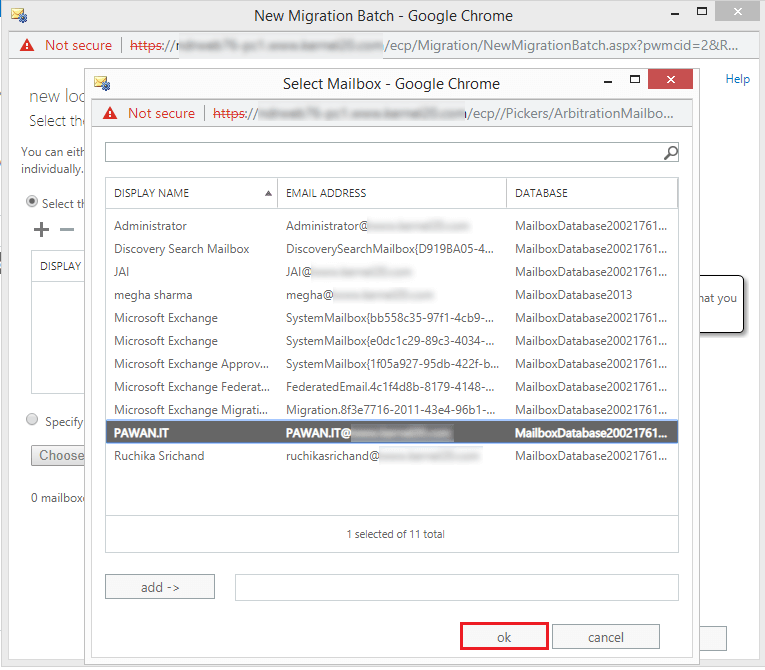
- Select the mailbox(es) which you want to move. Then click OK.
- Select the mailbox and click Next.
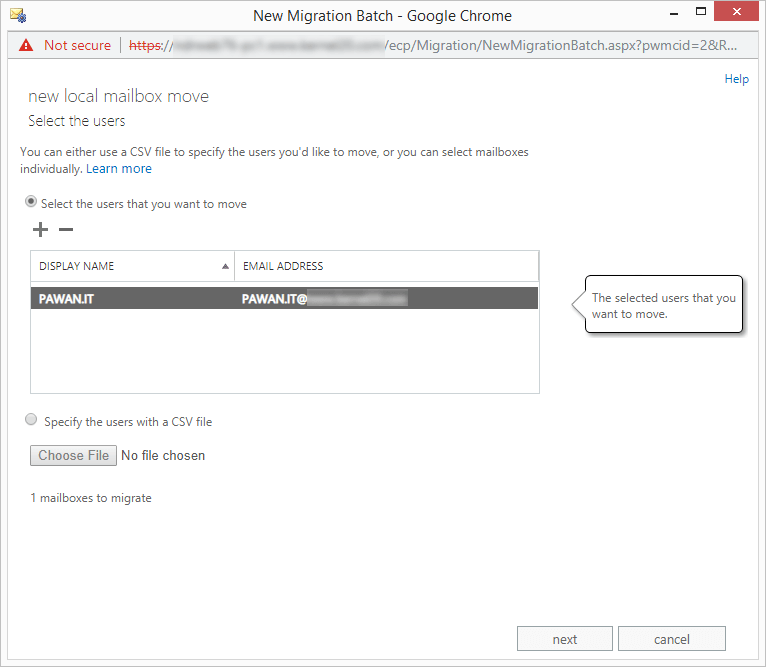 Note: You can also choose to use a CSV file to add mailboxes for migration.
- Now, you need to create a new batch. Provide a name to the batch and select the target database.
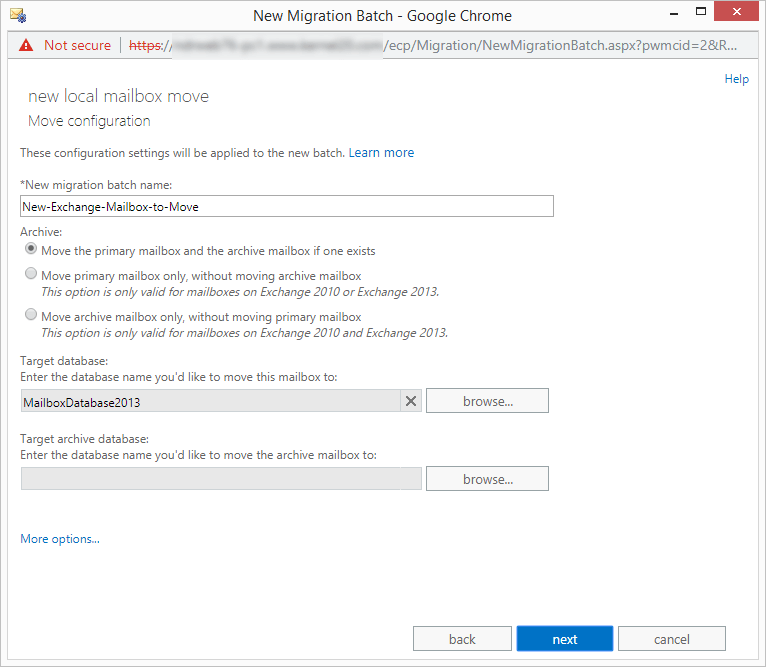 Note: If you have an archive mailbox in your account, then you can choose among various options like Move primary mailbox or archive mailbox if one exists, Move primary mailbox only, or Move archive mailbox only.
 - Select the recipient account which will get the report of the migration. You can choose more than one account. Here, you can also choose to start the migration automatically or manually.
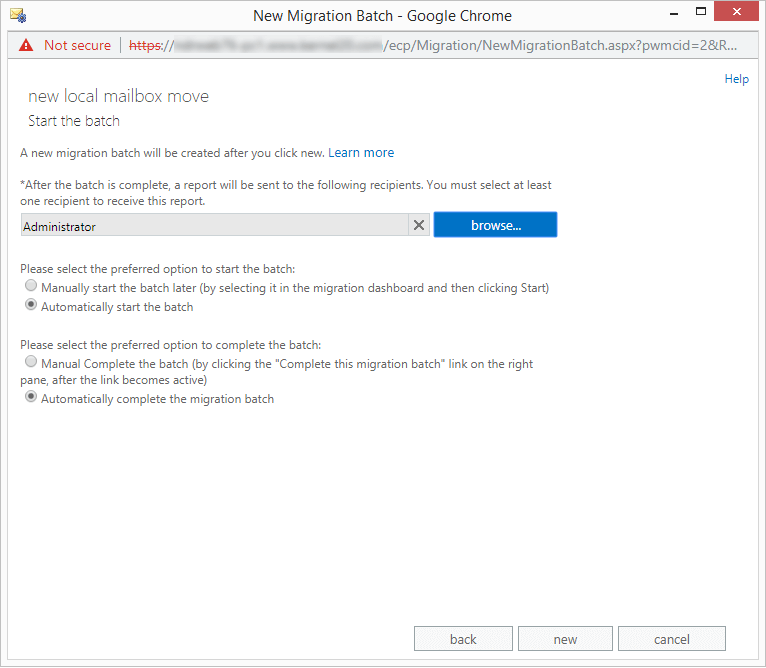
- As soon as the migration begins, you can see it listed in the migration category. And to check the migration status, you can click View details option.
- After clicking the View Details option, you will see the status of migration; also, you can download the report for the user.
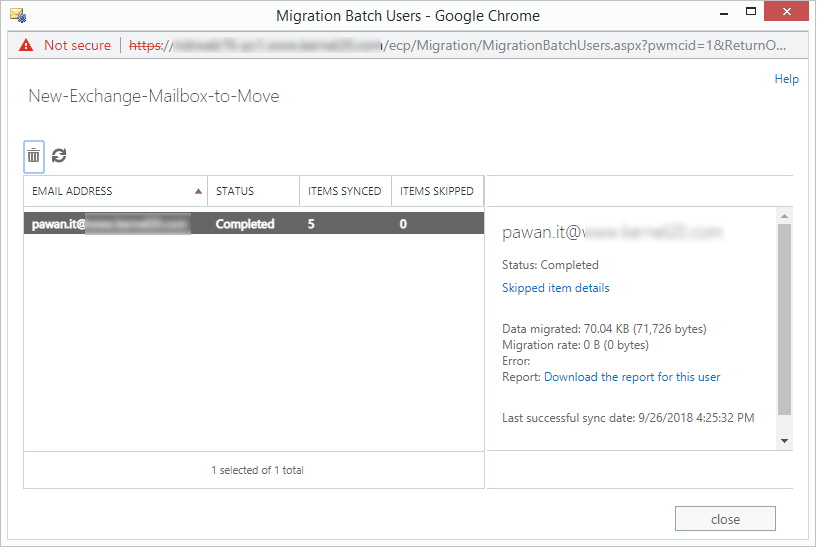
- After successful migration, the status of the migration batch will change to Completed.
Conclusion
Exchange administrators can easily move or recreate a mailbox using Exchange admin center. But the move may fail if done incorrectly. To save yourself from facing any such complication, just take the assistance of Kernel Migrator for Exchange – Express Edition. It will perform migration in minimum steps and place the mailbox to the desired destination swiftly.
More Information