Read time: 5 minutes
Outlook is a crucial part of the Microsoft suite that many businesses, professionals, and organizations use for communication and collaboration using its advanced features. It stores emails, attachments, calendars, tasks, etc., even in offline files for the convenience of the user. Outlook provides a Mail language setting to customize the region language and default language, which is reflected in the whole Outlook application.
Sometimes users get annoyed while changing the default language in Outlook when they can get proper methods to customize the change default language feature. So, we’ll go through the manual practices in Outlook to change the default language without any hassle.
The process to change the default display language in Outlook
This section has some effective ways that help you configure the default language in Outlook in easy steps. Follow each one of them with proper step-by-step instructions.
Process 1. Change the Outlook language
By default, MS Outlook runs in the specific language that is set to your device, but you can simply change it to any language that you want by following the below steps:
- First, Open Outlook and Click File tab then choose Options.
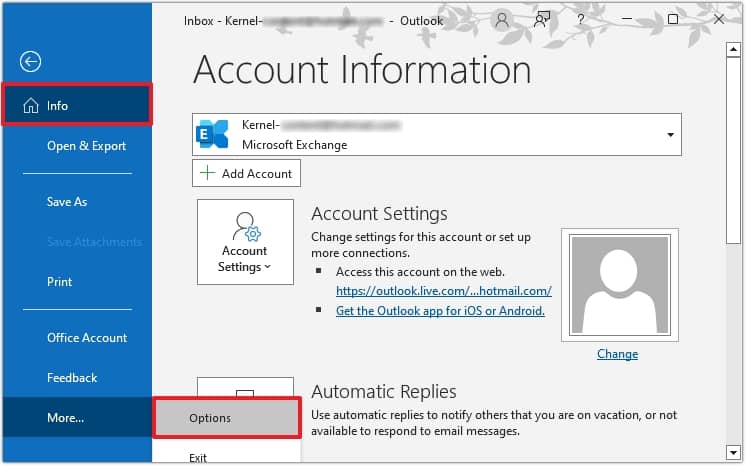
- In the Language section, select your preferred language from the available languages listed on the wizard and click on the Set as Preferred option.
- Finally, restart the Outlook application to save the changes.
Process 2. Install language accessory pack
If your desired language is unavailable in Outlook, first install a language accessory pack for Office on your system. You can install this pack after Office 365 installation to change the default Outlook language. It also includes proofing tools to check spelling or grammar and hyphenate text. To activate the specific pack in Office 365 after installation, you must follow the below steps:
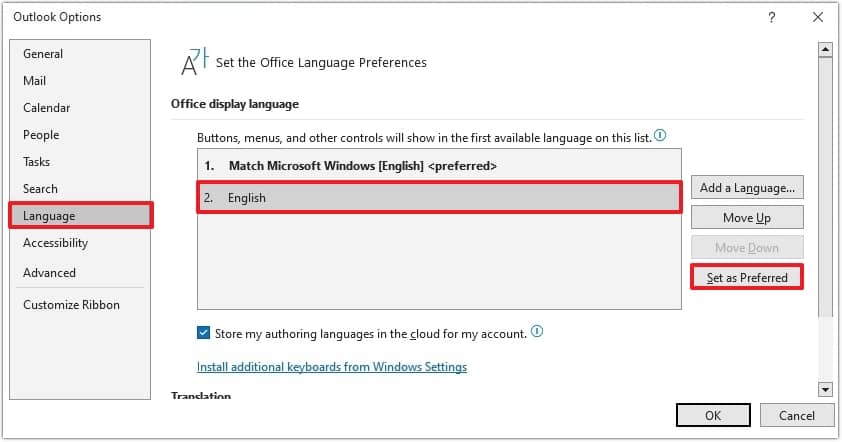
- First, open Outlook and click Options -> Language.
- Next, select the language you downloaded from the Language pack.
- Finally, click Set as Preferred.
To reflect the changes, you need to restart your Outlook application.
Note: It might be possible that you see an error message with code 30029-1011 during the installation of the language pack. This error message shows while trying to install the pack using the VL version of Office 365. To install the specific pack, you must have a standard version of the Office 365 suite to install the translation packages. If you also face the same error message, get the standard Office 365 version and repeat the installation process.
Process 3. Change Outlook Spell Check Language
Now, you have installed a new language and set it to the default language for the Outlook application. Hence, it is necessary to check the grammar or spelling and hyphenate text based on the selected language. For this, you need to change the Outlook spell check language from the default system language by performing the below steps:
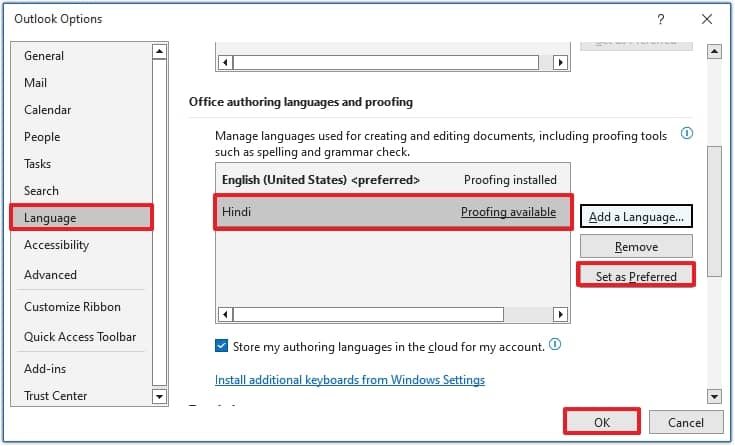
- In Outlook, click on Options then Language.
- Now, select your preferred language under Office Authoring Languages and Proofing.
- Finally, click Set as Preferred.
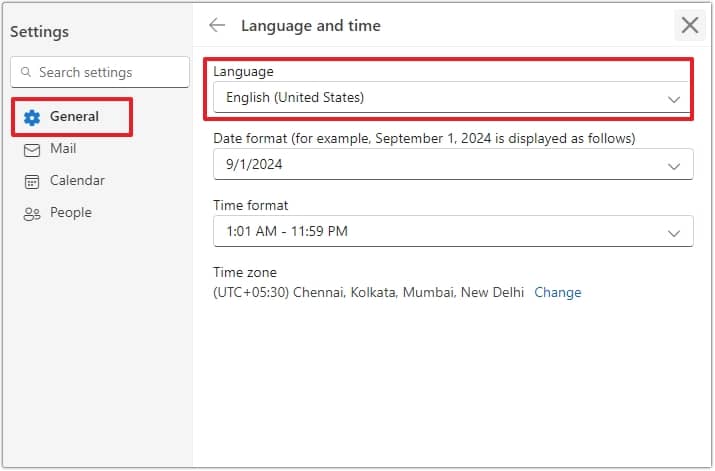
Process 4. Change the language in Outlook online
The default language of Outlook online is set based on the language settings of your Microsoft 365 account. If you want to change it, follow the below steps:
- Open your Outlook online account and click on Settings.
- From the General Section, go to the Language and click Save to apply changes.
However, in some cases, PST files get corrupted and damaged while applying these processes, which makes the resolution complex, and users may face different errors and other inconvenient situations. So, using Kernel for Outlook PST Repair software makes your PST file error-free with the recovery of deleted data in the original hierarchy.
Conclusion
The conversion of Outlook language into your familiar language helps in the effective use of the application. However, most Outlook users feel comfortable with the default language, but in some special cases, they need to change it to another language to work effectively. Before attempting this, it is recommended to install a PST repair tool to restore corrupt PST files and prevent data loss. Use the recommended Kernel for Outlook PST Repair which offers a simple user interface to scan and repair Outlook PST file s. It allows users to save it on various platforms such as Exchange Server, Gmail, Microsoft 365, etc. Furthermore, it can repair password-protected and archived PST files, even from ANSI or UNICODE formats.