Read time: 7 minutes
Emails have become an important part of our daily routine. We often use them to share sensitive information like financial data, legal contracts, sales reports and projections, confidential product information, or customer and employee information. It means mailboxes can be considered repositories for large amounts of sensitive data or information, and information leakage can become a severe threat to your organization. So, it’s necessary for organizations to maintain confidentiality.
Email encryption works as an additional layer of information security in such a case by ensuring that only intended recipients can view or read messages. With Office 365 Message Encryption (OME), sending and receiving encrypted emails between people inside and outside your organization becomes easy. Office 365 message encryption works with several email services like Outlook.com, Yahoo!, Gmail, and more.
Here, in this post, we will discuss Office 365 message encryption in detail and how to use it to protect emails sent externally.
How Does Encryption in Office365 Work?
Office365 migration encryption transforms the readable text into encrypted format (unintelligible cipher). Later the target recipient can decrypt this ciphertext, avoiding security breaches by unauthorized parties.
It relies on the Azure Rights Management Service (Azure RMS) and encryption options; Office365 encryption includes identity and authorization policies. You can use rights management templates and mail flow rules (transport rules) to encrypt messages with Office365 message encryption.
- Rights Management Templates
This feature allows you to apply encryption and restrict sharing to the message using options like ‘Encrypt Only’ and ‘Do Not Forward.’ It also comes with some additional restrictions. - Mail Flow Rules/Transport Rules
You can create transport rules to apply to a specific message or group of users (inside or outside your organization). When someone sends a message that matches the transport rule, it is automatically encrypted.
Who can send and receive encrypted messages?
Using Office365 Message Encryption, you can send an encrypted email to the recipients regardless of their email client (Gmail, Yahoo.com, etc.). Only the sender must have Office365 Message encryption to send an encrypted email successfully. The recipient can read the message or even send an encrypted reply without a subscription to Office365 or Outlook. The Office365 message encryption supports the below given Office365 plans:
- Microsoft 365 Business Premium
- Office 365 A1, A3 or A5
- Office 365 Enterprise E3 or E5
- Microsoft 365 Enterprise E3 or E5
- Office 365 Government G3 or G5
Note – If you don’t have any of the above plans, you can also purchase a standalone license for Azure Information Protection to access all the features of Office365 Message Encryption.
Method 1 – Encrypting Emails with Office365 Message Encryption
As an Office365 user, you can encrypt emails in Outlook with these simple steps:
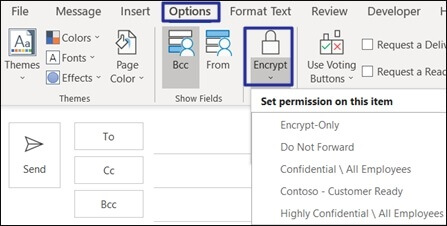
- Click on New Email and select the Options tab.
- Select Encrypt and pick any options based on the restrictions you want to enforce, like Encrypt-Only or Do Not Forward.
Note – To encrypt all outgoing emails in Outlook 2016 and 2019, there are some simple steps. When you use the Trust Center settings, all the emails will automatically get encrypted when you send them.
Method 2 – Configure a Sensitivity Label to Apply Encryption to Emails
A sensitivity label helps you define how sensitive certain data is. You can apply encryption to emails and files by creating a sensitivity label. You can also avoid this step if you already have sensitivity labels in your organization.
To create a Sensitivity Label, follow the below steps:
Open Microsoft Purview Compliance Portal , select Solutions, and click on Information Protection.
- Select Labels and click on +Create a label
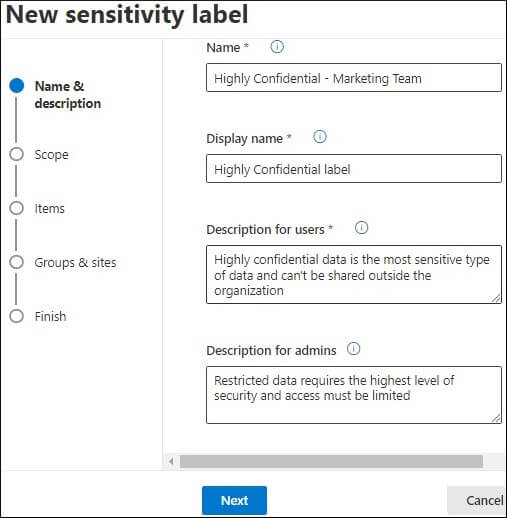
- In the New Sensitivity Label page, fill out all the necessary details about the label you are creating and click on Next.
- In Define the Scope for this Label wizard, select items and click Next.
- In the next window, select the Encrypt items and then click Next.
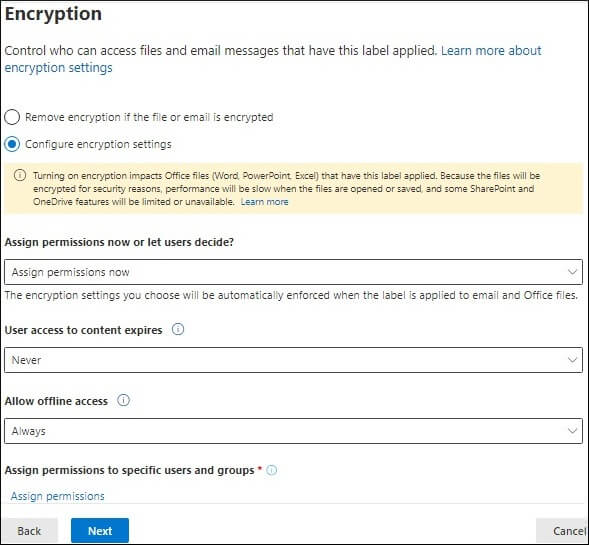
- Now select Configure encryption settings in Encryption Window and fill in other details as shown below.
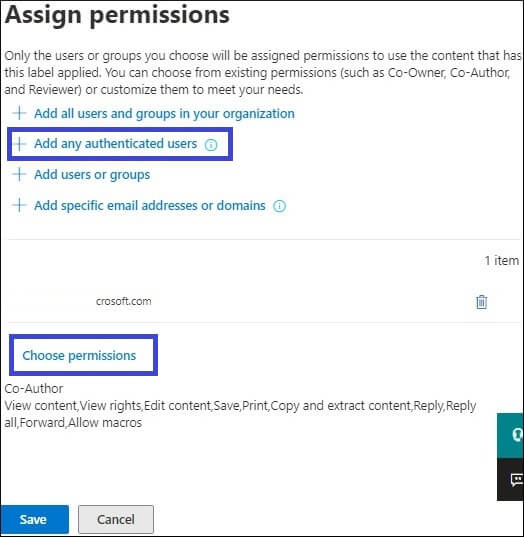
- Click on the Assign permissions link (a blue link in the above image) and add any authenticated users who can open the email. Also, choose permissions and then click on save to apply these changes.
- Now, you have the option to do auto-labeling. You can skip this step, as we will use the transport rule later. As we have selected this label with emails and files only, you can’t modify information in the group & sites and preview steps.
- Review your sensitivity label settings and click on create label to finish the task.
- Creating a label can take some time. Once the process is completed, you will receive confirmation.
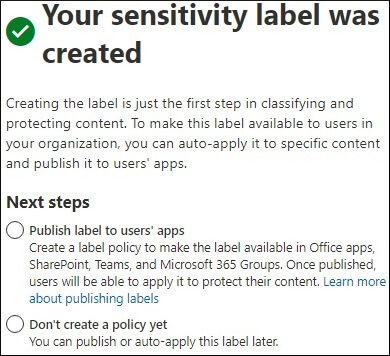
The next and final task is to publish the created sensitivity label to make it available for selection in the transport rule.
- Go to the label policies and select Publish label
- Click the choose sensitivity labels to publish and select your label. Click on Add and then Next to proceed.
- Now, choose which user or group should have the label available. Click Done and then next to proceed.
- In this step, you can select to use various policy settings. Click on Next.
- Now, you have the option to apply the default label for documents, emails, and Power BI. Once done, proceed to the next step.
- Now, name your label policy and add a description. Finally, review the policy and click on submit to publish it.
Method 3 – Configure a Mail Flow/Transport Rule to Encrypt Emails Sent externally
Using a published label (which we have done prior), you can create a transport rule that will help you apply the encryption to the emails sent externally by members of a selected group. To do so, follow the below steps:
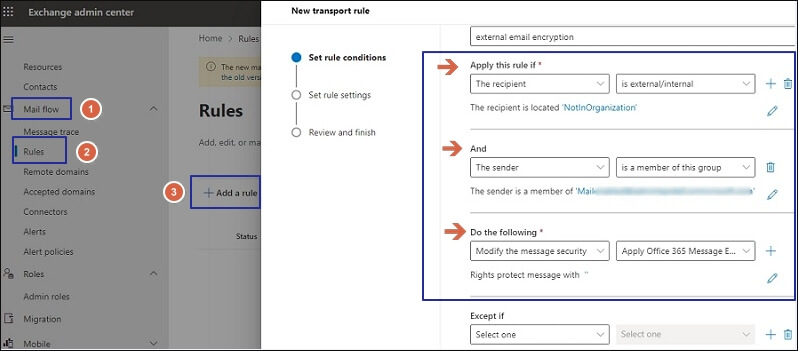
- Open the Exchange admin center. Click on Mail Flow and then select Rules.
- Click on +Add a rule and choose the option ‘Apply Office365 Message Encryption and rights protection to messages.’
- In the Set Rule Conditions wizard, give a name to the rule, like External email encryption.
- In the Apply this rule if row, select The Recipient, then is internal/external, and at last, select Outside the organization. Click on Save.
- Click +icon to add another condition. Here select the sender, then is a member of this group, and at last, select the group who have their emails encrypted. Click on Save.
- Now, in the Do the following row, select Modify the message security and Apply Office365 message encryption and rights protection.
- Click on the Select one link in the Rights protect message with section and add the sensitivity label we have published in previous steps (or a label of your choice).
- Complete the remaining steps of the process, review your rule settings, and at last, click on Finish to create a Mail flow rule/new transport rule.
- The transport rule is disabled by default, so choose it from the rules list and enable the rule using the toggle.
Once the new rule is enabled, all the emails or messages sent by a member of the selected group outside the organization will be automatically encrypted.
Conclusion
There are several ways to secure data in Office 365, and one such way is using Office365 Message Encryption. I hope you find this blog helpful in understanding how to secure externally sent emails using Office365 Message encryption.
Finally, we suggest you back up the Office 365 data as there are always a few chances of data loss or corruption. For Office365 backup, an automated tool Kernel Migrator for Exchange, is the best solution. exchange migration tool backs up all mailbox items like emails, notes, contacts, attachments, etc.