Read time: 7 minutes
When you want the privacy of your email message protected, encrypting the message is a sound choice. Email messages in Outlook are encrypted when they are converted from plaintext into cipher text using an encryption key. A recipient can decode a message only if their private key matches the public key used to encrypt it. Without a private key, recipients see indecipherable text. There are two encryption options to secure email in Outlook:
1. S/MIME encryption: The recipient and sender of mail need to use mail applications that support S/MIME encryption. The Microsoft Outlook program supports S/MIME.
2. Microsoft 365 message encryption: Microsoft 365 Message Encryption requires a Microsoft 365 Enterprise E3 license, which comes with Microsoft 365 Message Encryption.
Methods to send secure email in Outlook
Now let’s discuss the methods to encrypt emails in detail. We will cover 2 different ways of encrypting your data and converting plaintext to ciphertext.
Method 1. Encryption with S/MIME
Windows desktop clients can only use encryption if you are a subscriber to Microsoft 365. It is important to add the certificate to the computer’s keychain before starting this procedure. Your computer must first be configured with your signing certificate before you can use it in Outlook.
- Access Outlook and go to the File menu.
- Then, choose Options & click on the Trust Center. Within the Trust Center option, you now need to click on Trust Center Settings.
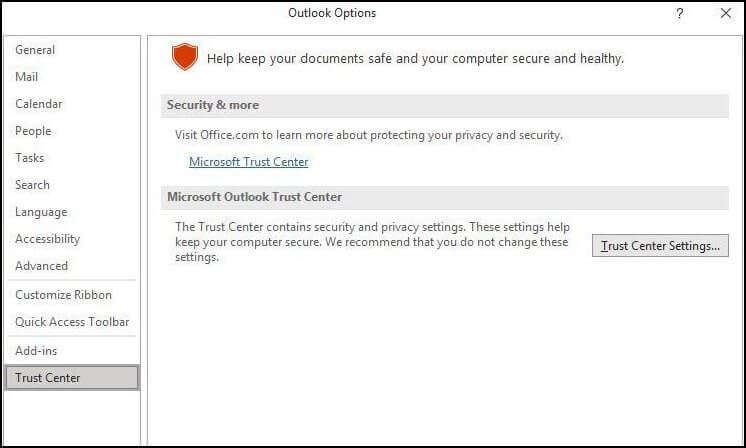
- Under the left pane window, choose Email Security.
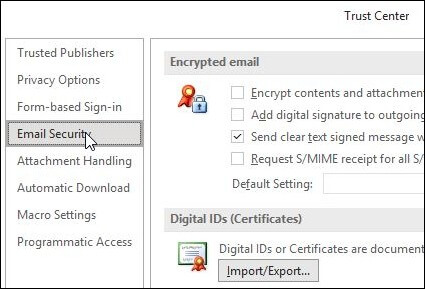
- Within Encrypted email, select Settings.
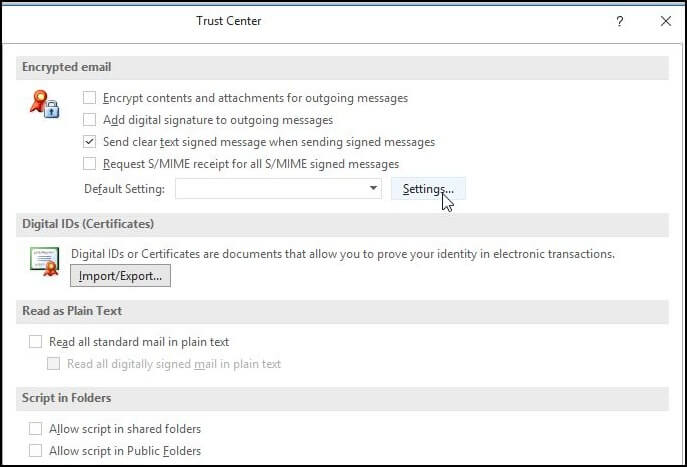
- Under the Certificates and Algorithms tab, tap on Choose & click on the S/MIME certificate. Tap on OK.
If you have opted for Microsoft Office Insider program, then you could perform the below steps to add encryption to the email:
- Within your email message, select Options and choose Encrypt.
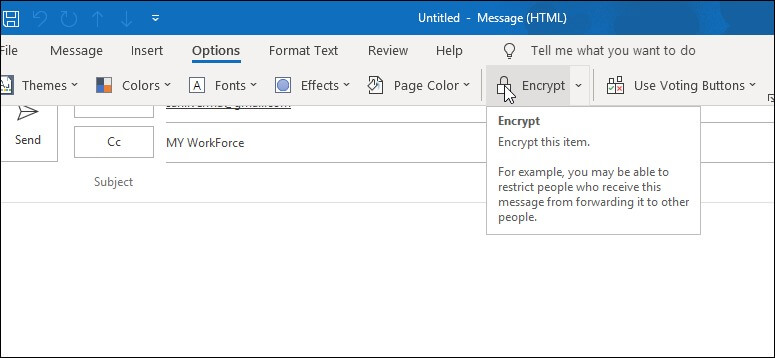
- From the drop-down menu, tap on the Encrypt with S/MIME option.
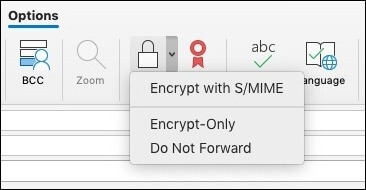
- You’ll get an Encrypt with S/MIME option if you have successfully installed an S/MIME certificate on your PC.
For Outlook 2016 & 2019 users the encryption can be achieved with the steps below:
- Within your new email message window, select Options and choose Permissions.
- Select the required level of restriction you need.
- Lastly, compose your mail & hit Send.
Encrypt every outgoing message
To encrypt all outgoing messages in the future, simply follow the steps below:
- Launch Outlook & navigate to the File menu.
- Next, choose Options & click on the Trust Center. Under the Trust Center option, you now have to tap on Trust Center Settings.
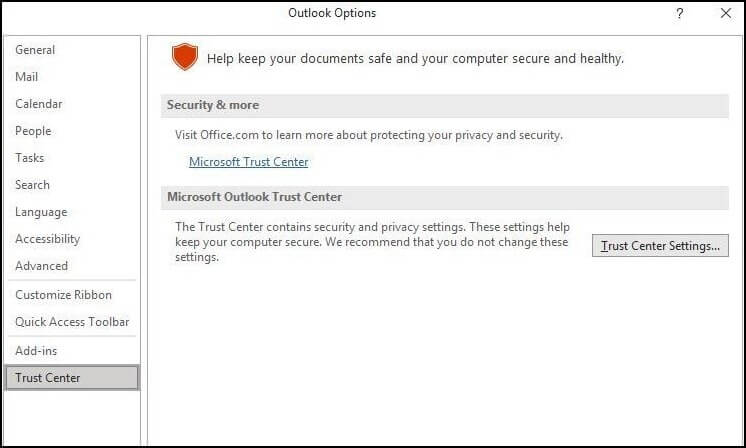
- From the left pane window, choose Email Security.
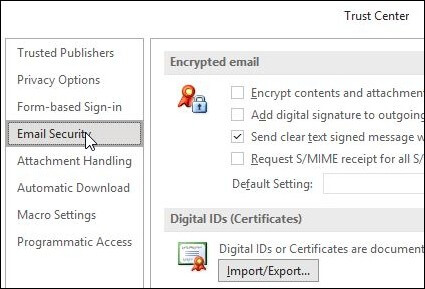
- Within Encrypted email, choose the Encrypt contents & attachments for the outgoing messages check box.
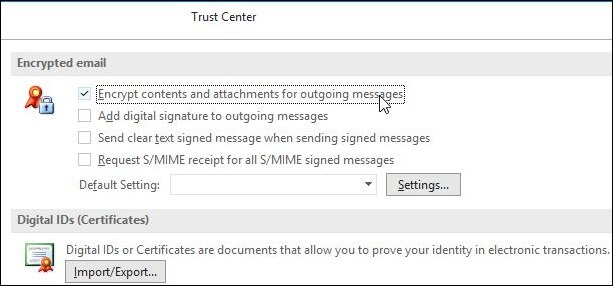
- You can also modify certain additional settings, like using a specific certificate, tap on Settings for any such modifications.
Note: If all your emails are encrypted, all your recipients will need your digital ID to decrypt them.
Method 2. Send encrypted email via Office 365
There may be instances when Outlook is not opening in Windows 10 and other OS versions then Outlook Online allows users to send secure emails from Office 365. It is the same as Outlook except for a slight difference in the menu.
- Firstly, compose a new mail in Outlook Online
- Choose Encrypt from the toolbar.

- Tap on Change Permissions if you wish to prevent forwarding of your email.
- Tap on Send when you are done.
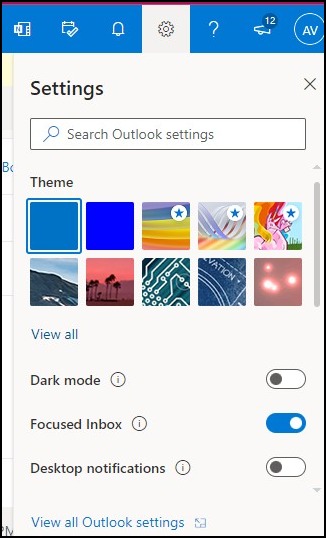
- Choose the gear icon & select view all Outlook settings.
- Choose Mail & click on Customize actions.
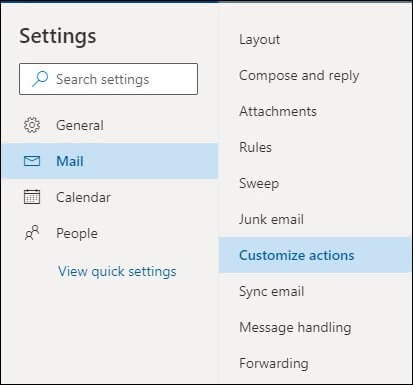
- Checkmark the box Encrypt.
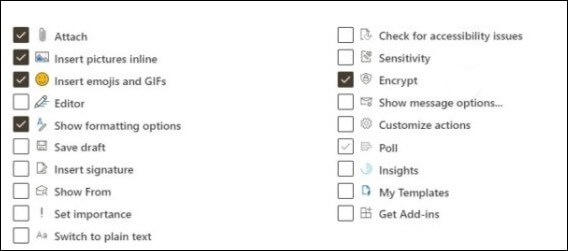
In case you cannot find the encrypt button on the toolbar, then you need to tap on the 3 dots above.
When you open Outlook emails in a web browser and try to add encryption to a new message, Outlook provides you with the following options:
- Encrypt
- Do Not Forward
- Confidential
- Contoso
- Highly Confidential
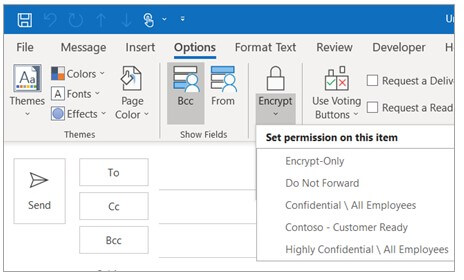
Selecting the option Do Not Forward will encrypt the message and prevent it from being forwarded, printed, or copied. Using this method, it is possible to ensure the content of the email is viewed only by the intended recipient.
Removing encryption from sent mails
Once the email has been sent, you can also remove the encryption afterward. Undoing the encryption will enable the recipient to read the message without verification. To remove the protection, follow the steps below:
- Navigate to Sent items in your Outlook.
- Access the encrypted mail you have sent.
- Choose File & select the option Unrestricted Access within Encrypt.
How to access password protected emails?
As we now know how to securely send emails in Outlook, there can be instances when you might be struggling with opening your encrypted protected files. To assist you in your problems, we have come up with a brilliant tool that focuses mainly on repairing encrypted & password protected files and retrieving deleted/lost email attachments.
Kernel for Outlook PST Repair is an advanced tool embedded with powerful algorithms and can manage every PST file related issue with ease. The PST repair tool can even treat damage/corruption in Outlook data file with ease.
This tool reports searches for PST files in your specified system drive, repairs ANSI & UNICODE formats, PST files of any size, etc. It can save recovered PST files into other formats such as DBX, MBOX, EML, MSG, TXT, HTML, RTF, & MHTML. Moreover, you can also export PST to Microsoft 365, email servers, web mails, etc. With features such as smart filtering and retaining meta properties, this tool supports Office 365 Outlook 2007, 2010, 2013, 2016 & 2019 versions.
Conclusion
The prevalence of data breaches is on the rise, and many companies are unprepared to prevent and mitigate them, thereby putting their reputations and finances at risk. Thus, the need to keep your mail and system secured is a must. With our article, you can easily send secure email in Outlook with encryption via S/MIME Encryption & Microsoft 365 Encryption. Furthermore, in case there are encrypted & password protected files issues, it is advisable to keep Kernel for Outlook PST Repair tool in your system and solve all your PST file problems.


