Read time 8 minutes
Office 365 and MS Outlook are the two most widely used email clients across the world. However, with the growing popularity of cloud-based platforms, users are migrating their data to cloud-based Office 365. But what if users have lost their entire mailbox from their Office 365 account, and have no backup data?
This guide will explain to you all, reasons to export emails, how one can export emails from Office 365 to Outlook PST manually and using a PST export tool.
Primary reasons to export emails from Office 365 to Outlook PST
Though there can be many possible reasons to export emails to Outlook PST from Office 365. But the primary reasons are:
- Backup
- Archiving
- Portability
- Save space
Let’s discuss the reasons further in detail
- Backup: Many users take backups of their emails to save them in their local system. This proves to be the only saving grace in severe cases of corruption, threats, and loss of data. In cloud platforms, data loss chances are more regarding account taping, hacking, network packet analysis, etc. as compared to a desktop email client such as Outlook. Hence, to keep your data safe, taking backup Office 365 is a best practice.
- Archiving: It is safe to say that it is a wise habit to keep a copy of all the important emails for any future emergencies.
- Portability: Exporting Office 365 emails to PST helps offer portability and easy accessibility to the mailbox data. When data is in a PST file format, it can be accessed on any device and any email application without creating havoc.
- Save space: PST is a format with a compact file size that allows users to save up cloud space and can be stored without any complexities. If you’re running out of storage, either you need to upgrade your cloud subscription for more storage or to delete mailbox data to get more free space.
The manual approach to export emails from Office 365 to Outlook
Before proceeding, make sure your system meets the following system requirements:
- Should have 32/64-bit versions of Windows 7 and later versions.
- Microsoft .Net Framework 4.5
- Web browsers should be any of these: Internet Explorer 8 (IE8) and later versions or Google Chrome or Mozilla Firefox, along with ClickOnce add-in installed.
Follow these steps to export emails from Office 365 to Outlook using this manual method-
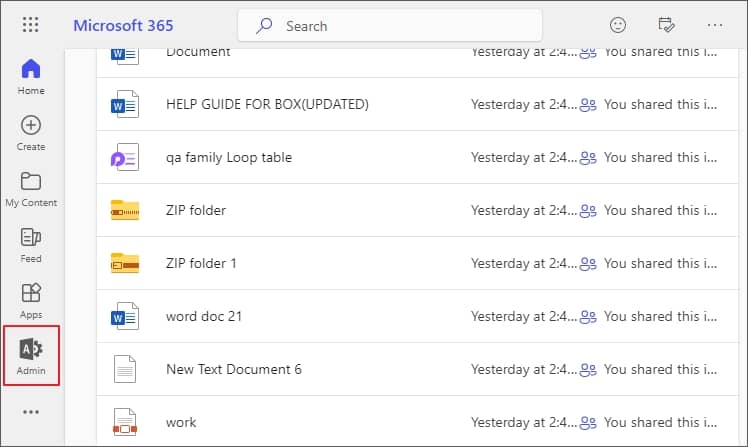
- Sign in to Office 365 with valid admin credentials and go to Admin.
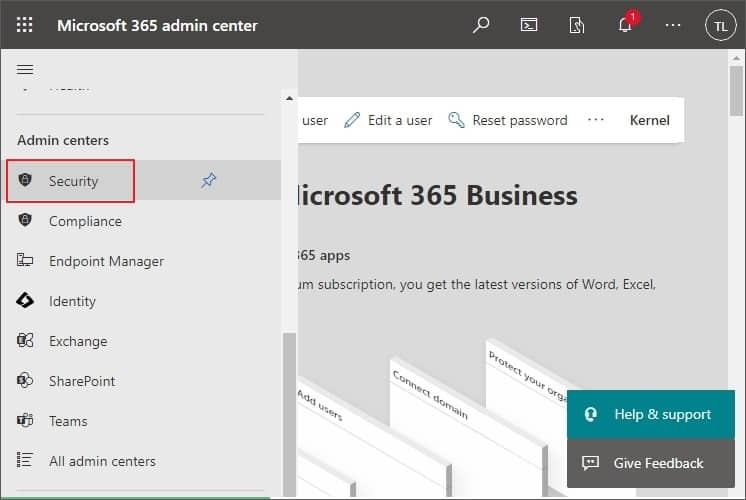
- Then, in the Microsoft 365 admin center, click on Security.
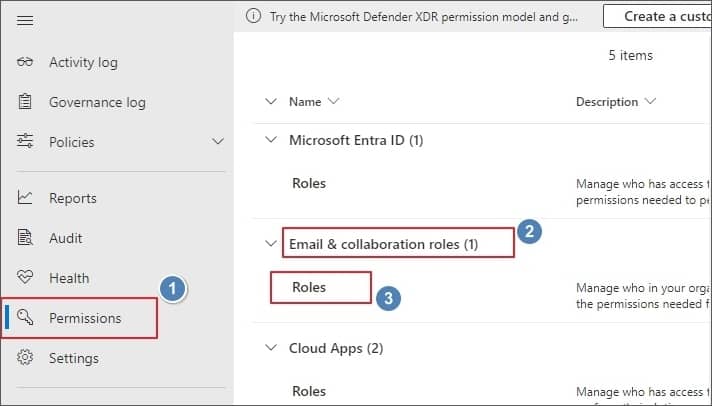
- Now, navigate to Permissions > Email & collaboration roles > Roles.
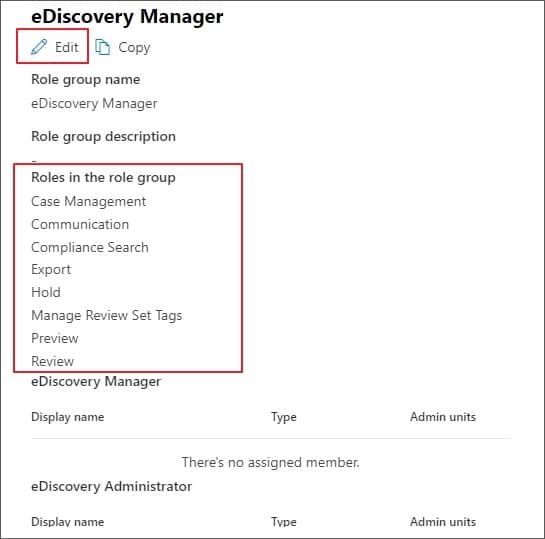
- From the list email collaboration permissions, click eDiscovery Manager and check for the assigned roles in the role group.
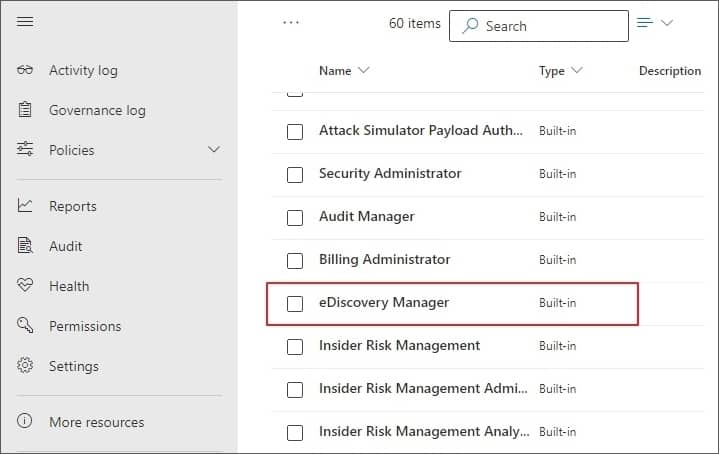
- It will have Case Management, Compliance Search, Export, Hold, Preview, Review, and others. For some members, the Export role might be missing, and you can add this role by clicking on the Edit button.
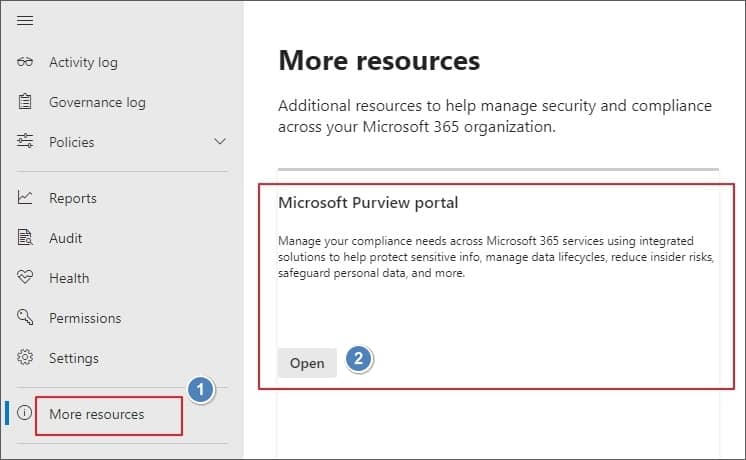
- Now go to the More resources tab, and from the right-hand side pane, click on the Open button under the Microsoft Purview portal to manage your compliance needs across Microsoft 365 services.
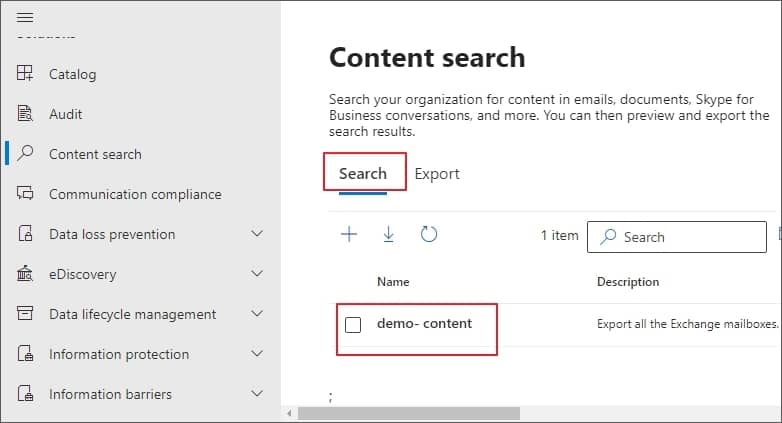
- Select the Content Search tab on the left side of the screen and then create a new search using the + button.
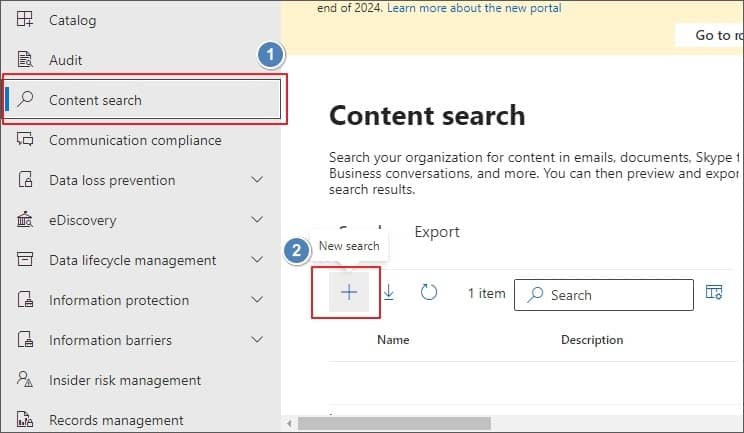
Note: If you can’t find the Content search option, go to eDiscovery Manager and check if the necessary permissions are assigned to you. However, if the permissions are not granted, make sure you have them before proceeding to export.
- After clicking on New search, provide a Name and description to it and click Next. On the Locations page, turn on the status button beside the Exchange mailboxes, and the Included column should have All for Choose users, groups, or teams. Click Next.
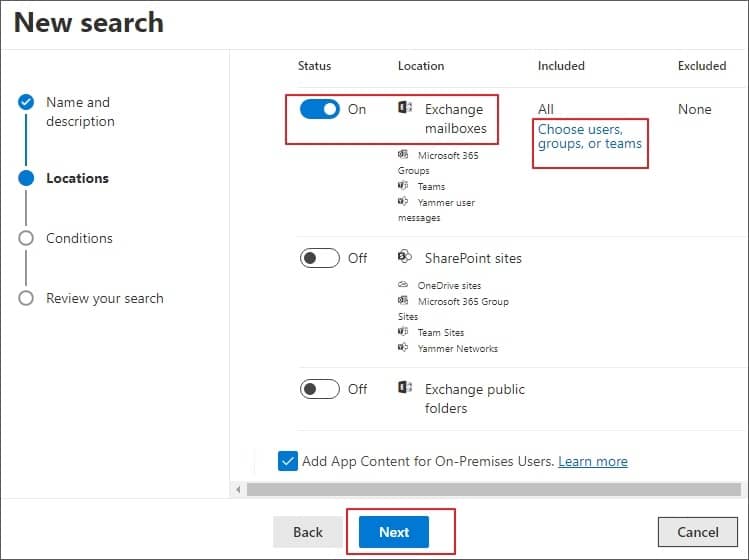
Note: Selecting SharePoint sites and Exchange Public folder might cause a slight delay in the export process; therefore, we’re selecting only Exchange mailboxes for now.
- Under the Conditions tab, select filters like Query builder, KQL editor, Keywords, and Add conditions (Date, Sender/Author, Type, Sent, To, Title, etc.). With these filters, you can selectively export Office 365 emails to Outlook PST.
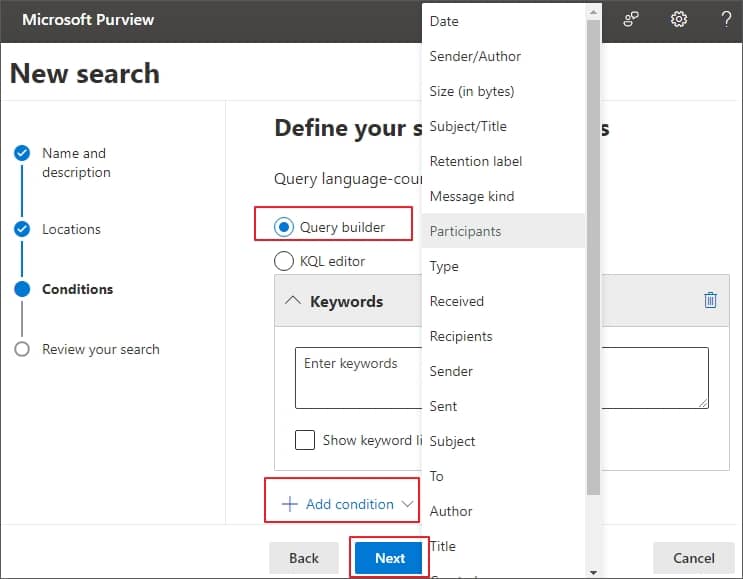
Note: In order to perform export of all Office 365 mailboxes, do not select filters.
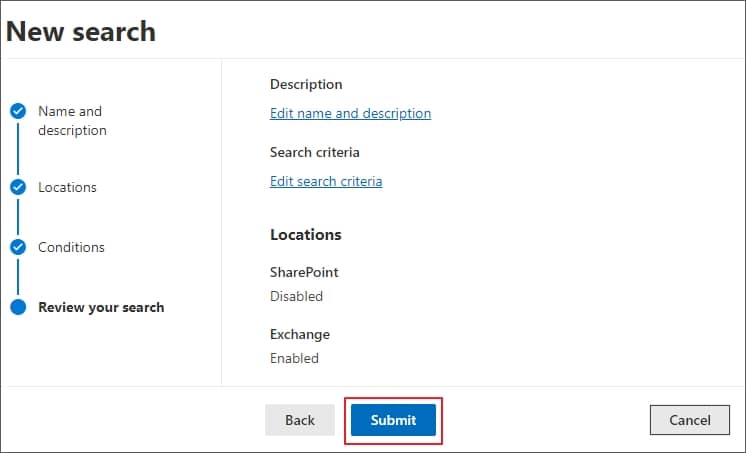
- After that, Review your search and select Submit to start eDiscovery.
- A new search is created, and you can check the progress of eDiscovery by clicking on the created search.
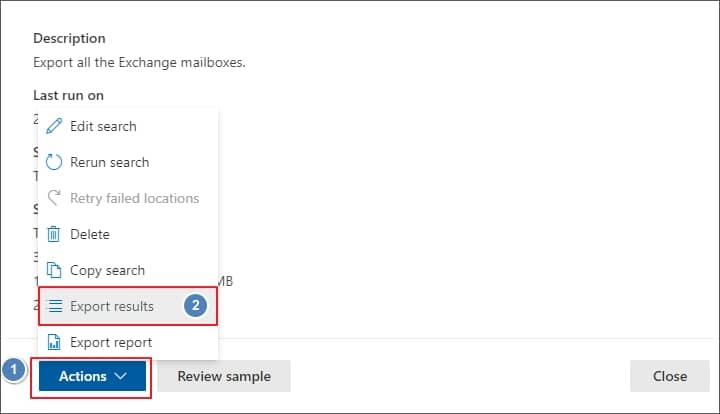
- Now click on the Actions dropdown and select Export results.
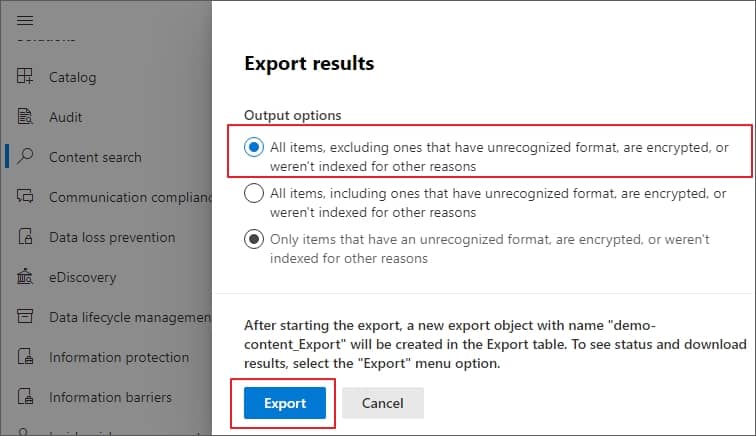
- From the various Output options for Export results, select All items, excluding ones that have unrecognized format, are encrypted, or weren’t indexed for other reasons if you want to export all mailbox items and click Export.
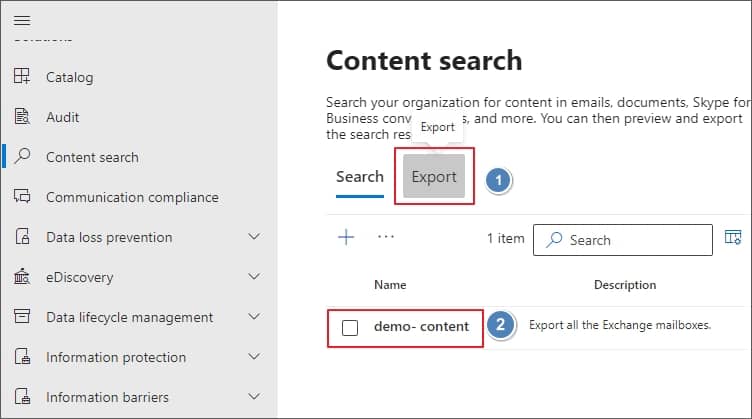
- This will initiate the Export process, and you can go back to the Content search tab and then click on Export and then created search to trace the progress of the Export process.
- Once done, copy the Export key and then click on Download results. This key will be needed in the ClickOnce extension.
- In the new pop-up eDiscovery PST Export Tool, paste the Export key you copied in the previous step and provide the destination path to save the exported files. Press Start to export Office 365 emails to PST.
- Here you can access your PST file by adding it to an existing Outlook profile in MS Outlook.
Drawbacks of manual approach
Manual methods are not suitable for every user. There are some drawbacks of the manual approach, which are listed below:
- The manual method is a much-complicated task.
- It is a very lengthy and tedious process to export emails from Office 365 to Outlook.
- It is not convenient for non-technical users.
- It requires proper and in-depth technical knowledge to perform the migration task.
An Alternative and better approach to Export emails from Office 365 to Outlook
As we discussed the drawbacks of the manual method mentioned above, it is challenging for non-technical users to perform such a lengthy and complicated task. Therefore, it is advisable for you to choose a third-party tool such as Kernel Export Office 365 to PST to export entire Office 365 mailboxes to Outlook swiftly. This is because the tool requires less technical knowledge to operate it.
With Export Office 365 to PST, all kinds of users can efficiently operate this Export Office 365 to PST tool without technical assistance. The tool allows the export of emails from Office 365 to multiple file formats, including PST, MSG, EML, PDF, HTML, etc.
Conclusion
Implementing a manual method to export mailboxes from Office 365 to Outlook can lead to errors such as eDiscovery PST Export Tool stuck calculating, and eDiscovery Export tool download fails. The manual export process becomes difficult for non-technical users as it requires sound technical knowledge and intricate detailing. This is where a professional solution like Kernel Export Office 365 to PST fits in. The tool is quick, reliable, and easy to use.