Read time 4 minutes
JPEG is a widely used common image format that includes compressed image data. Thousands of images can be stored in a small memory space and can be shared widely over the Internet or between different systems. The size of the images can also be altered for storage and downloading without compromising the quality of the image.
While opening JPEG image files, you might encounter some errors that require different methods to fix them. Error 256 is one such error that is generally seen on iMac where you are unable to export a JPEG image. This issue is often resolved by shutting down the MacBook Pro and restarting it again.
Some of the common JPEG errors are:
- Grainy, pixelated, blurry JPEG photos
- ‘Invalid image file header
- Invalid value for Registry error
- JPEG error #53 where the Windows operating system is corrupt.
- JPEG error #52 when the file is not a valid JPEG file.
Though many users recommend free methods to repair JPEG files, such types of errors often require the help of a third-party tool in repairing them effectively and efficiently. One such third-party tool is Kernel Photo Repair. This amazing tool repairs corrupt jpg image formats and supports other formats such as BMP, GIF, RIFF, RAF, TIF, PNG, and more.
It has a user-friendly interface with advanced features which can repair image files of any size and any type. Its excellent repair feature works without making any compromise on the quality of the image. In this blog, we shall discuss how to get hands-on with this tool quickly and easily. You can use this tool to fix the JPEG “Invalid Image” error message and fix the broken or corrupt JPEG file header.
Repair JPEG file with this professional software
- Install and launch the tool. Click the Plus button.
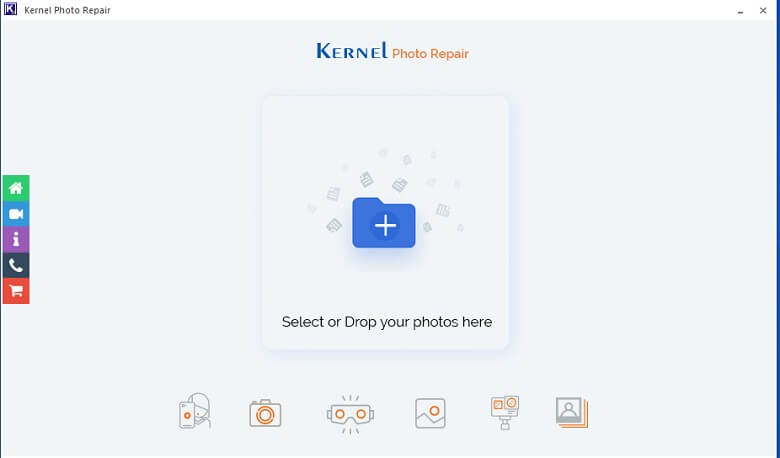 Note: You can drag or drop the image on the home page.
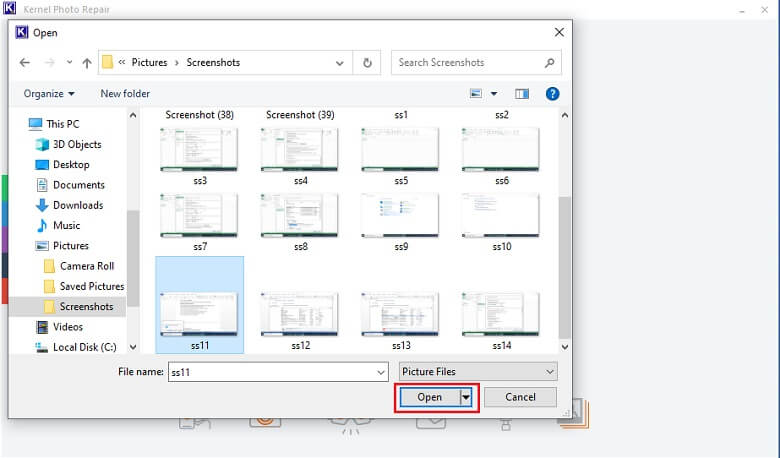
 - Add the corrupt image by using the Add icon button as shown.
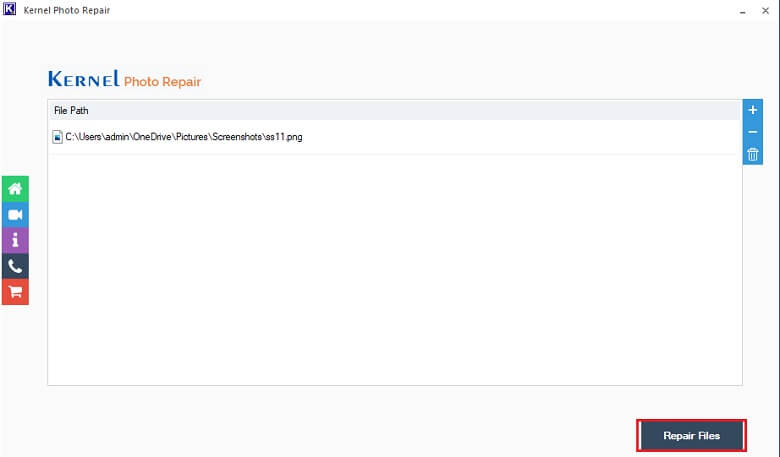
- Once added, select the Repair files option as shown below.
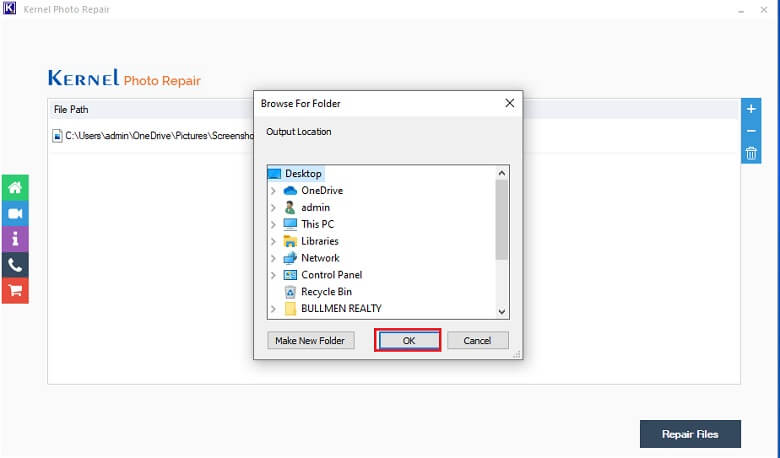
- You need to provide the destination for the repaired files. Click OK.
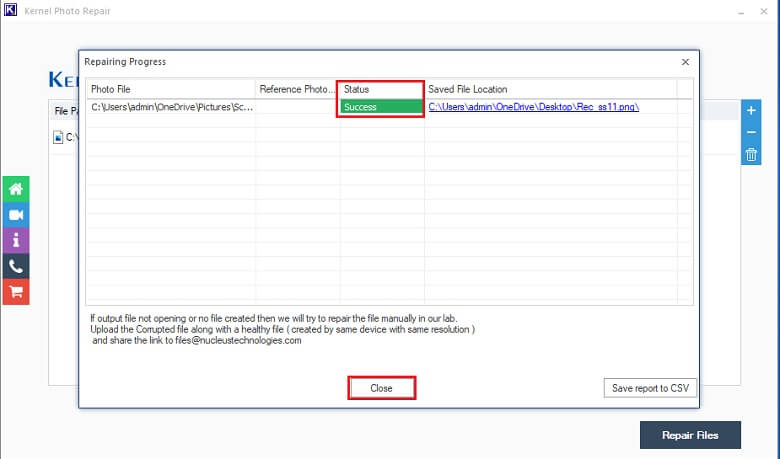
- Once the processing is done, you will see the ‘Success’ status. Click on the Close button.
- Check the recovered images on the destination provided earlier.
This is a brilliant tool that is capable of working on every possible image format without any issue. It comes with a trial version that performs repair function perfectly, except that the recovered images are saved in low resolution.
Summary
With the upsurge of digital media, we sometimes face errors in viewing images in different image formats. There can be different reasons for such errors. Most of the time, such errors require an additional helping hand to recover the images in their original quality. The tool has been effectively designed to provide quick and easy recovery of corrupt images in any format.