Read time 6 minutes
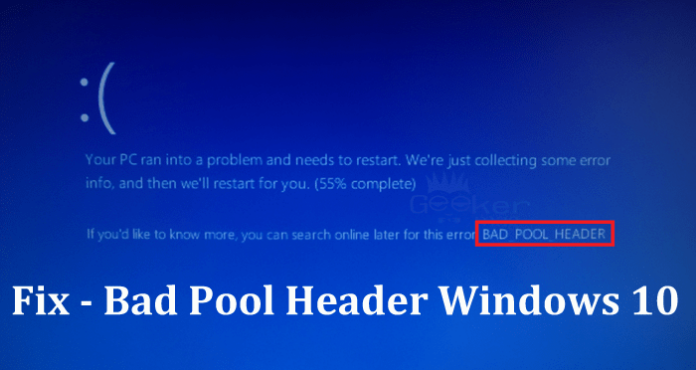
Many users complain about different types of blue screen errors the face while booting their Windows 10 system, including the recently popular “Bad Pool Header” error, which goes on appearing on each restart, making it impossible for the users to access Windows data and services. Let us ponder over this error in detail and find out possible solutions.
About “Bad Pool Header’ error in Windows 10
It is a BSOD (Blue Screen of Death) error that sometimes appears when a user boots the system in normal mode. It indicates that the system is facing a memory allocation issue currently. The error is associated with the Windows memory allocation and a corrupted pool header.
What causes the “Bad Pool Header” error?
Bad sectors, corrupted Windows registry, disk write-up issue, failed storage drive, faulty drivers, hardware, software, incompatible software applications, etc. can be the likely reasons for the “Bad Pool Header” blue screen error.
Fix the “Bad Pool Header” error manually
Windows 10 “Bad Pool Header” error can be fixed using some manual techniques to get access to your Windows 10 system again:
- Remove the External Devices
- Check the Hardware
- Check/Replace RAM
- Boot Windows 10 in Safe Mode
Remove the External Devices– If any external devices other than keyboard or mouse are connected to your system, disconnect the devices immediately, and then restart the system.
This is because due to corruption in external devices or incorrect connection between system and device, the “Bad Pool Header” can occur.
Check the Hardware – If you have recently attached any new hardware to your system other than the mandatory ones, it is recommended to remove that hardware as it may be the reason why you are facing this blue screen error. The hardware could be a printer, fax machine, dual monitor, sound card, etc.
Check/Replace RAM – Inadequate RAM storage and corruption in its sectors will affect the system, sometimes resulting in the blue screen error like “Bad Pool Header.” As a preventive measure, users can check the RAM on their systems and replace them with a healthy one having sufficient storage as per the system requirements.
Boot Windows 10 in Safe Mode – Users can try to run the system in Safe Mode and then perform certain Troubleshooting actions to fix the error.
Running Windows in Safe Mode includes entering the Windows Recovery environment, which can be performed using the following steps.
- Press and hold the system power button for about 10 seconds to shut down your system.
- Now, press the power button again to start the system. As soon as you view the Windows logo, press and hold the power button for about 10 seconds to shut down the system.
- Repeat the cycle of power on and shut down for a total of 3 times.
- After the third time, allow the system to restart. Now the users will enter the Windows Recovery environment on their Windows 10 system.
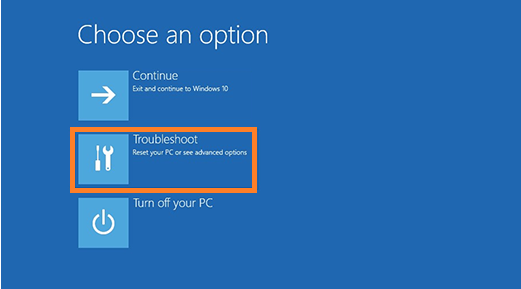
- On the Windows Recovery environment screen, under Choose an option, click on the Troubleshoot option.
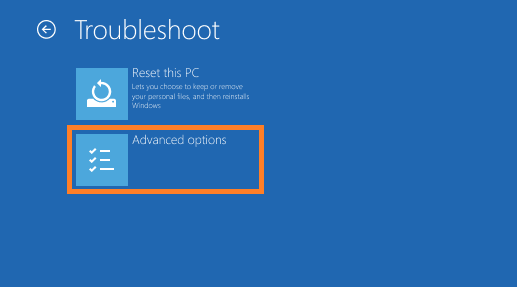
- On the Troubleshoot screen, click on Advanced options.
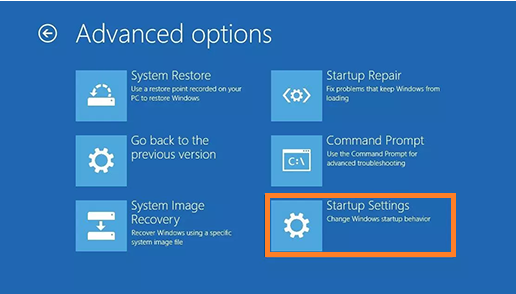
- Now, click on Startup Settings.
- On the Startup Settings screen, click the Restart option.
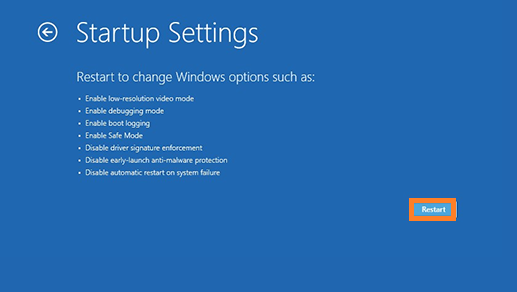
- The system will get restarted. Now, click on the fifth option from the displayed list, or you can directly click on the F5 option for enabling Safe mode.
Note: If you want to exit the Safe Mode, type msconfig in your Windows Run box and click on OK. Then select the Boot tab and unselect the Safe boot checkbox under Boot options.
In Windows Recovery Environment (Troubleshoot>Advanced options), users can utilize options– System Restore (to restore the system using an earlier restore point on your system) and Startup Repair (to perform the Startup Repair to modify the Windows startup behavior).
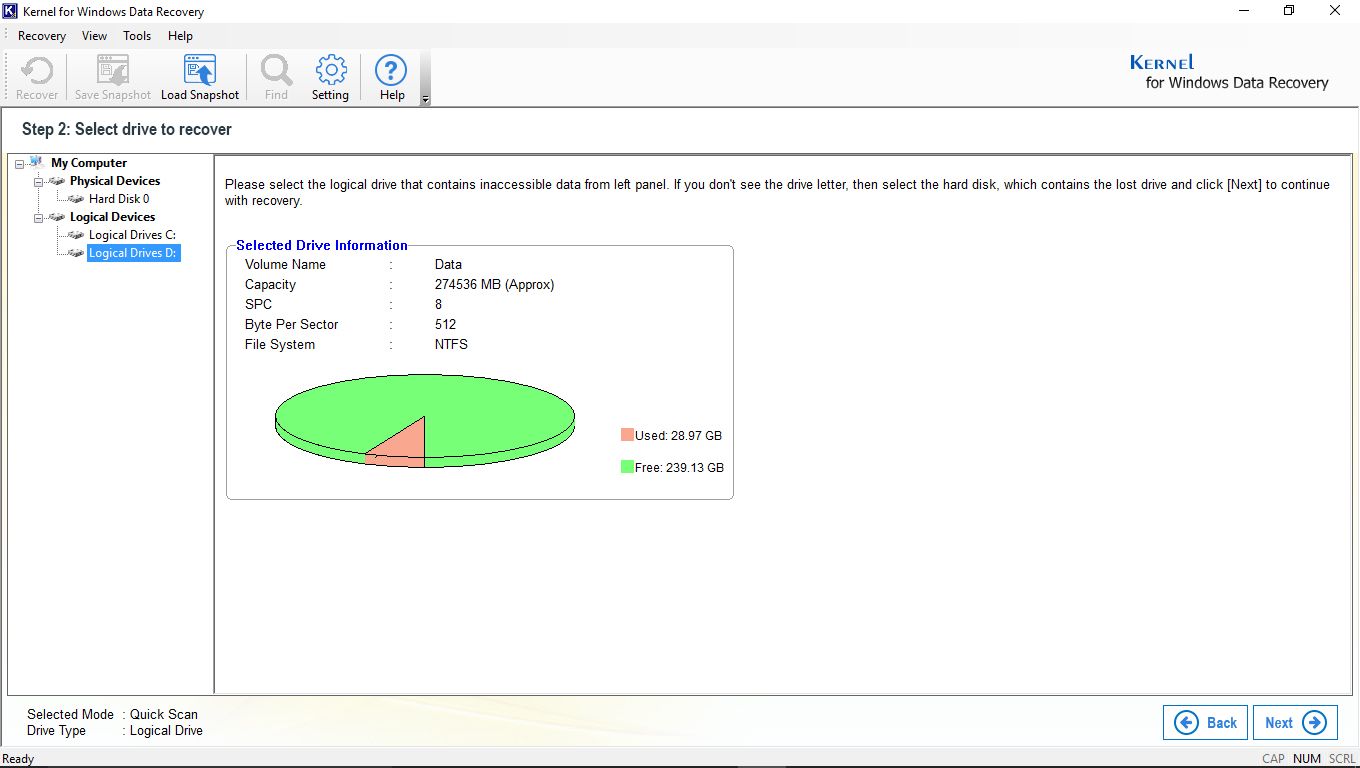
These manual techniques can help you fix the blue screen error and access Windows 10 system again. However, it is advised to backup your Windows data using a Windows data recovery tool to be prepared against a data loss situation. If you are facing a data loss, then also you can try a Windows data recovery tool to get back your lost data. An ideal solution for this would be the Kernel Windows Data Recovery tool. This tool scans the selected system drives, partitions, sectors, and recovers lost, missing, or deleted files, folders, Office documents, media files, and emails from corrupt Windows partitions and removable external devices. It recovers Windows data that got inaccessible due to hard disk failure, bad sectors in the drive, corrupted Windows registry, corrupted disk partitions, virus infection, etc. The recovery and restoration are complete without any data loss. So, now it is easier to fix Windows 10 file corruption issues as it has three scanning modes and a content preview facility. You can try its free trial version for data recovery from any Windows version.
Wrapping Up
Fixing the “Bad Pool Header” error can be tried with different manual techniques. This can help you get access to the lost Windows data again. If you have lost Windows 10 data, you can try a Windows data recovery tool – Kernel for Windows Data Recovery.


