Read time 4 minutes
Deleting files permanently from Windows PC is a myth unless you use a third-party tool to delete the data permanently.
We surely don’t want our private data to get into the hands of anyone could misuse it; that’s why we delete it for good, especially on Windows systems. Even after ‘Shift + Delete,’ the data is still stored somewhere on Windows, which could be restored by an expert data recovery tool. So, how can you securely delete files on Windows 10?
In this article, we will discuss how you can remove data permanently from your Windows 10.
Removing data permanently from Windows 10
Here, we will discuss two unique methods to delete files on Windows 10 securely. The first method involves using the in-built tool Cipher offered by Microsoft for the successful deletion of data. A second method is an automated tool specially designed for file deletion.
- Use Cipher for Data Deletion
If you’re unwilling to invest in any third-party tool to delete files on Windows 10, then using Cipher securely is the best option for you. Cipher is not like other software applications; it can be used with Windows Command Prompt only.
Note: Before using the Cipher method, make sure you remove the files from your system’s Recycle Bin and other areas.- After deleting the files from your system, launch the Windows command prompt from the Start menu.
- In the command prompt, type the following command
Cipher/w:C: and then press Enter.
- Running this command will overwrite all the data from your C drive that has been deallocated, which means it will delete the data permanently (the data that has been removed earlier).
The above method describes the process of deleting the files from the entire C drive, which could be a lengthy process. So, if you want to remove something from a specific location, then type the exact address of that location in Windows CMD like
cipher/w:C:\users\Himanshu\Documents - Kernel File Shredder
Kernel File Shredder is an advanced utility specially designed to help users securely delete files on Windows 10 system. It is integrated with advanced file shredding algorithms to execute file shredding. Besides, it comes with a simple user interface, making it easy to use even for non-technical users.
The advantages of Kernel File Shredder are:
- Ensures complete removal of data without any trace
- Performs shredding as per the user requirement
- Multiple shredding algorithms are available on a single console
- Easy to install and use
- Even non-technical users can perform shredding
- Works on Windows 10 and all other versions
To use this tool, you can follow the below steps:
- Download and launch the tool on your system, and the home screen of the tool will appear on the screen.
- Select the ‘File and Folder’ option from the Shred menu in the left pane.
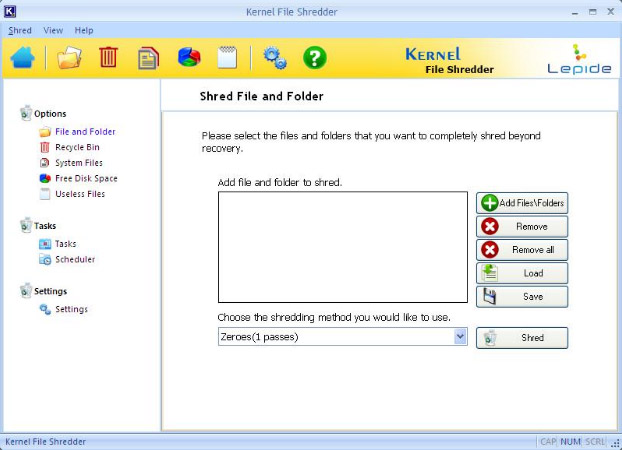
- The Shred File and Folder screen will appear on screen; click the Add Files/Folders button to add the location from where you want to shred files.
- Select a Shredding method from the drop-down menu, and then click Shred.
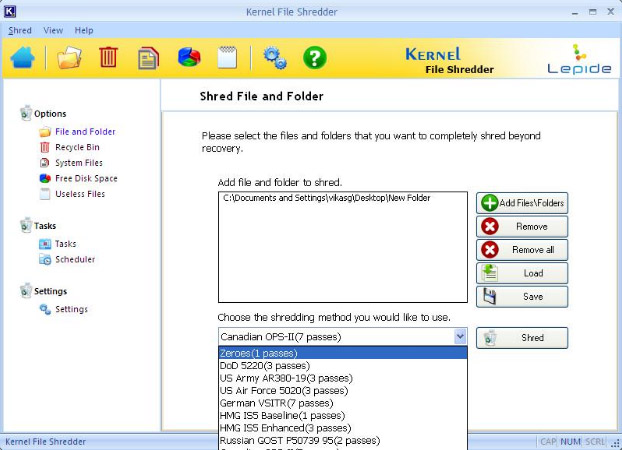
- The tool will start shredding the files, and once it is complete, it will display the information on the screen. Click OK to end the process.
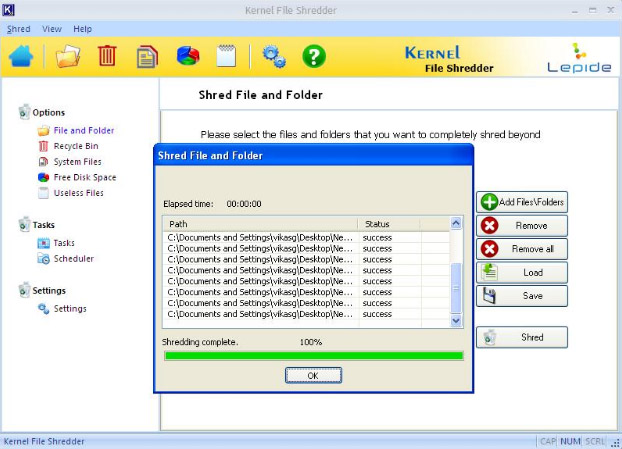
That’s how you can wipe a hard drive without deleting Windows with the help of Kernel File Shredder. This software can also be used to shred System files, recycle bin files, etc.
Conclusion
Securely deleting files on Windows 10 is crucial for everyone, as there comes a time when we need to sell our old PC or laptop to purchase a new one, and we surely don’t want to give your critical data to any other person. So, we created this article to help you learn how you can remove data permanently from your Windows 10 PC with the help of an in-built utility or an automated solution.


