Read time 5 minutes
Microsoft Outlook has emerged as the dominant email management platform, primarily because of its seamless integration with various email services through protocols such as IMAP, POP, SMTP, and more. In addition, contemporary iterations of Outlook offer compatibility with both on-premises Exchange servers and Exchange Online (Office 365). The process of connecting an account remains consistent across these servers, where users can simply input their email address and password.
This article will demonstrate the step-by-step process of manually connecting your Exchange account to Outlook using the IMAP server. It will furnish essential details, including the appropriate port number, incoming mail server, outgoing mail server, and encryption settings. Utilizing the manual method can result in a more robust connection, which is especially crucial when dealing with Exchange Server.
How to set up an IMAP connection to Exchange account using Outlook?
In order to establish an IMAP connection between your Exchange account and Outlook, it’s imperative to confirm that IMAP client connectivity has been enabled within your Exchange settings. Additionally, you should have your Exchange email address and password readily available for the setup process.
Next, perform this procedure step by step:
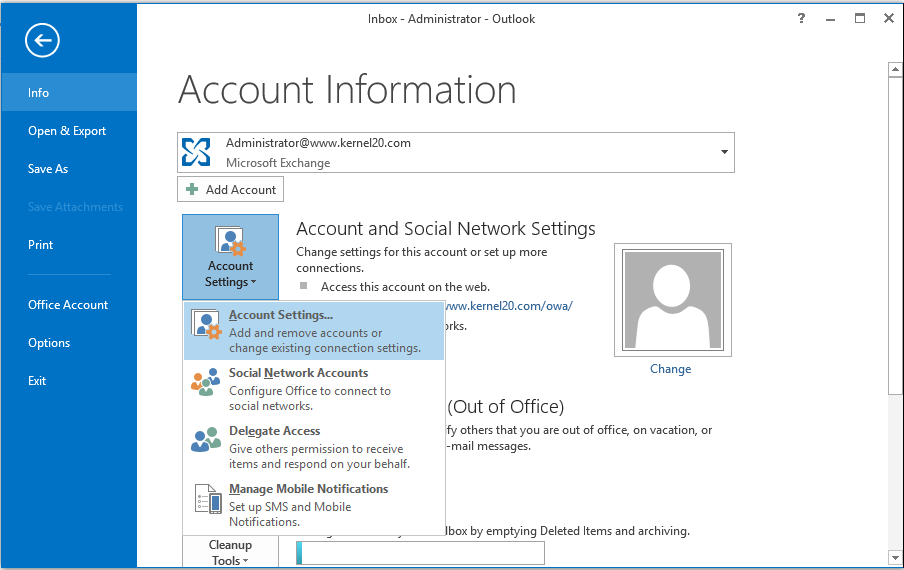
- Open the Microsoft Outlook application and go to File > Account Settings > Account Settings.
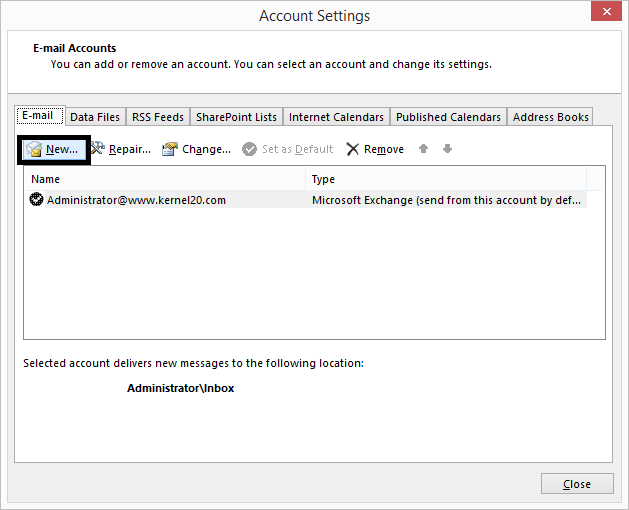
- On the Account Settings page, click New option under E-mail.
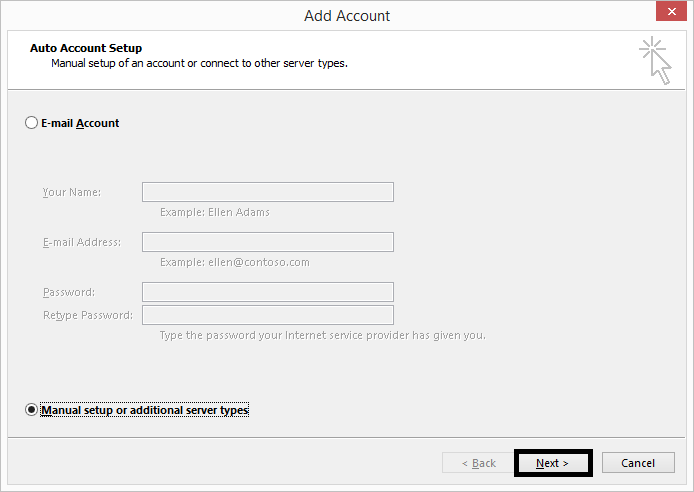
- Next, select the Manual setup or additional server types option and click Next.
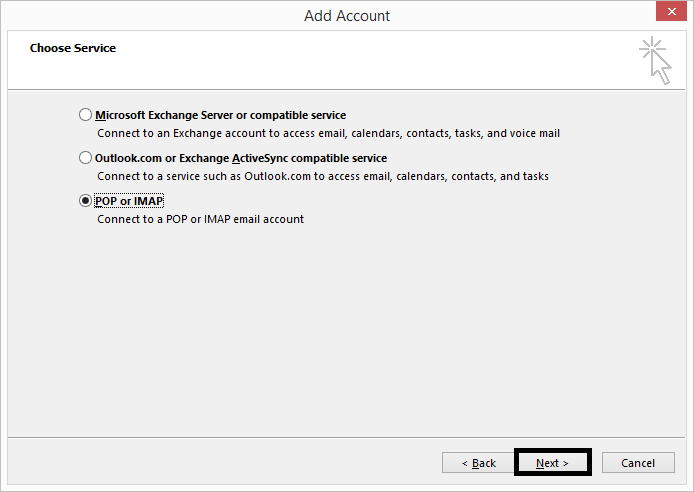
- Select POP or IMAP and click Next.
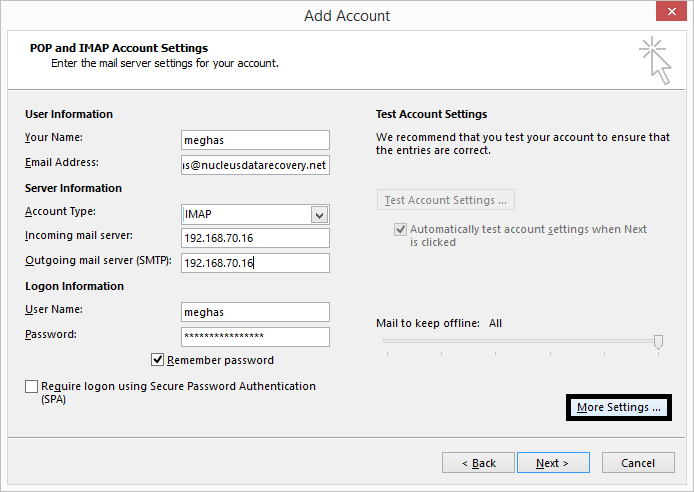
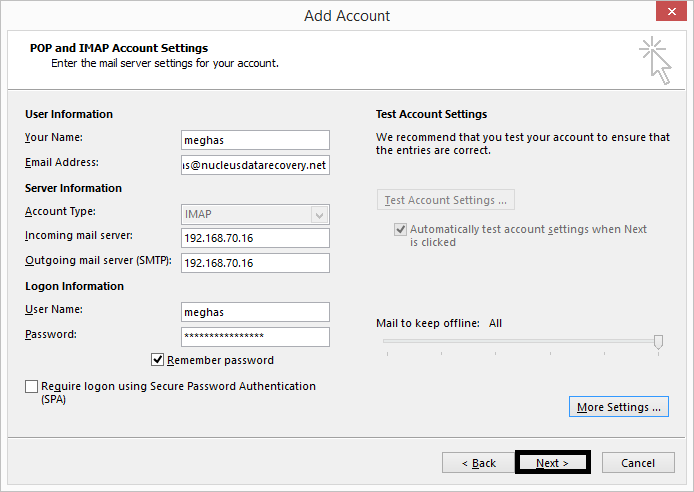
- On the Add Account page, enter the details related to the mailbox, which you want to connect:
- User Information: Enter the user name and email address
- Server Information: Select the Account Type as IMAP and provide Incoming mail server and Outgoing mail server details.
- Logon Information: Provide the mailbox user name and password.
- Leave the checkbox saying Require logon using SPA as blank.
Click on More Settings on the bottom right.
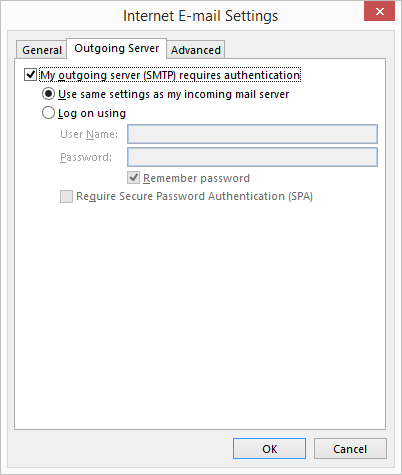
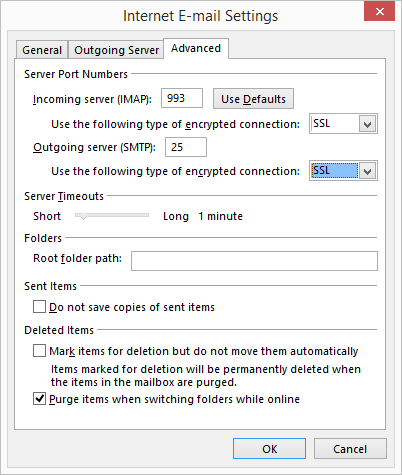
- The Internet E-mail settings dialogue will get opened. Switch to the Outgoing Server tab and select the checkbox saying My outgoing server (SMTP) requires authentication. After this, switch to the Advanced tab.
- Here, select the type of encrypted connections as SSL for incoming and outgoing servers. Click OK.
- Now, click Next to continue further.
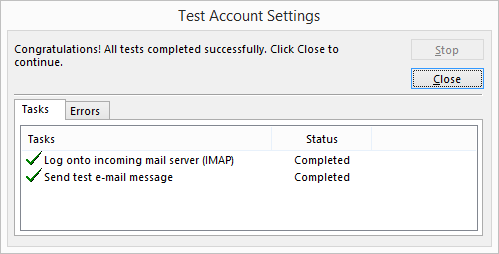
- The Test Account Settings process will get started. After a short time, it delivers the below message with the Status as Completed, if there are no errors in the IMAP connection. Click Close.
- Finally, click Finish to complete the process.
The Exchange account is now configured in Outlook with IMAP settings. Using this method, you can access your company IMAP mailbox from anywhere.
How to backup company IMAP mailbox data?
There are times when you want to back up your company IMAP mailbox data. This is possible with the Kernel IMAP Backup tool, a professional backup software with many user-friendly- features.
This software provides comprehensive backup capabilities for a wide range of popular IMAP email servers, allowing users to create backups in Outlook PST format as well as other file formats such as MSG, DOC, EML, PDF, HTML, and MSG. Moreover, it offers users the flexibility to tailor their backups by specifying criteria such as date ranges, item types, and folder selections. This tool boasts compatibility with nearly all major IMAP servers, including Gmail, Yahoo, Outlook.com, G Suite, Amazon WorkMail, AOL, Zimbra, and more. It also extends its support to servers like Notes, GroupWise, Office 365, and Exchange Server accounts.
Summing up
Connecting the Exchange Server to Outlook is a straightforward process when you follow the steps outlined in the article. Additionally, we’ve highlighted the effectiveness of Kernel IMAP Backup software, which enables you to securely store mailbox items in various offline file formats, including PST, EML, MSG, DOC, DOCX, and more. Even if you’ve already established a connection with your Outlook account, our software offers the capability to create backups, ensuring the safety of your important data.


