Read time 6 minutes
Office 365 from Microsoft has helped many small organizations to have an enterprise-level email communication system with minimal investment on infrastructure. For them, an Office 365 subscription is far more economic and convenient than an on-premises Exchange Server deployment. At the same time, there is a major concern regarding how they will be able to migrate Exchange mailboxes to Office 365. For small organizations having up to 150 mailboxes, Microsoft suggests cutover migration as the best way of migration. But, the complexity of this migration process compels many Exchange administrators to think of using third-party tools like Kernel Migrator for Exchange to accomplish Exchange to Microsoft 365 migration.
Exchange Server to Office 365 Cutover Migration
A cutover migration helps to move up to 150 mailboxes from Exchange to Office 365 in a hassle-free manner. The mailboxes are moved altogether and the task can be completed in a few days if everything goes well in the environment. The basic steps of this migration process are:
Prepare the Exchange environment for the migration
- Verify the domain ownership, and connect Office 365 to Exchange
- Migrate mailboxes from Exchange Server to Exchange Online
- Perform the post-migration activities
A brief overview of these steps are given here:
- Prepare the Exchange environment for Office 365/ Microsoft 365 migration – As a preparatory step, you need to configure Outlook Anywhere (for Exchange 2010/2007/2003 versions) if it is not configured automatically (as in Exchange 2013), and add an SSL certificate to it. Also, you need to turn off Unified Messaging for the Exchange mailboxes.
Note: The Exchange account you are using must have permissions to access the Exchange mailboxes. For migration, this account must have FullAccess permission on each mailbox, and Receive AS permission on the mailbox database. - Verify the domain ownership, and connect Office 365 to Exchange – Now, in Office 365 you need to verify that you own the domain name (that you use for the Exchange organization). To do this, you can refer to the directions given by the DNS hosting provider. And finally connect to the Exchange Server from the Office 365 Exchange admin center (Recipients > Migration) using Outlook Anywhere migration endpoint.
- Migrate mailboxes from Exchange Server to Exchange Online – In this step, you create a cutover migration batch and run it. This is done form Exchange admin center (Recipients > Migration). You can view the status of the migration on the migration dashboard.
- Perform the post-migration activities – After the successful migration, you can route emails to directly to Office 365. Also, ensure that all your users are in Office 365, and their emailing system is functioning properly in the cloud.
Save Exchange Mailboxes to Microsoft 365 using Kernel Migrator for Exchange
Kernel Migrator for Exchange provides an easy alternative for Exchange to Office 365 cutover migration. You simply can migrate live Exchange mailboxes to Office 365 from the software interface. Exchange Migration tool lets you map the source Exchange mailboxes to Office 365 mailboxes manually or using a CSV file. It supports all the Exchange Server versions for the migration. Also, you can filter Exchange mailboxes by Item Type and Date Range before migrating them to Office 365. In the end, you can generate reports to get the details of the migration.
Let us understand the automated migration from Exchange to Office 365 through its steps.
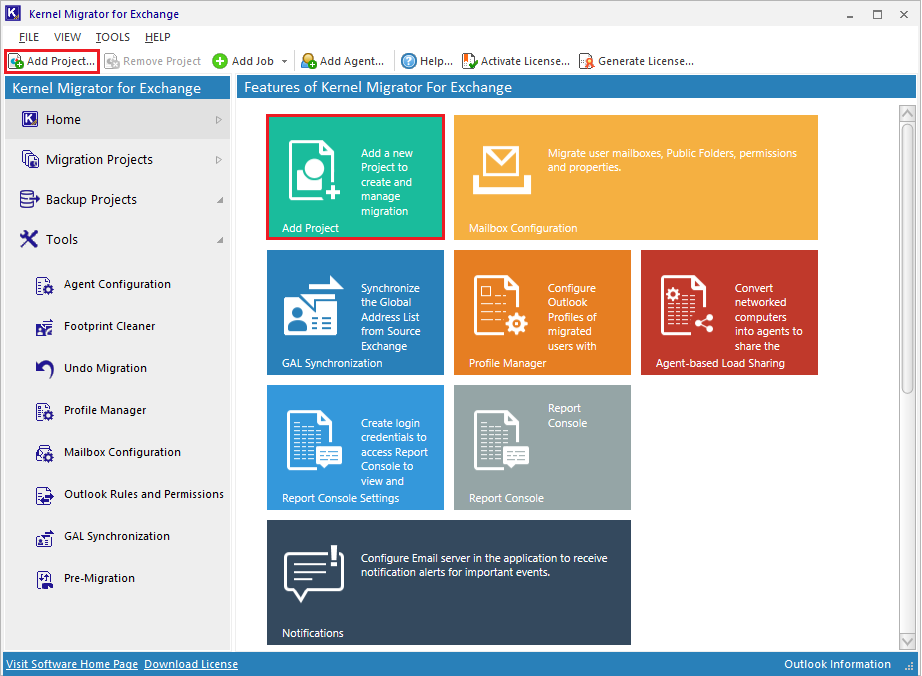
- Start the Kernel Migrator for Exchange application. On the Welcome Screen, click Add Project to add a project name for the migration. Provide a name for the project and click OK.
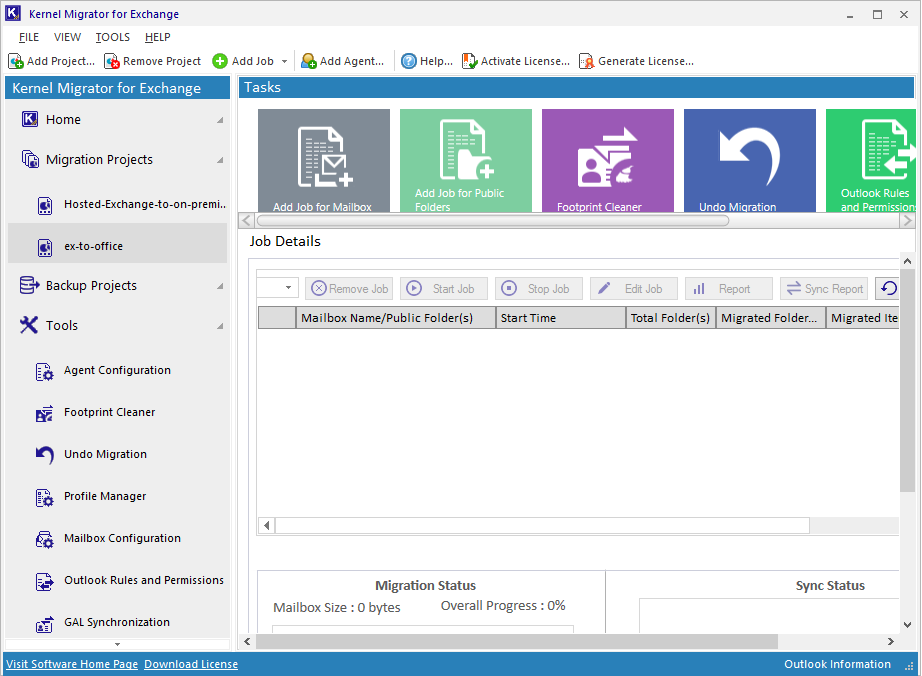
- Now, under project name click Add Job for Mailboxes to add a job for the migration.
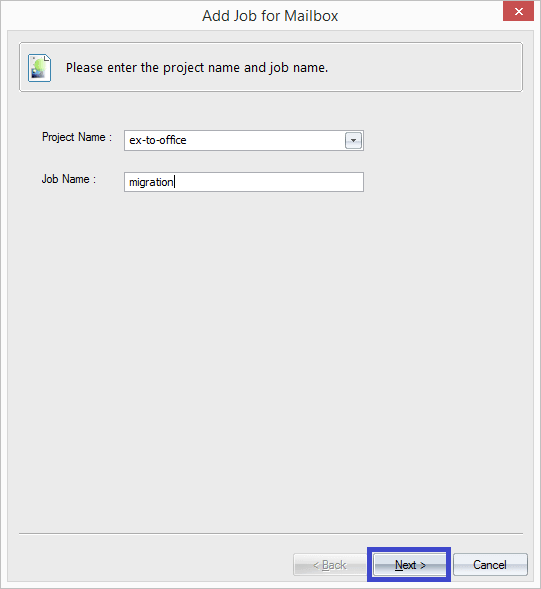
- Provide a job name and click Next.
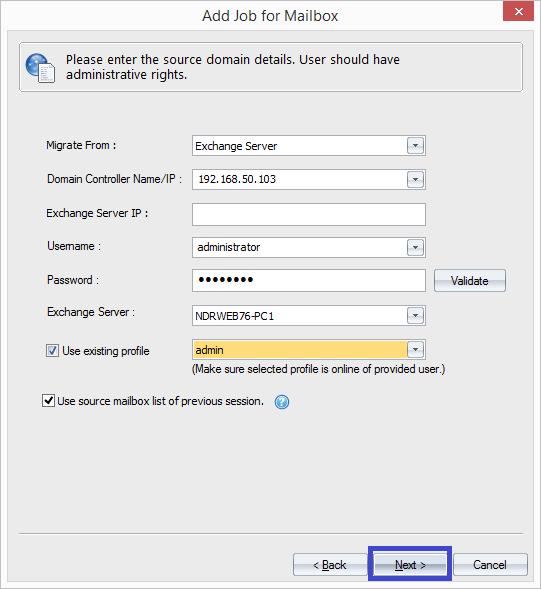
- Enter your Exchange Server details like server domain, user name, password, etc., select the options (if needed) and click Next.
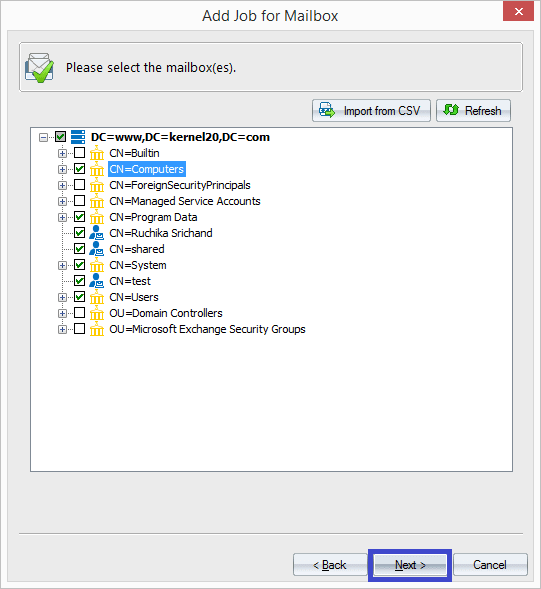
- Select the desired mailboxes for migration from the retrieved list of mailboxes and click Next.
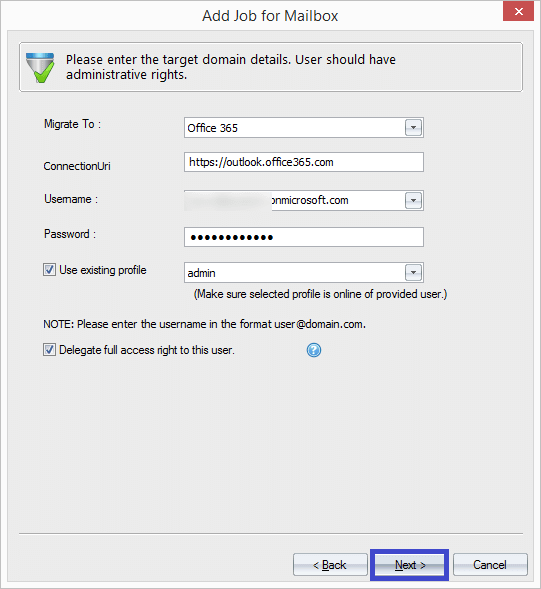
- Select Office 365 as a destination from the drop-down, enter its credentials like user name, password and click Next.
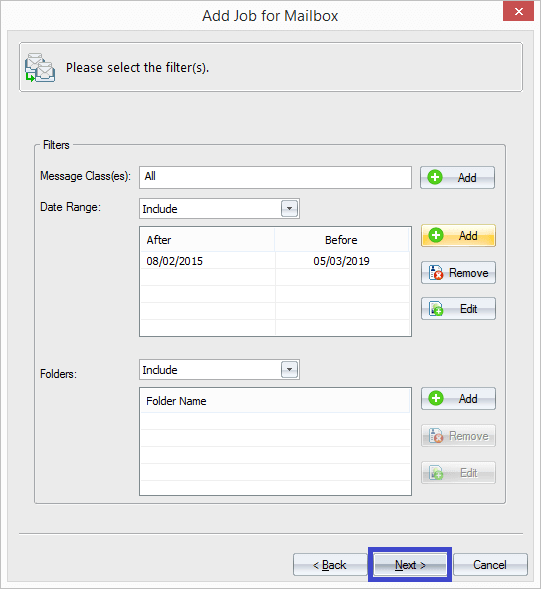
- Apply filters like Message class, Date range, etc. and click Next.
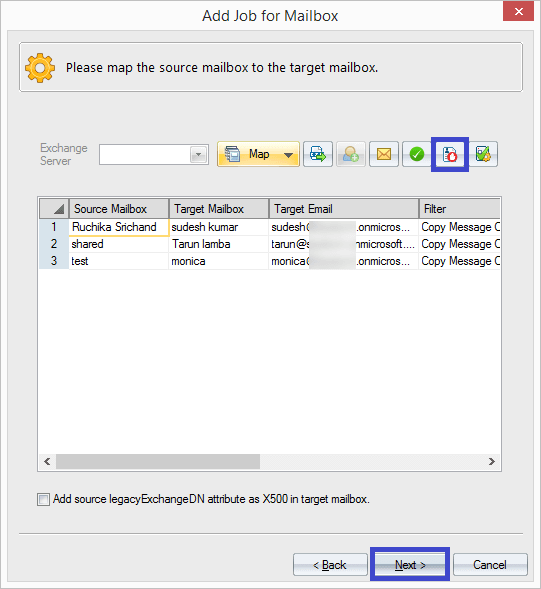
- Map the source mailboxes with target mailboxes manually or using CSV file. After mapping, click Next.
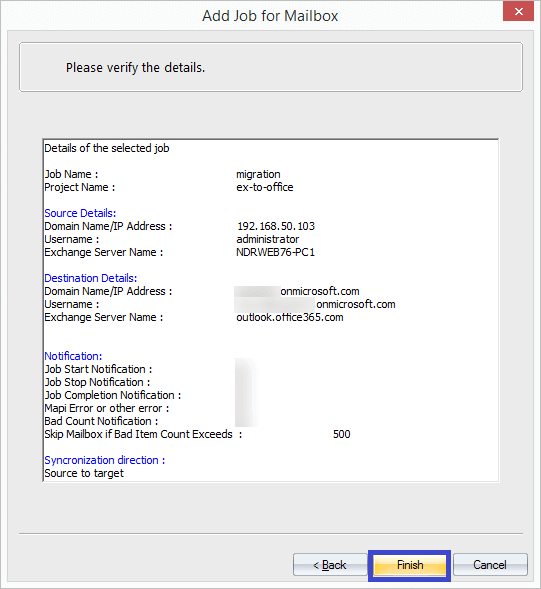
- Next screens include options to manage bad items & synchronization, notification settings, allow/deny migration options, report console settings. Make your selections and move further. Finally, you reach the summary stage which includes the complete migration details. Confirm and click Finish.
- The migration process will get started and completed in minimum time and the status changes from Progress to Success.
Kernel Migrator for Exchange tool performs migrations like Exchange to Exchange, Office 365 to On-Premises Exchange, and hosted Exchange Migrations as well.
Conclusion
For small organizations, a cutover migration is recommended for migrating Exchange mailboxes to Office 365. However, many Exchange administrators try an easier alternative like Kernel Migrator for Exchange to save Exchange mailboxes to Office 365 considering the technical difficulties of the cutover migration process.