Read time 7 minutes
In businesses, some mailboxes get more emails than others and sometimes the user finds it difficult to respond to each email. As a business requires to provide a satisfactory answer to many emails, Office 365 offers to delegate the control of a mailbox to another account to reply to an email. The Administrator can manage the permissions of selected mailbox and provide read and write access to another mailbox account. You can perform following actions through such permissions –
- Read email from another mailbox.
- Send email from another mailbox.
- Send email on behalf of another mailbox.
Note – it takes up to 60 minutes for the changed permissions levels to propagate completely.
These permissions can be assigned to other user mailboxes via Microsoft 365 admin center or Exchange Online PowerShell cmdlets.

Try Kernel Office 365 Migration tool to migrate data between Office 365 tenant along with their permissions.
Let us know what these mailbox permissions are
- Read and Manage: This permission allows the assigned user mailbox(es) to read as well as manage emails in the user mailbox on which the permission is assigned.
- Send as: This permission allows the assigned user mailbox(es) to send emails from another user’s mailbox on which permission is assigned.
- Send on behalf: This permission allows the assigned user mailbox(es) to send email on behalf of the mailbox on which permission is assigned.
Assigning permissions to another user mailboxes via Microsoft 365 admin center
Now, that you know what permissions a user mailbox can assign to other user mailboxes, let us know the procedure to assign it. First we are going to perform it using the Microsoft 365 Admin Center interface. Here are the steps:
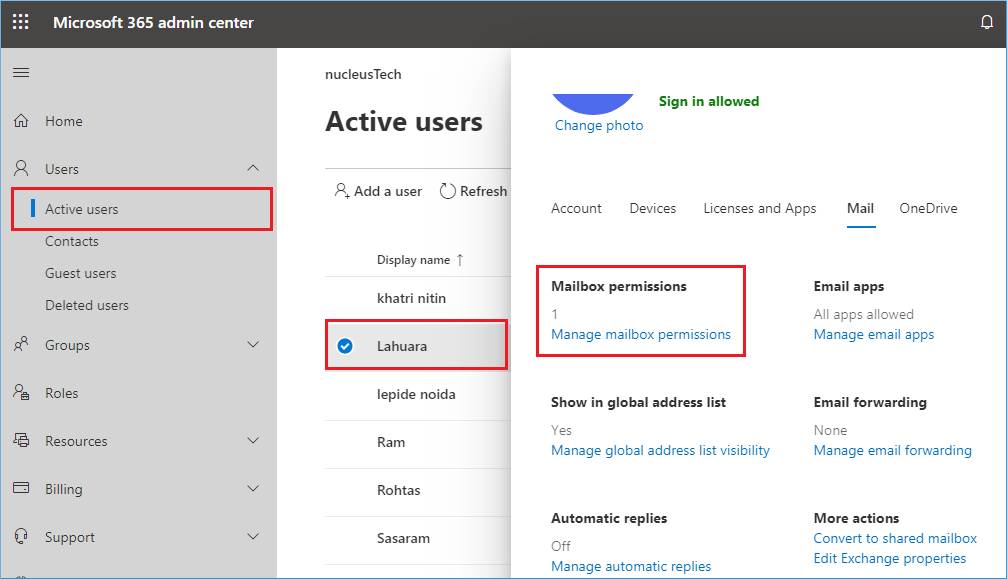
- Log in to your Microsoft 365 account and click Admin.
- Then, go to Users>Active Users. Double-click on any desired user and then under Mail Settings section, click Edit option against Mailbox permissions.
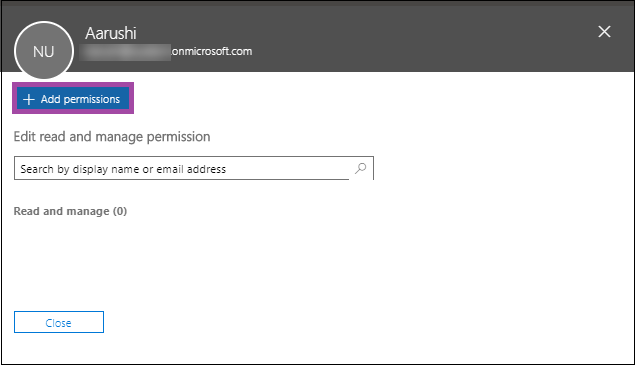
- A new page Edit mailbox permissions will get open. Here, to set permissions for user mailboxes, click Edit against Read and manage feature.
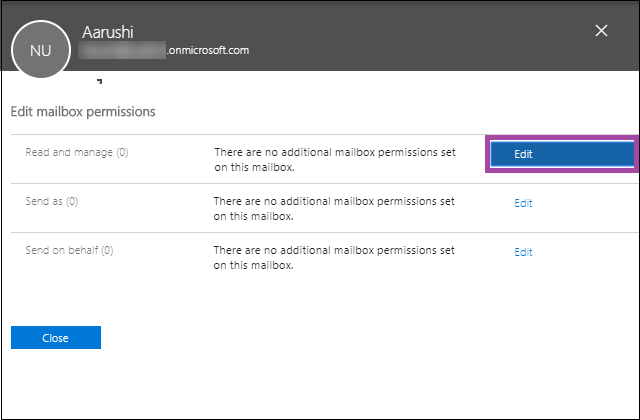
- Click +Add permissions to add the user mailboxes whom you want to assign this permission.
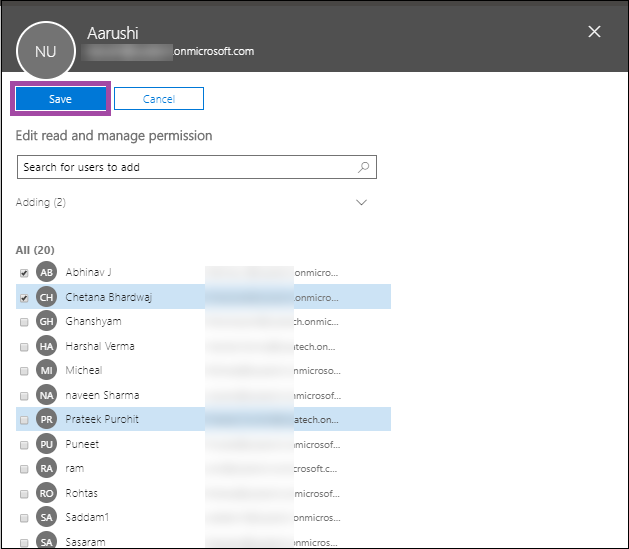
- Select the desired user mailboxes from the list and then click Save.
- Thus, user mailboxes are assigned permissions.
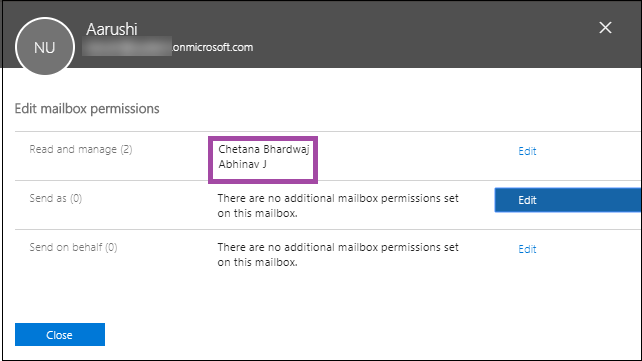
- Similarly, you can assign Send as and Send on behalf permissions to other user mailboxes.
Assigning permissions to user mailboxes through Exchange admin center
You can also set permissions for the selected user mailboxes via the Exchange Admin Center.
Now, head on to the steps through which you can assign these permissions.
- Open your Microsoft 365 account with the login credentials.
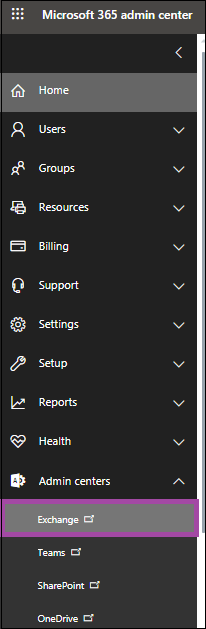
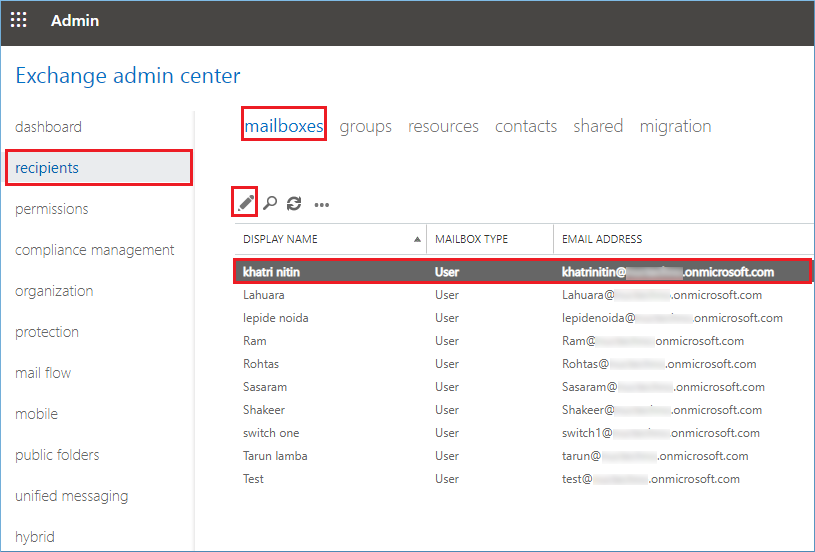
- Click Admin and then open EAC by navigating to Admin centers>Exchange.
- In EAC, click recipients and then select mailboxes option. Then, select the desired mailbox and click the Edit icon.
Note: You can select multiple mailboxes and under Bulk Edit on the leftmost pane, click More options and choose Mailbox Delegation option to assign the permissions to mailboxes simultaneously.
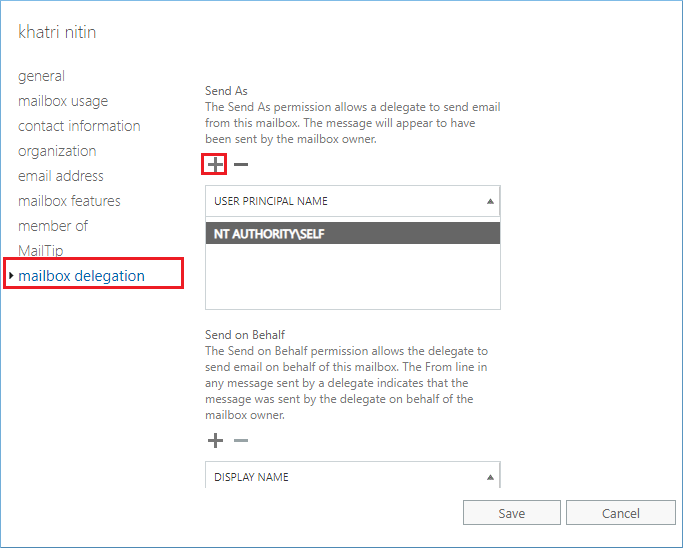
- Now, select mailbox delegation option from the left pane and then click + icon under Send As to select the user mailboxes and assign them this permission.
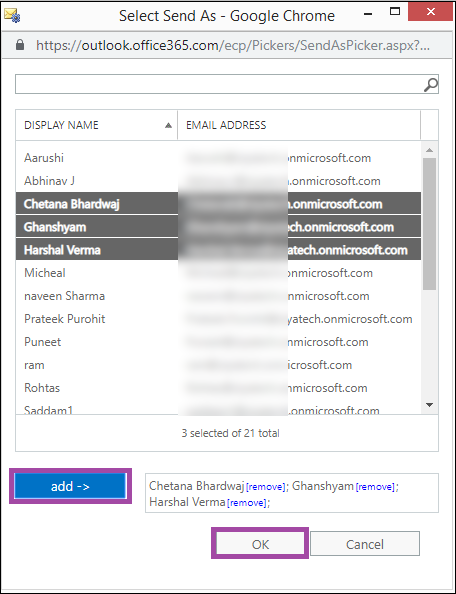
- Select the user mailboxes to which you want to assign this mailbox permission, click add -> and finally click OK to add them.
- Likewise, you can assign other mailbox permissions like Send on behalf and Full access.
Another way to assign these mailbox permissions to the Microsoft 365 user mailboxes is the use of PowerShell cmdlet. It is quite a technical procedure and requires prior knowledge of using and running cmdlets in the Exchange PowerShell.
To run the PowerShell commands for assigning the permissions, you need to connect Windows PowerShell to Exchange Online first.
How to connect to exchange online PowerShell?
Follow these instructions to connect to the Exchange Online PowerShell.
- First, run the Windows PowerShell as administrator (right-click on the application icon and choose Run as administrator option).
- Run this command.
$session = New-PSSession -ConfigurationName Microsoft.Exchange -ConnectionUri “https://outlook.office365.com/powershell-liveid/” -Credential $cred -Authentication Basic -AllowRedirection
- Enter the Microsoft 365 global account credentials in the opened window and click on OK.
- Now, run this final command to connect Exchange Online to PowerShell.
Import-PSSession $session
Assign mailbox permissions with PowerShell cmdlets
Now assign the permissions to the selected mailbox with the execution of following cmdlets in the Exchange Online PowerShell.
- To assign Send As permission to a user mailbox, run this command
Add-RecipientPermission <Identity> -AccessRights SendAs -Trustee <Identity>
- Assign Send on Behalf permission to a user mailbox with this command
Set-Mailbox <Identity> -GrantSendOnBehalfTo <Identity>
- Assign Full Access permission to single user mailbox with this cmdlet.
Add-MailboxPermission <Identity> -User <Identity> -AccessRights FullAccess -InheritanceType All
Note: In the above cmdlets, provide the desired value in place of
as per the requirement.
So, we have discussed these manual techniques to assign mailbox permissions to the Microsoft 365 user mailboxes. Some users with technical knowledge may find it easy to perform while other users might find it difficult to operate especially while dealing with the PowerShell commands.
If you are interested in data migration between Microsoft 365 tenants, perform bulk mailbox migration to Microsoft 365 or any other Microsoft 365 migration, we offer the perfect solution from our end. The Kernel Office 365 Migration tool is designed specifically to help its users in attaining a smooth, simple and efficient cloud migration.
Conclusion
Office 365 Administrator can assign permissions to various user mailboxes using both Office 365 Admin Center and Exchange Management Shell cmdlets. Generally, the permissions are allotted to mailboxes for their data-related tasks and when you want to migrate the mailboxes, then you will want to migrate such permissions also.
Kernel Office 365 migration software helps you to perform Office 365 tenant to tenant migration along with their permissions and complete features. In a new destination, the mailboxes will find them comfortable and usable instantly.