Migration of a domain from one Office 365 tenant to another is often essential after business mergers and acquisitions. Unlike the normal migration of data from one mailbox to another, domain migration from one tenant to another is a complex process as it requires the creation of new user accounts, redirection of mail flow, and the use of PowerShell scripts or a professional migration tool.
Though professional tools are available in plenty, discussing the manual migration methods will help you get a better understanding of the overall process of the migration. So, we will discuss the different stages of such a migration briefly. Also, we discuss a professional migration tool that can simplify the overall migration process.
Migrate a Domain from One Office 365 Tenant to Another
To move a domain from one Office 365 tenant to another, we need to create new user mailboxes in the target corresponding to the mailboxes in the source tenant. Once user mailboxes are ready and active in the target tenant, one can migrate mailboxes from the source tenant to the target tenant before abandoning the source tenant. The entire migration process involves numerous steps spanning for a few weeks, depending on the volume of your data and the migration facilities available. Here, we assume that you have only less than 500 users, and the volume of data for migration is not very large.
- Initial preparations First of all, you need to have enough Office 365 licenses to assign new users to the target tenant. Also, the migration being an intensive process, you need more administrative accounts, both in source and target tenants. Create them before starting the migration process and provide the required permissions.
If you are using the recent versions of Outlook (2013, 2016, or 2019), you only need to remove the Outlook profile and create it again. But if you are using the older versions of Outlook (2007 or 2010), the client will rebuild the OST file using the auto-discover feature.
- Create user accounts in the target User objects can be created in target in different ways. A common but complex way is to do it through directory synchronization using the Azure AD Connect tool. In this, all the users and groups of the source tenant are synced to the target tenant. The new users will have the domain name of the target tenant at first but can be updated to the source tenant name once the migration is over.
Alternately one can manually create users in the target tenant using its Office 365 admin center. If you have to create a large number of mailboxes, you can import a CSV file with the user details (using the Office 365 admin center or PowerShell). Once you have created new user mailboxes, you are ready for the migration.
- Educate end-users Nowadays, Office 365 is a platform everyone is aware of. However, keep end-users of your organization informed of the platform change. It will help them be prepared for the changes. One major change to end-users will be the updating of the Autocomplete list after the migration. Also, end-users must be aware of using Outlook on the Web for mailbox access.
- Prepare the domain Domain preparation must be started at least three days before the actual migration so that everything is in place when you start the migration. It begins with the domain verification process for the email domain in the target tenant. For this, in the Microsoft admin center of the target email domain, add the source email domain and create TXT records in DNS (Domain Name Systems). But this verification will fail at this time as the domain is in use in the source. However, this will allow DNS record time to propagate. It may take 3 days (72 hours) and will occur later as you proceed with the migration process.
- Create a CSV file for migration Now list the mailboxes you want to migrate from the source tenant to the target tenant. The use of a CSV file simplifies the addition of mailboxes and the mapping of source mailboxes with the target mailboxes.
- Schedule TTL test Now, on the MX record, reduce the TTL value for the primary domain. You can try the lowest value possible for it (up to 5 minutes). And you can use Mx Lookup to verify MX and DNS changes.
- Disable directory sync You need to disable directory sync in the Office 365 admin center of the source tenant well before the beginning of the migration. T his is because it will take up to 24hrs for these changes to take effect. After this, changes to the source AD DS will not be reflected in the Office 365 organization.
- Stop inbound mail flow Just before you start the migration, stop the inbound mail flow. This can be done by changing the primary MX record to an unreachable domain from the current Office 365 domain. In this situation, the Internet mail servers will queue the mail to try the delivery later. So, you will receive all the emails after your migration is over.
Alternately, you can use an MX backup service to deal with the problem of NDR (non-delivery report) from some servers. MX backup services can queue the mails for a longer duration and deliver them to you after the migration is over.
- Prepare the source tenant To prepare the source tenant for migration, you must remove the primary domain from all the source objects. This must be done for SharePoint Online public website and Lync. Reset the default email address on the mailboxes, Distribution Lists, Rooms, and Resources, etc., to the initial domain. Then, set the initial domain as the default domain in the source tenant. In addition, remove the proxy addresses from user objects that are still using the primary domain. You can use the PowerShell cmdlets to check if any object is still using the primary domain name:
Get-MsolUser -DomainName - Prepare the target tenant Now you can proceed to complete the verification of the primary email account in the target tenant. But this can be done only one hour after removing the primary domain from the source tenant.
Edit the users in (in the portal or using Windows PowerShell), set the source domain as the primary domain for users, and then assign licenses and passwords to new user accounts in the target tenant. Once you transition the mail routing, you will start receiving emails from the mail queue. At this point, you can release emails from the MX backup service if you are using one. Finally, verify the mail flow to/from the new mailboxes in the target.
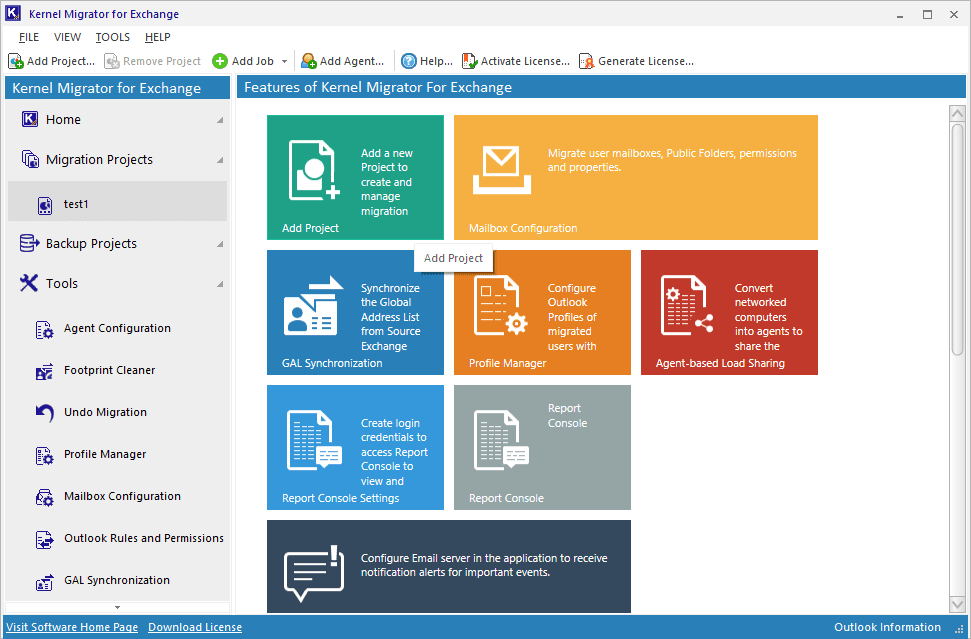
- Plan and perform the migration Now, you can start the migration at a convenient time. To ensure swift migration, many Office 365 administrators recommend tools like Kernel Migrator for Exchange (KME). It is a professional tool that conducts migrations in all types of Exchange environments, including Exchange Online (Office 365).
Professional solutions like it helps you perform migrations of Exchange and Office 365 with much ease irrespective of the number of mailboxes or the environment's complexity. You can use this tool for Office 365 tenant to tenant migrations, migration to Office 365 from different platforms, etc. With advanced features like selective migration, mailbox mapping, etc., this is one of the most popular tools for migrations.

In addition to migrating data, Kernel Migrator for SharePoint assists administrators in different stages of migration in different ways. These additional functionalities of the tool are discussed later in this article.
- Post-migration tasks For a smooth emailing experience after the migration, you need to clear the Outlook auto-complete list. With this, Office 365 tenant to tenant to migration comes to a successful ending.

How can Kernel Exchange Migrator assist in the tenant to tenant migration of a domain?
As discussed, a professional migration solution is an essential part of data migration from one tenant to another. But a good migration tool like this accomplishes more than that. It helps in performing various pre-migration tasks as well as post migration tasks, ensuring smooth after-migration experience for SharePoint administrators as well as end users. When you have more than 500 user accounts and the volume of data is very large, using this tool is highly recommended. For efficient management of the migration, this tool provides facilities like Report Console, Migration Job Reports, and Notifications. Once the migration is over, end-users access the mailbox data in their email clients.

Figure: Report Console in the tool Here, we will see how KME helps administrators in different stages of migration.
- Initial preparations An advantage of using this tool is that it provides a Pre-migration Analyzer that helps you plan the migration resources. Considering the resources available to you, it calculates the time required for the migration. And you can add more resources or use more of your existing resources to execute the migration as per your requirements.
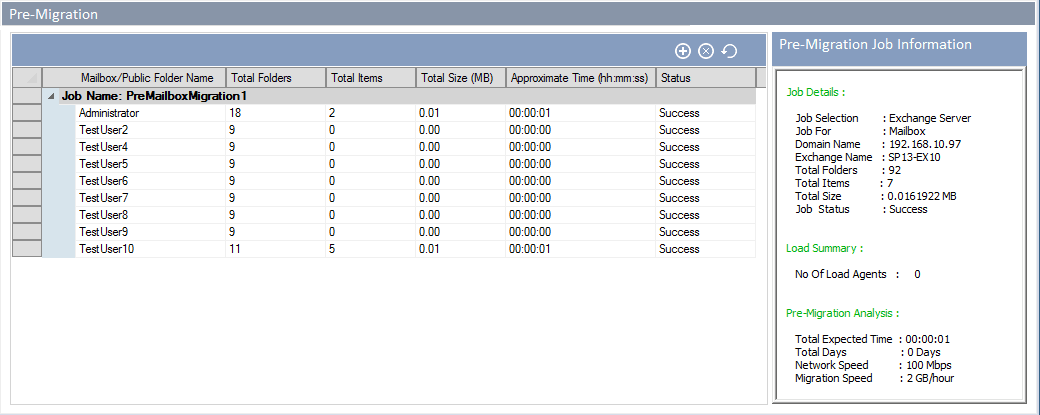
Figure: Pre-Migration Analyzer report in KME tool
- Create user accounts in the target If you are using this tool, it provides an option to create new user mailboxes in the target Office 365 tenant.
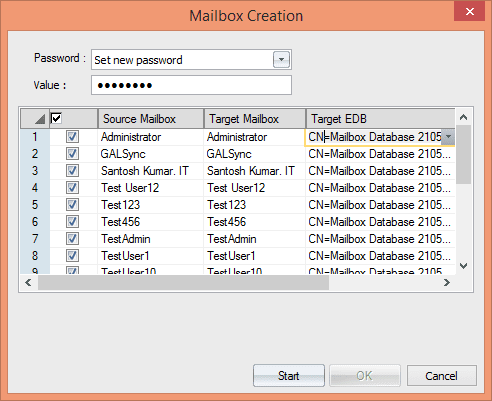
Figure: Creation of new user mailboxes in target Office 365 tenant using KME
- Create a CSV file for migration Most professional migration tools like this support the use of CSV files to add mailboxes and perform the mapping.
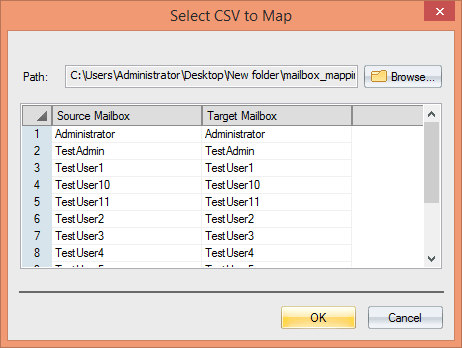
Figure: CSV-based Mailbox mapping in KME
- Post-migration tasks The tool performs many post-migration tasks and facilitates easy switch from the old environment to the new one.


Conclusion
Domain migration from one Office 365 tenant to another is a very complicated process that needs to be executed carefully. Different stages of this migration can be performed using Windows PowerShell scripts or other manual options. However, a professional solution like Kernel Migrator for Exchange can make these tasks easier for Office 365 administrators.
![]()